BREAKING NEWS
LATEST POSTS
-
Blackmagic DaVinci Resolve 20
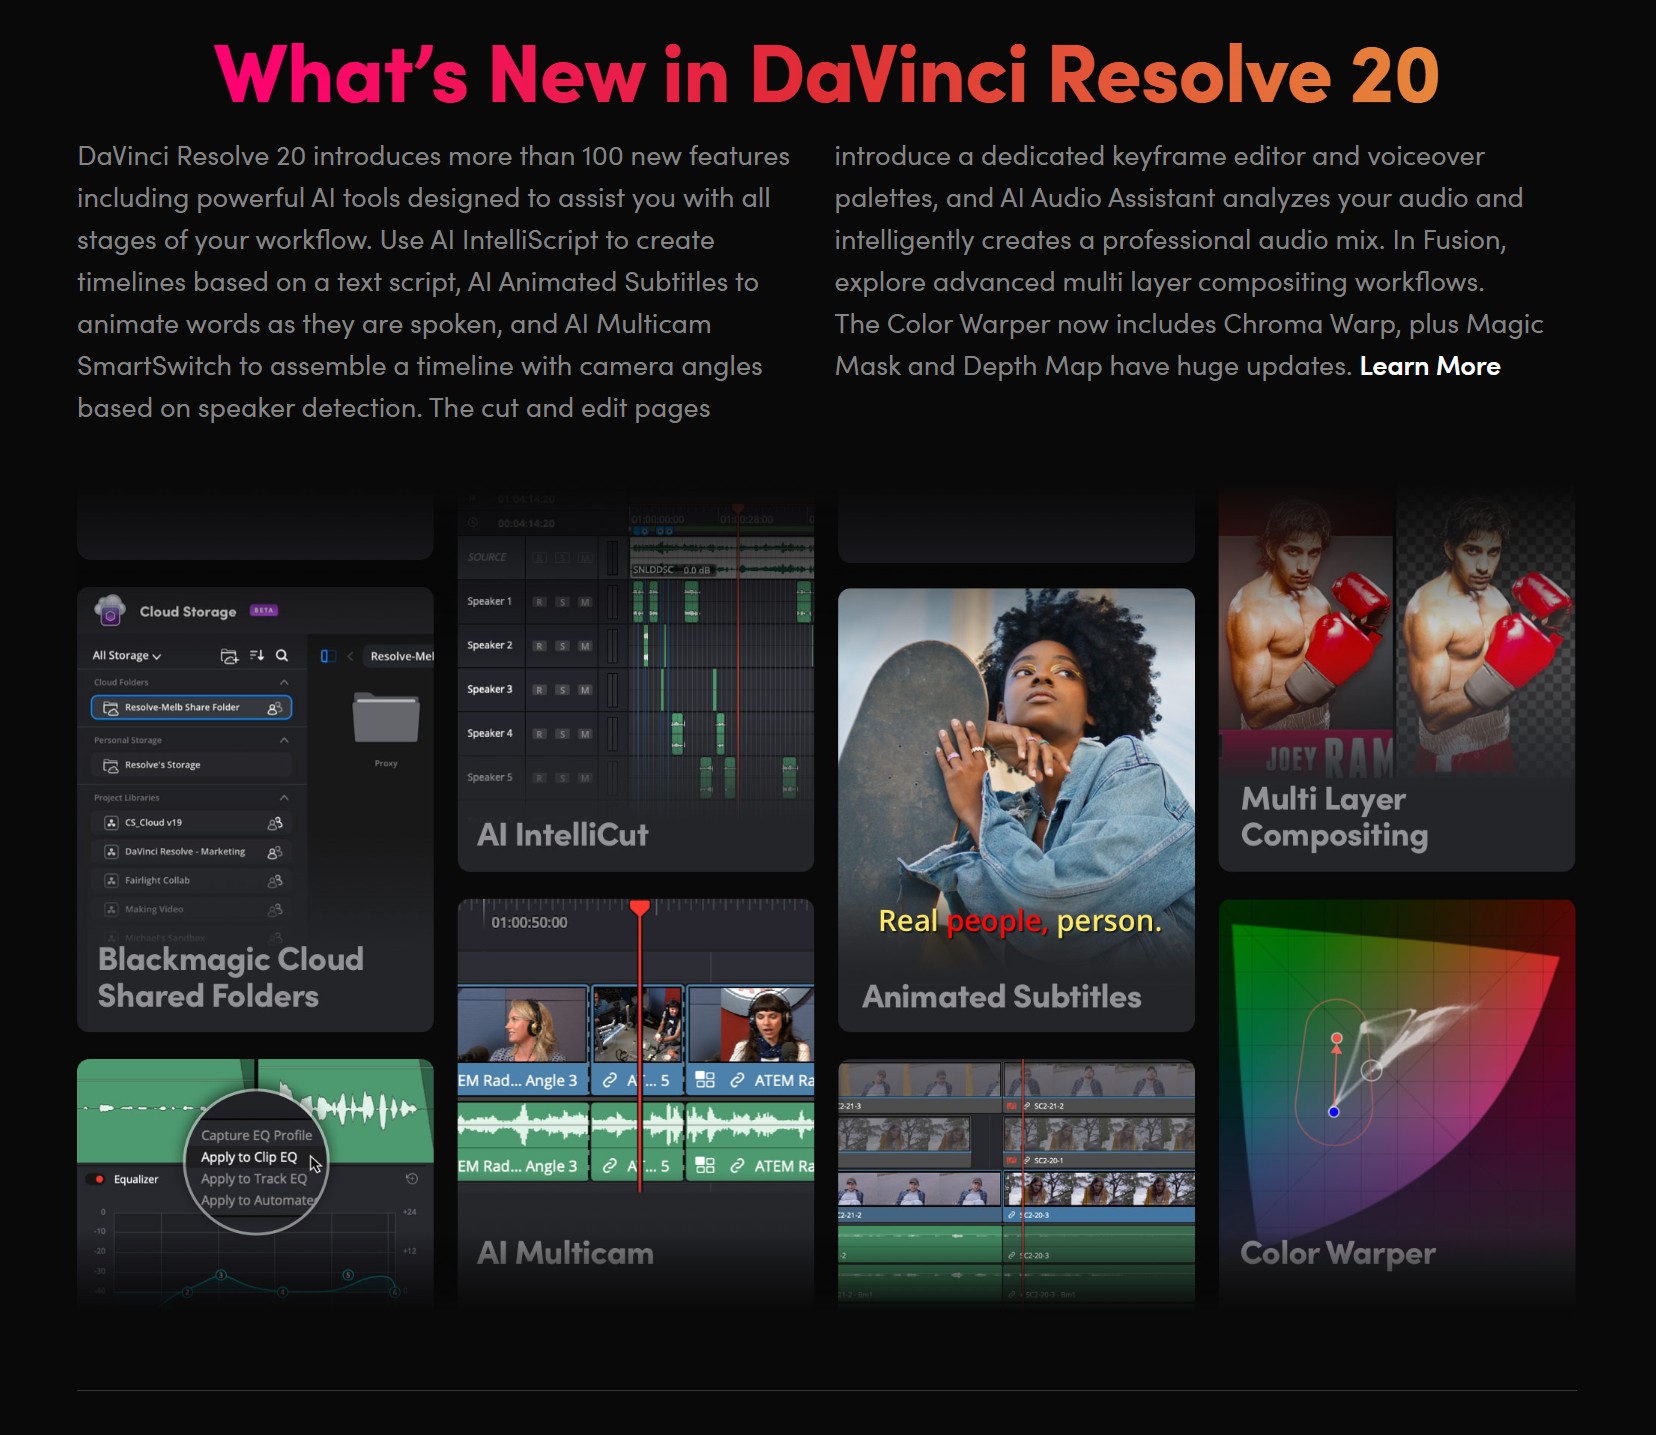
A major new update which includes more than 100 new features including powerful AI tools designed to assist you with all stages of your workflow. Use AI IntelliScript to create timelines based on a text script, AI Animated Subtitles to animate words as they are spoken, and AI Multicam SmartSwitch to create a timeline with camera angles based on speaker detection. The cut and edit pages also include a dedicated keyframe editor and voiceover palettes, and AI Fairlight IntelliCut can remove silence and checkerboard dialogue between speakers. In Fusion, explore advanced multi layer compositing workflows. The Color Warper now includes Chroma Warp, and the Magic Mask and Depth Map have huge updates.
https://www.blackmagicdesign.com/products/davinciresolve
-
ZAppLink – a plugin that allows you to seamlessly integrate your favorite image editing software — such as Adobe Photoshop — into your ZBrush workflow
While in ZBrush, call up your image editing package and use it to modify the active ZBrush document or tool, then go straight back into ZBrush.
ZAppLink can work on different saved points of view for your model. What you paint in your image editor is then projected to the model’s PolyPaint or texture for more creative freedom.
With ZAppLink you can combine ZBrush’s powerful capabilities with all the painting power of the PSD-capable 2D editor of your choice, making it easy to create stunning textures.
ZAppLink features
- Send your document view to the PSD file editor of your choice for texture creation and modification: Photoshop, Gimp and more!
- Projections in orthogonal or perspective mode.
- Multiple view support: With a single click, send your front, back, left, right, top, bottom and two custom views in dedicated layers to your 2D editor. When your painting is done, automatically reproject all the views back in ZBrush!
- Create character sheets based on your saved views with a single click.
- ZAppLink works with PolyPaint, Textures based on UV’s and canvas pixols.

-
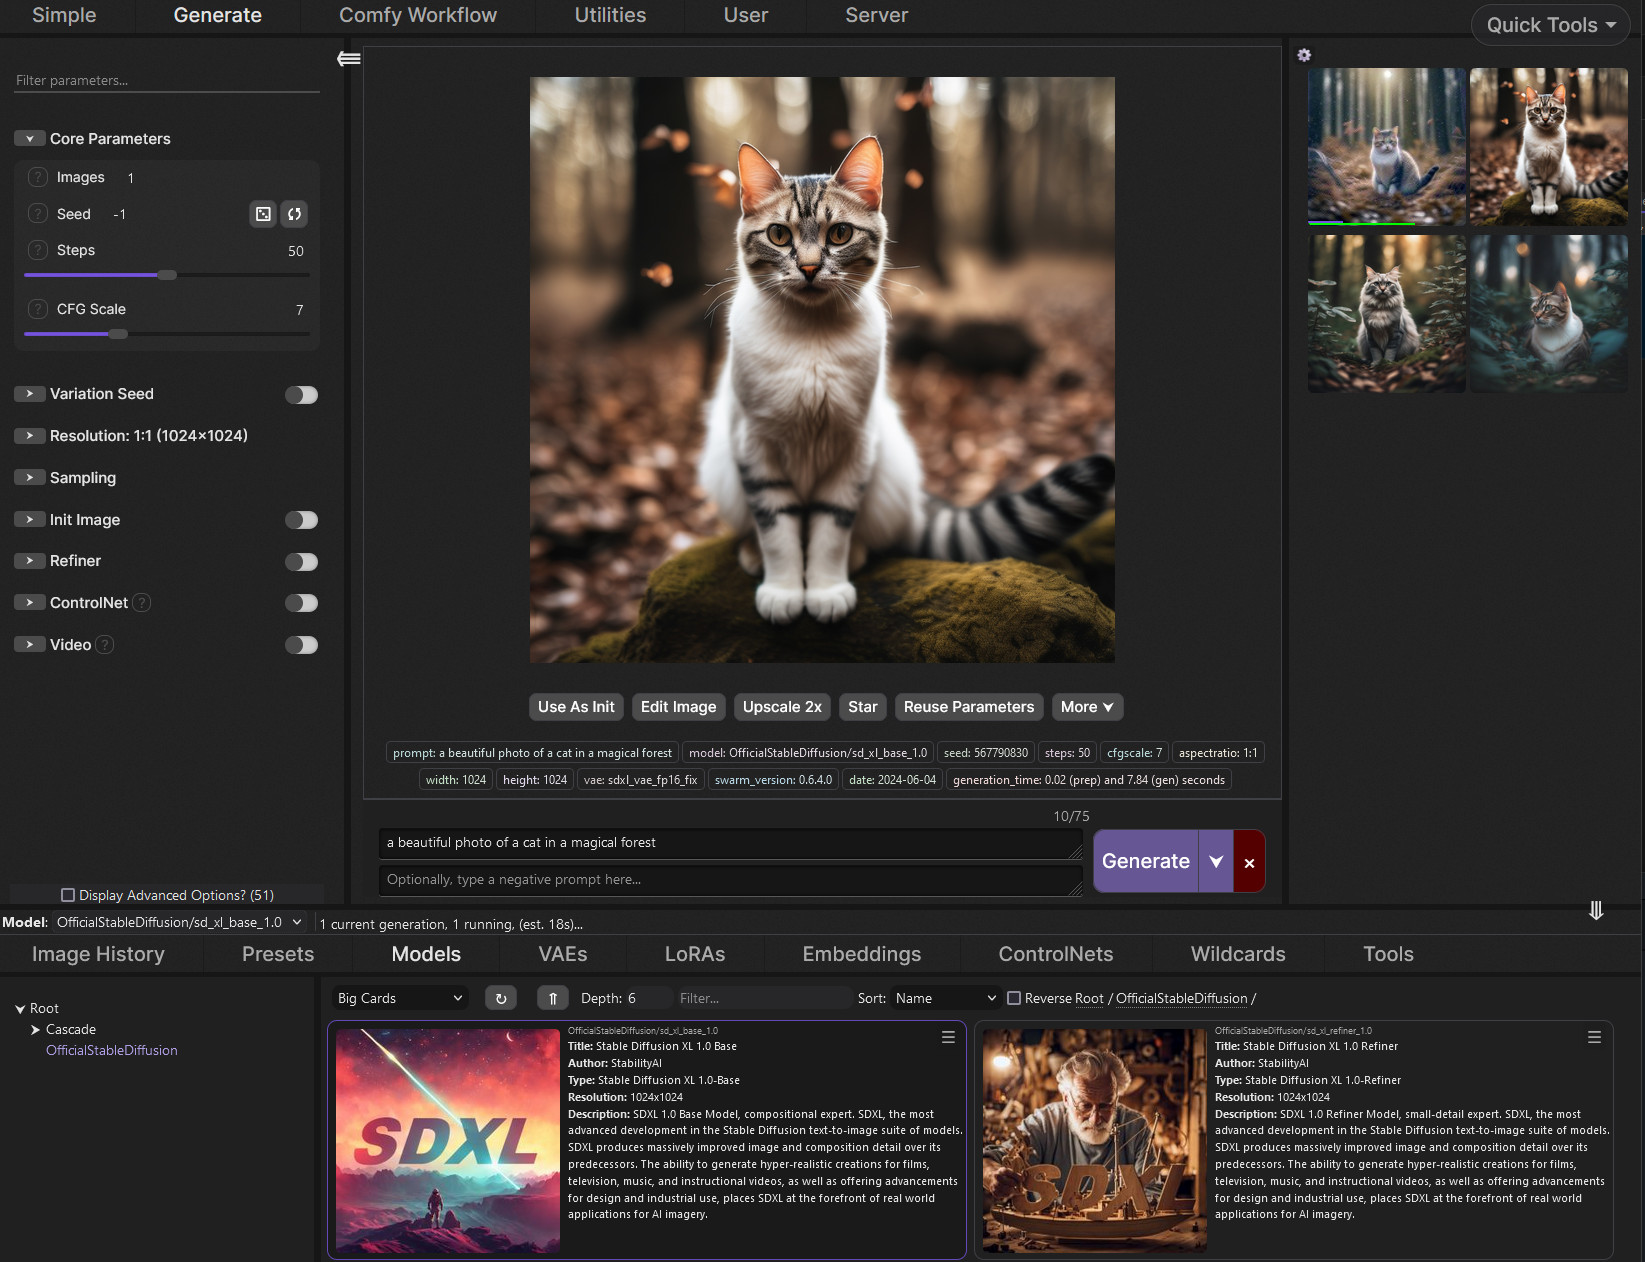
SwarmUI.net – A free, open source, modular AI image generation Web-User-Interface
https://github.com/mcmonkeyprojects/SwarmUI
A Modular AI Image Generation Web-User-Interface, with an emphasis on making powertools easily accessible, high performance, and extensibility. Supports AI image models (Stable Diffusion, Flux, etc.), and AI video models (LTX-V, Hunyuan Video, Cosmos, Wan, etc.), with plans to support eg audio and more in the future.
SwarmUI by default runs entirely locally on your own computer. It does not collect any data from you.
SwarmUI is 100% Free-and-Open-Source software, under the MIT License. You can do whatever you want with it.
-
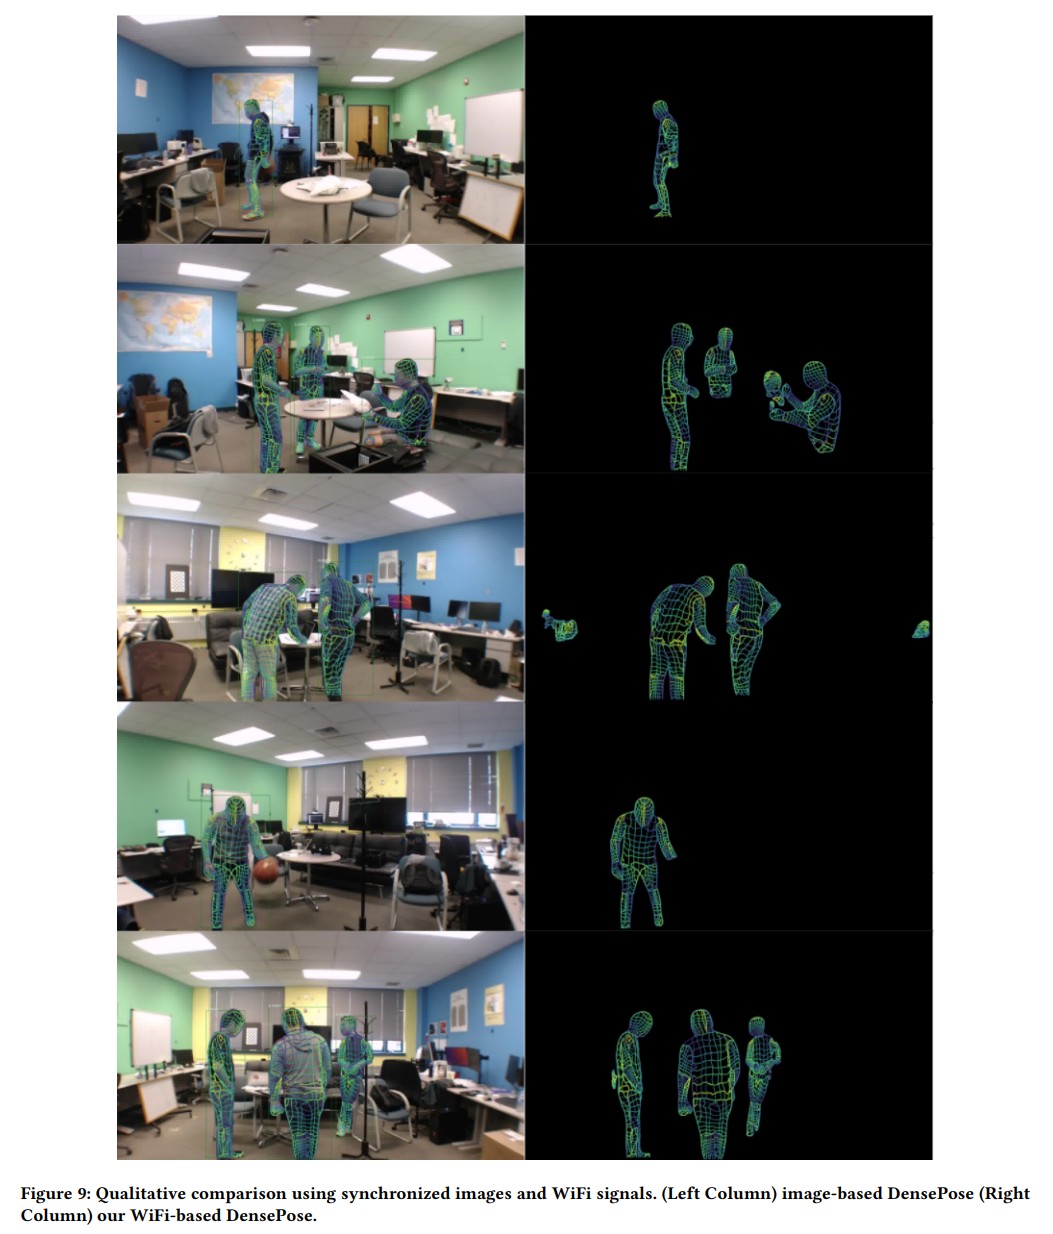
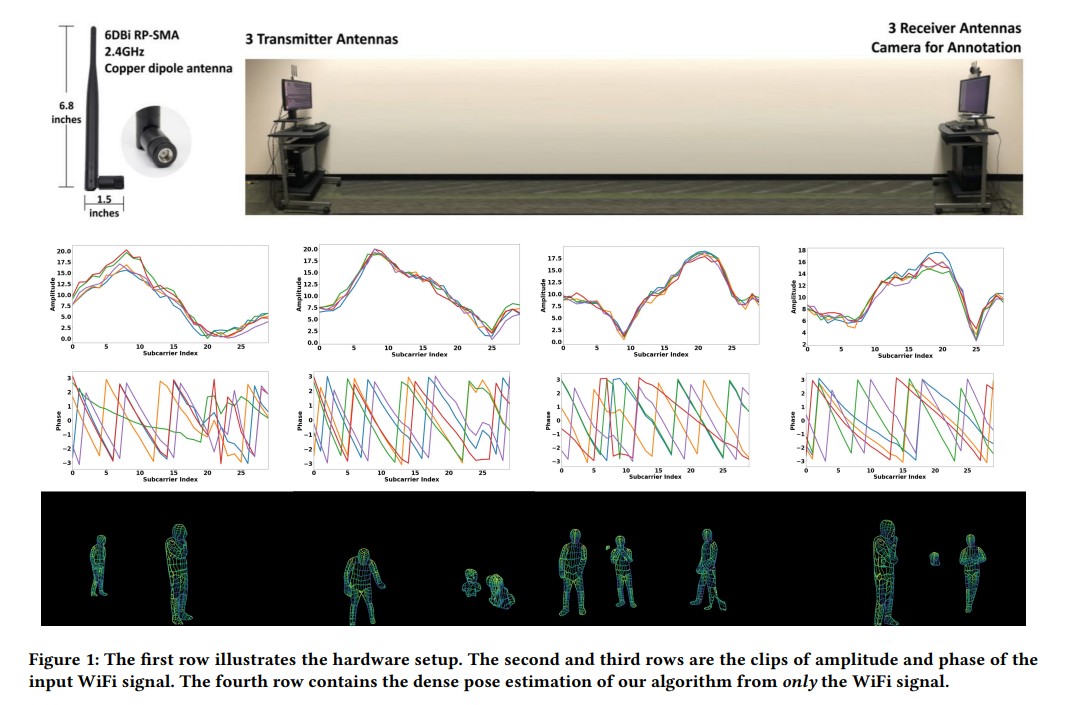
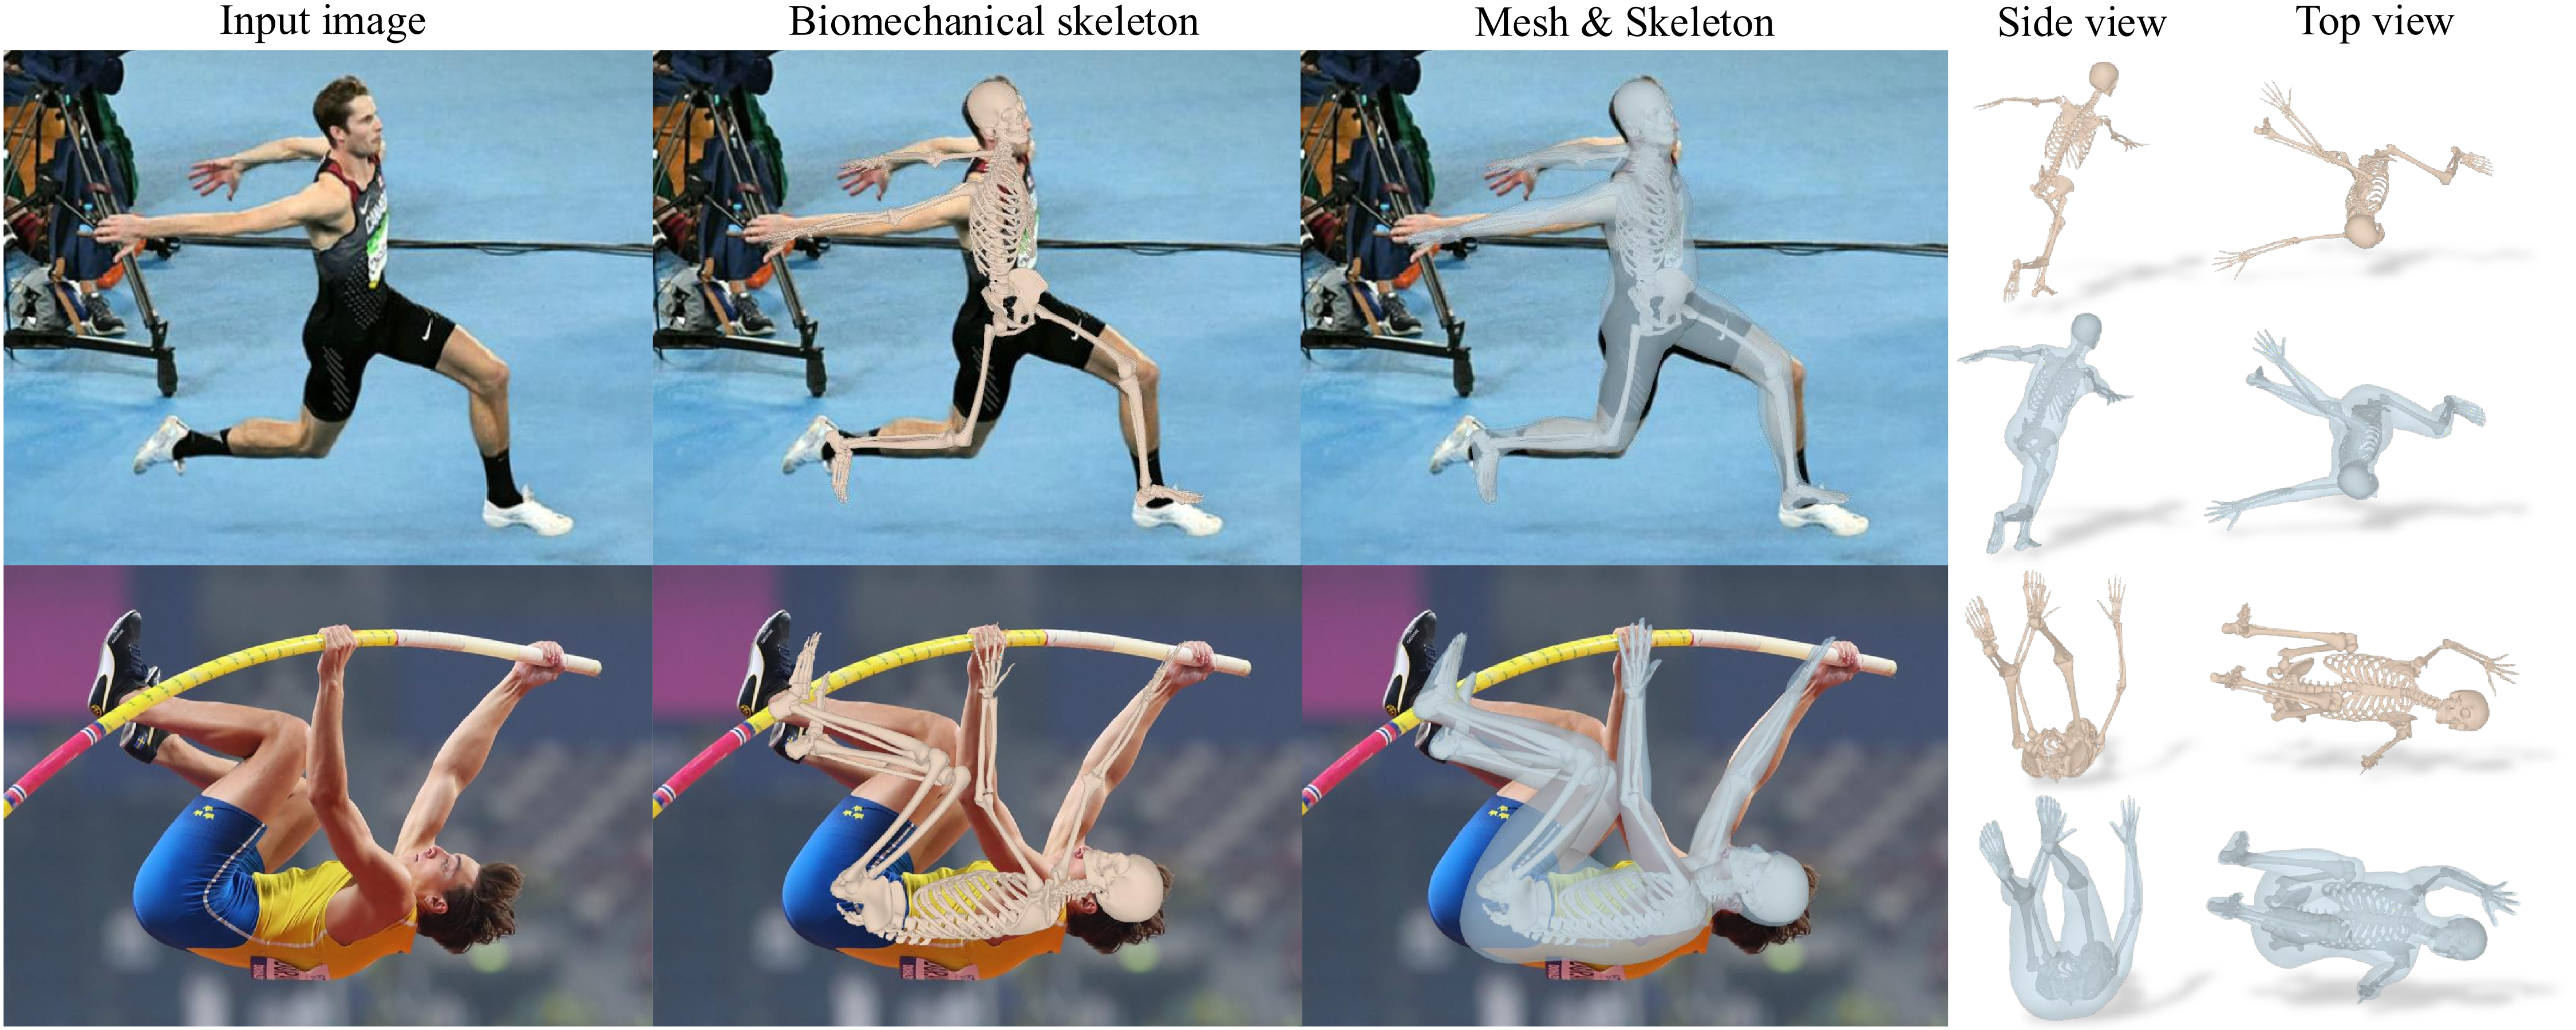
DensePose From WiFi using ML
https://arxiv.org/pdf/2301.00250
https://www.xrstager.com/en/ai-based-motion-detection-without-cameras-using-wifi
Advances in computer vision and machine learning techniques have led to significant development in 2D and 3D human pose estimation using RGB cameras, LiDAR, and radars. However, human pose estimation from images is adversely affected by common issues such as occlusion and lighting, which can significantly hinder performance in various scenarios.
Radar and LiDAR technologies, while useful, require specialized hardware that is both expensive and power-intensive. Moreover, deploying these sensors in non-public areas raises important privacy concerns, further limiting their practical applications.
To overcome these limitations, recent research has explored the use of WiFi antennas, which are one-dimensional sensors, for tasks like body segmentation and key-point body detection. Building on this idea, the current study expands the use of WiFi signals in combination with deep learning architectures—techniques typically used in computer vision—to estimate dense human pose correspondence.
In this work, a deep neural network was developed to map the phase and amplitude of WiFi signals to UV coordinates across 24 human regions. The results demonstrate that the model is capable of estimating the dense pose of multiple subjects with performance comparable to traditional image-based approaches, despite relying solely on WiFi signals. This breakthrough paves the way for developing low-cost, widely accessible, and privacy-preserving algorithms for human sensing.
-
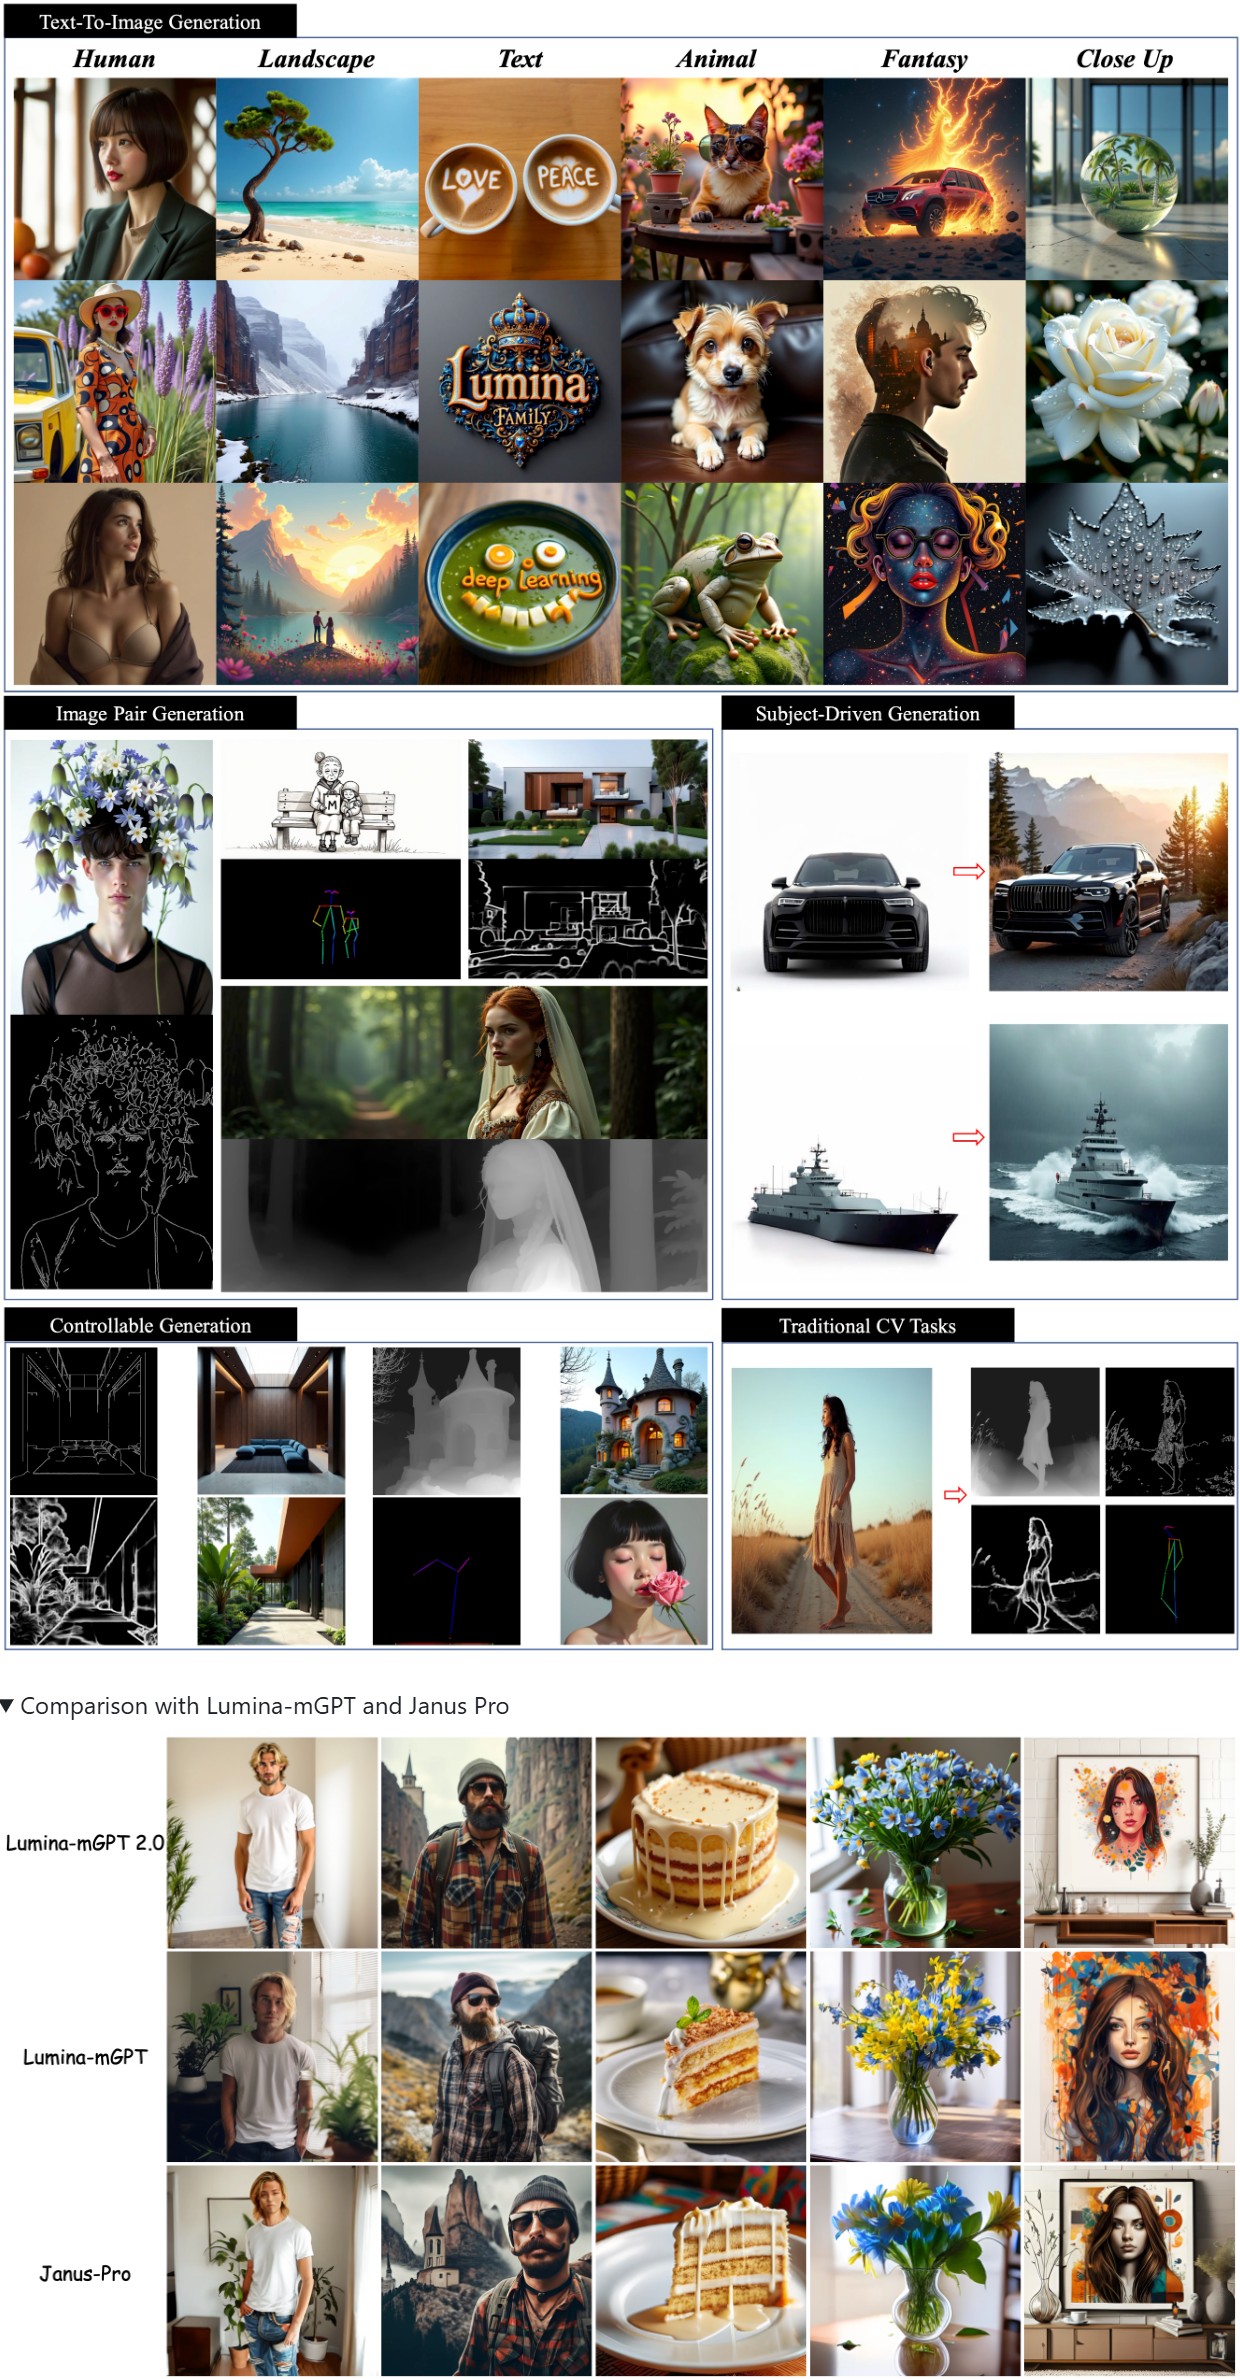
Lumina-mGPT 2.0 – Stand-alone Autoregressive Image Modeling
A stand-alone, decoder-only autoregressive model, trained from scratch, that unifies a broad spectrum of image generation tasks, including text-to-image generation, image pair generation, subject-driven generation, multi-turn image editing, controllable generation, and dense prediction.
https://github.com/Alpha-VLLM/Lumina-mGPT-2.0


FEATURED POSTS


-
Free fonts
https://fontlibrary.org
https://fontsource.orgOpen-source fonts packaged into individual NPM packages for self-hosting in web applications. Self-hosting fonts can significantly improve website performance, remain version-locked, work offline, and offer more privacy.
https://www.awwwards.com/awwwards/collections/free-fonts
http://www.fontspace.com/popular/fonts
https://www.urbanfonts.com/free-fonts.htm
http://www.1001fonts.com/poster-fonts.html

How to use @font-face in CSS
The
@font-facerule allows custom fonts to be loaded on a webpage: https://css-tricks.com/snippets/css/using-font-face-in-css/
-
Embedding frame ranges into Quicktime movies with FFmpeg
QuickTime (.mov) files are fundamentally time-based, not frame-based, and so don’t have a built-in, uniform “first frame/last frame” field you can set as numeric frame IDs. Instead, tools like Shotgun Create rely on the timecode track and the movie’s duration to infer frame numbers. If you want Shotgun to pick up a non-default frame range (e.g. start at 1001, end at 1064), you must bake in an SMPTE timecode that corresponds to your desired start frame, and ensure the movie’s duration matches your clip length.
How Shotgun Reads Frame Ranges
- Default start frame is 1. If no timecode metadata is present, Shotgun assumes the movie begins at frame 1.
- Timecode ⇒ frame number. Shotgun Create “honors the timecodes of media sources,” mapping the embedded TC to frame IDs. For example, a 24 fps QuickTime tagged with a start timecode of 00:00:41:17 will be interpreted as beginning on frame 1001 (1001 ÷ 24 fps ≈ 41.71 s).
Embedding a Start Timecode
QuickTime uses a
tmcd(timecode) track. You can bake in an SMPTE track via FFmpeg’s-timecodeflag or via Compressor/encoder settings:- Compute your start TC.
- Desired start frame = 1001
- Frame 1001 at 24 fps ⇒ 1001 ÷ 24 ≈ 41.708 s ⇒ TC 00:00:41:17
- FFmpeg example:
ffmpeg -i input.mov \
  -c copy \
  -timecode 00:00:41:17 \
  output.mov
This adds a timecode track beginning at 00:00:41:17, which Shotgun maps to frame 1001.
Ensuring the Correct End Frame
Shotgun infers the last frame from the movie’s duration. To end on frame 1064:
- Frame count = 1064 – 1001 + 1 = 64 frames
- Duration = 64 ÷ 24 fps ≈ 2.667 s
FFmpeg trim example:
ffmpeg -i input.mov \
  -c copy \
  -timecode 00:00:41:17 \
  -t 00:00:02.667 \
  output_trimmed.mov
This results in a 64-frame clip (1001→1064) at 24 fps.