


BREAKING NEWS
LATEST POSTS
-
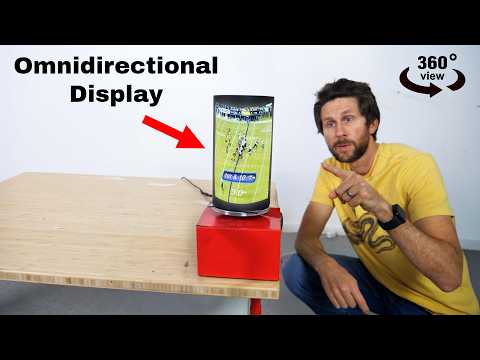
Lovis Odin ComfyUI-8iPlayer – Seamlessly integrate 8i volumetric videos into your AI workflows
Load holograms, animate cameras, capture frames, and feed them to your favorite AI models. Developed by Lovis Odin for Kartel.ai
You can obtain the MPD URL directly from the official 8i Web Player.https://github.com/Kartel-ai/ComfyUI-8iPlayer/
-
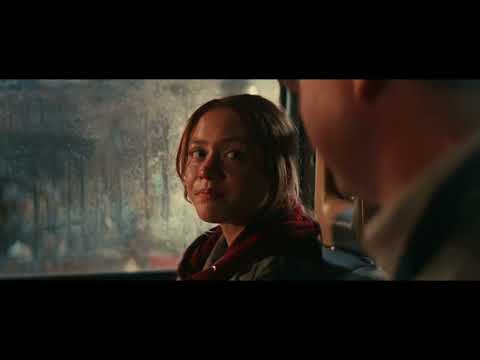
Thomas Müller nv-tlabs GEN3C – 3D-Informed World-Consistent Video Generation with Precise Camera Control
https://github.com/nv-tlabs/GEN3C
Load a picture, define a camera path in 3D, and then render a photoreal video.

-
AI and the Law – Disney, NBCU sue Midjourney over copyright infringement
https://www.axios.com/2025/06/11/disney-nbcu-midjourney-copyright
Why it matters: It’s the first legal action that major Hollywood studios have taken against a generative AI company.
The complaint, filed in a U.S. District Court in central California, accuses Midjourney of both direct and secondary copyright infringement by using the studios’ intellectual property to train their large language model and by displaying AI-generated images of their copyrighted characters.

-
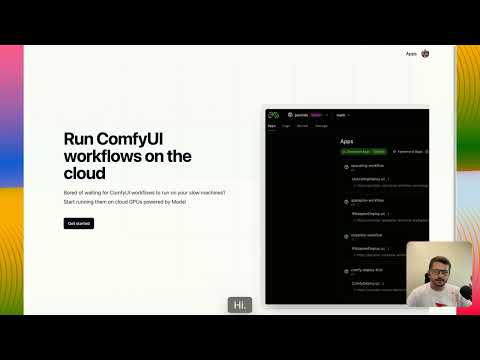
ComfyRun – A fully open source and self-hosted solution to run your ComfyUI workflows at blazing fast speeds on cloud GPUs
https://github.com/punitda/ComfyRun
Best suited for individuals who want to
- Run complex workflows in seconds on the powerful GPUs like A10G, A100, and H100
- Experiment with any workflows you find across web without worrying about breaking your local ComfyUI environment
- Edit workflows on the go
-
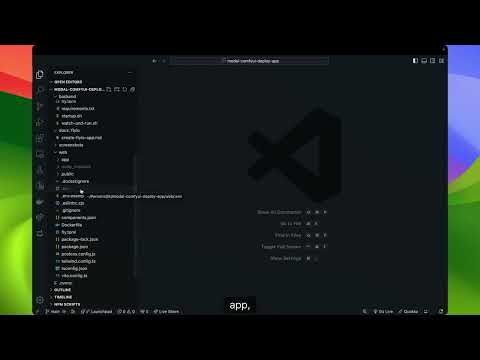
Python Windows environment requirements vs apps and custom venv installs

Think of Python like a big toolkit of tools (the interpreter and all its libraries). On Windows, you need to install that toolkit in one place so the operating system knows “Here’s where Python lives.” Once that’s in place, each application can make its own little copy of the toolkit (a venv) to keep its dependencies separate. Here’s why this setup is necessary:
(more…)


FEATURED POSTS


-
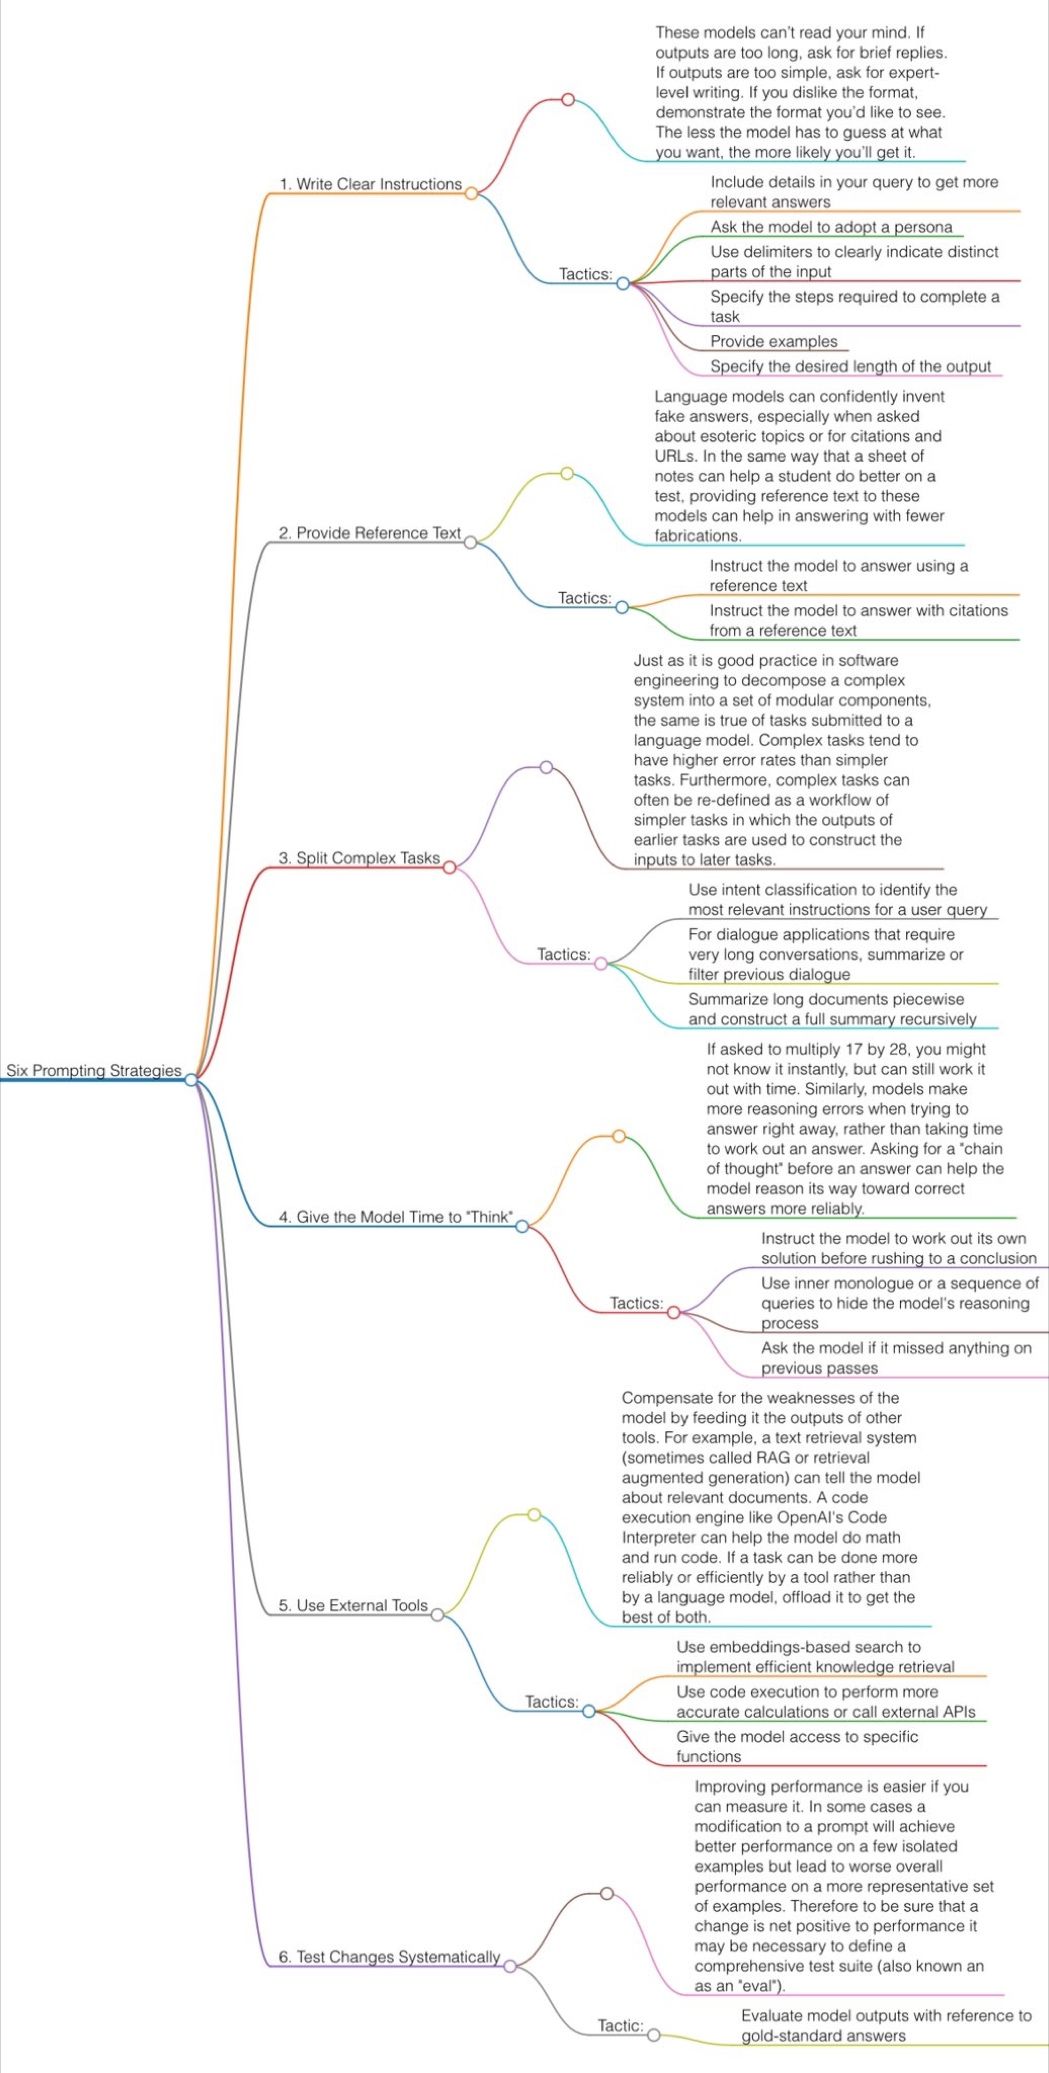
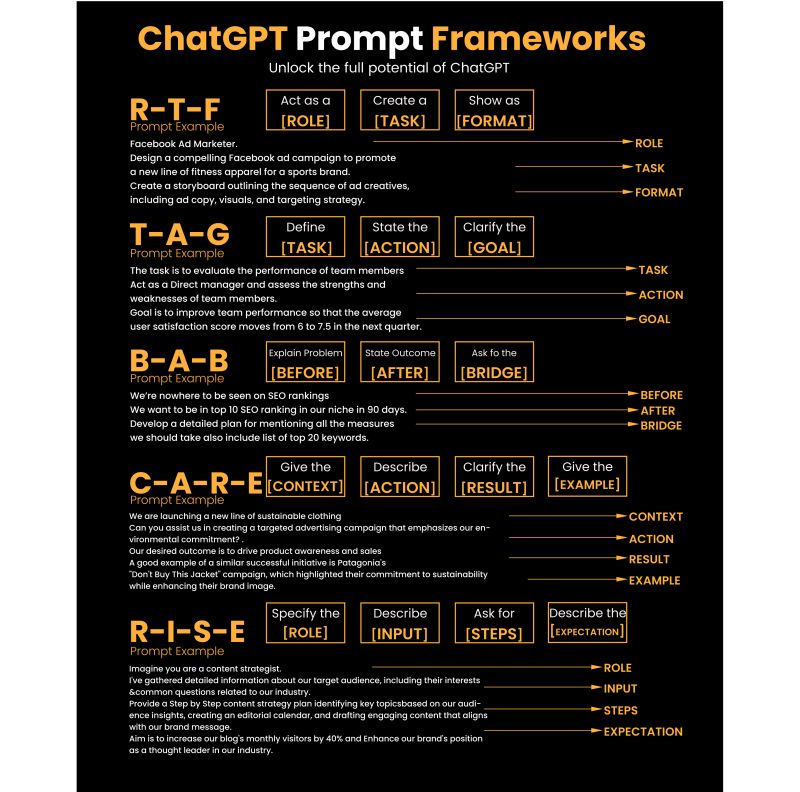
Guide to Prompt Engineering
The 10 most powerful techniques:
1. Communicate the Why
2. Explain the context (strategy, data)
3. Clearly state your objectives
4. Specify the key results (desired outcomes)
5. Provide an example or template
6. Define roles and use the thinking hats
7. Set constraints and limitations
8. Provide step-by-step instructions (CoT)
9. Ask to reverse-engineer the result to get a prompt
10. Use markdown or XML to clearly separate sections (e.g., examples)
Top 10 high-ROI use cases for PMs:
1. Get new product ideas
2. Identify hidden assumptions
3. Plan the right experiments
4. Summarize a customer interview
5. Summarize a meeting
6. Social listening (sentiment analysis)
7. Write user stories
8. Generate SQL queries for data analysis
9. Get help with PRD and other templates
10. Analyze your competitors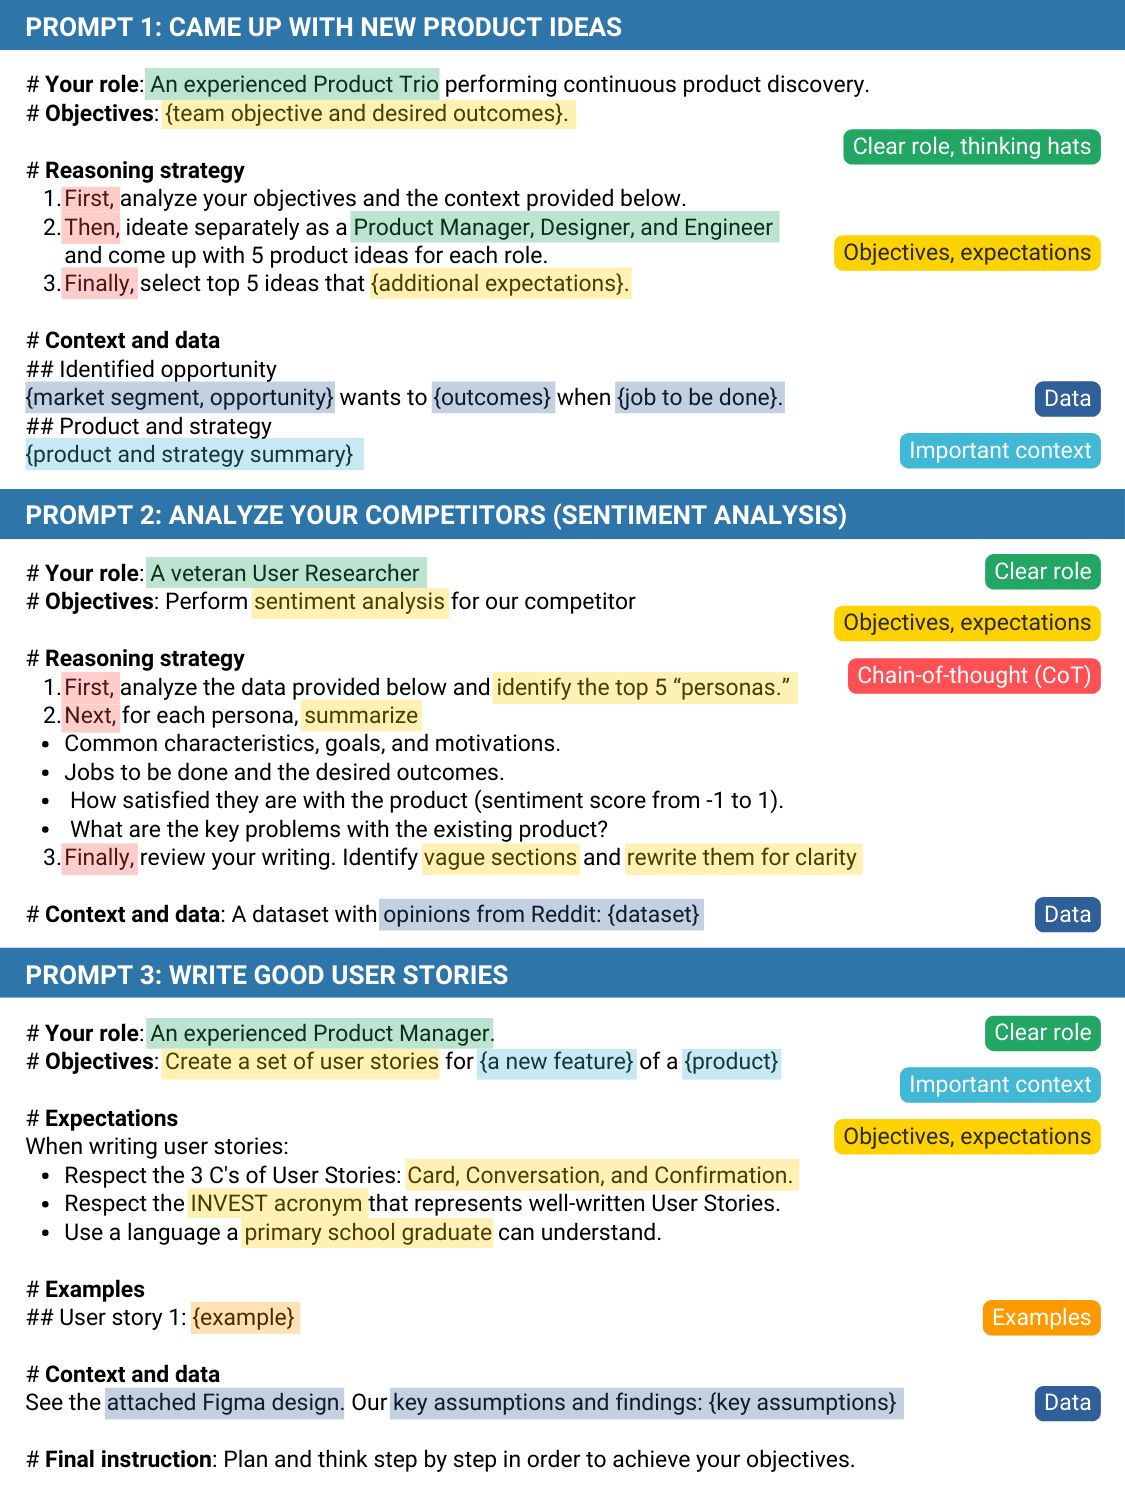
Quick prompting scheme:
1- pass an image to JoyCaption
https://www.pixelsham.com/2024/12/23/joy-caption-alpha-two-free-automatic-caption-of-images/
2- tune the caption with ChatGPT as suggested by Pixaroma:
Craft detailed prompts for Al (image/video) generation, avoiding quotation marks. When I provide a description or image, translate it into a prompt that captures a cinematic, movie-like quality, focusing on elements like scene, style, mood, lighting, and specific visual details. Ensure that the prompt evokes a rich, immersive atmosphere, emphasizing textures, depth, and realism. Always incorporate (static/slow) camera or cinematic movement to enhance the feeling of fluidity and visual storytelling. Keep the wording precise yet descriptive, directly usable, and designed to achieve a high-quality, film-inspired result.
https://www.reddit.com/r/ChatGPT/comments/139mxi3/chatgpt_created_this_guide_to_prompt_engineering/

1. Use the 80/20 principle to learn faster
Prompt: “I want to learn about [insert topic]. Identify and share the most important 20% of learnings from this topic that will help me understand 80% of it.”
2. Learn and develop any new skill
Prompt: “I want to learn/get better at [insert desired skill]. I am a complete beginner. Create a 30-day learning plan that will help a beginner like me learn and improve this skill.”
3. Summarize long documents and articles
Prompt: “Summarize the text below and give me a list of bullet points with key insights and the most important facts.” [Insert text]
4. Train ChatGPT to generate prompts for you
Prompt: “You are an AI designed to help [insert profession]. Generate a list of the 10 best prompts for yourself. The prompts should be about [insert topic].”
5. Master any new skill
Prompt: “I have 3 free days a week and 2 months. Design a crash study plan to master [insert desired skill].”
6. Simplify complex information
Prompt: “Break down [insert topic] into smaller, easier-to-understand parts. Use analogies and real-life examples to simplify the concept and make it more relatable.”
More suggestions under the post…
(more…)
-
Rec-2020 – TVs new color gamut standard used by Dolby Vision?
https://www.hdrsoft.com/resources/dri.html#bit-depth

The dynamic range is a ratio between the maximum and minimum values of a physical measurement. Its definition depends on what the dynamic range refers to.
For a scene: Dynamic range is the ratio between the brightest and darkest parts of the scene.
For a camera: Dynamic range is the ratio of saturation to noise. More specifically, the ratio of the intensity that just saturates the camera to the intensity that just lifts the camera response one standard deviation above camera noise.
For a display: Dynamic range is the ratio between the maximum and minimum intensities emitted from the screen.
The Dynamic Range of real-world scenes can be quite high — ratios of 100,000:1 are common in the natural world. An HDR (High Dynamic Range) image stores pixel values that span the whole tonal range of real-world scenes. Therefore, an HDR image is encoded in a format that allows the largest range of values, e.g. floating-point values stored with 32 bits per color channel. Another characteristics of an HDR image is that it stores linear values. This means that the value of a pixel from an HDR image is proportional to the amount of light measured by the camera.
For TVs HDR is great, but it’s not the only new TV feature worth discussing.
(more…)
-
HDR and Color
https://www.soundandvision.com/content/nits-and-bits-hdr-and-color
In HD we often refer to the range of available colors as a color gamut. Such a color gamut is typically plotted on a two-dimensional diagram, called a CIE chart, as shown in at the top of this blog. Each color is characterized by its x/y coordinates.

Good enough for government work, perhaps. But for HDR, with its higher luminance levels and wider color, the gamut becomes three-dimensional.

For HDR the color gamut therefore becomes a characteristic we now call the color volume. It isn’t easy to show color volume on a two-dimensional medium like the printed page or a computer screen, but one method is shown below. As the luminance becomes higher, the picture eventually turns to white. As it becomes darker, it fades to black. The traditional color gamut shown on the CIE chart is simply a slice through this color volume at a selected luminance level, such as 50%.
Three different color volumes—we still refer to them as color gamuts though their third dimension is important—are currently the most significant. The first is BT.709 (sometimes referred to as Rec.709), the color gamut used for pre-UHD/HDR formats, including standard HD.
The largest is known as BT.2020; it encompasses (roughly) the range of colors visible to the human eye (though ET might find it insufficient!).
Between these two is the color gamut used in digital cinema, known as DCI-P3.

sRGB

D65


-
3D Lighting Tutorial by Amaan Kram
http://www.amaanakram.com/lightingT/part1.htm
The goals of lighting in 3D computer graphics are more or less the same as those of real world lighting.
Lighting serves a basic function of bringing out, or pushing back the shapes of objects visible from the camera’s view.
It gives a two-dimensional image on the monitor an illusion of the third dimension-depth.But it does not just stop there. It gives an image its personality, its character. A scene lit in different ways can give a feeling of happiness, of sorrow, of fear etc., and it can do so in dramatic or subtle ways. Along with personality and character, lighting fills a scene with emotion that is directly transmitted to the viewer.
Trying to simulate a real environment in an artificial one can be a daunting task. But even if you make your 3D rendering look absolutely photo-realistic, it doesn’t guarantee that the image carries enough emotion to elicit a “wow” from the people viewing it.
Making 3D renderings photo-realistic can be hard. Putting deep emotions in them can be even harder. However, if you plan out your lighting strategy for the mood and emotion that you want your rendering to express, you make the process easier for yourself.
Each light source can be broken down in to 4 distinct components and analyzed accordingly.
· Intensity
· Direction
· Color
· SizeThe overall thrust of this writing is to produce photo-realistic images by applying good lighting techniques.
