Hi, thanks for checking out the Startup CTO’s Handbook! This repository has the latest version of the content of the book. You’re welcome and encouraged to contribute issues or pull requests for additions / changes / suggestions / criticisms to be included in future editions. Please feel free to add your name to ACKNOWLEDGEMENTS if you do so.
A novel approach that leverages momentum-based self-distillation to promote consistency and accuracy across the blocks while decoupling the number of blocks from the physical GPU count.
Unlike other models like Sora, Pika2, Veo2, HunyuanVideo’s neural network weights are uncensored and openly distributed, which means they can be run locally under the right circumstances (for example on a consumer 24 GB VRAM GPU) and it can be fine-tuned or used with LoRAs to teach it new concepts.
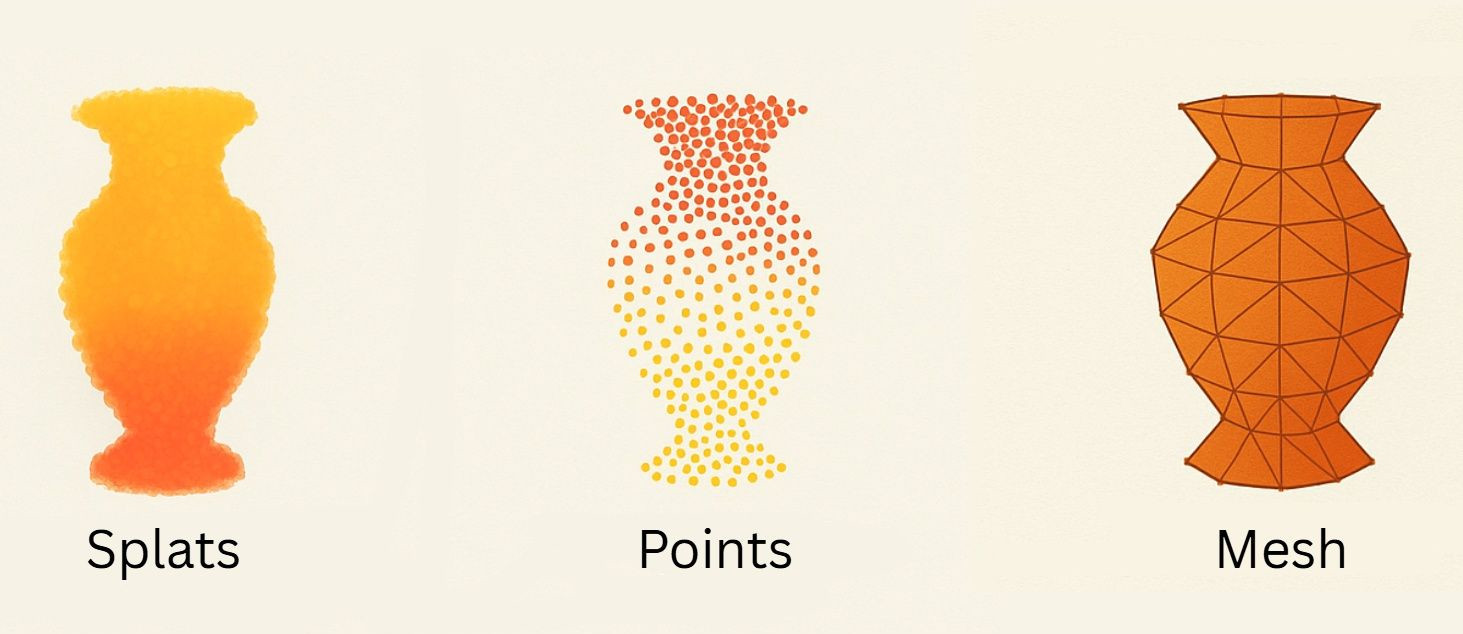
🔸 Gaussian Splats: imagine throwing thousands of tiny ellipsoidal paint drops. They overlap, blend, and create a smooth, photorealistic look. Fast, great for visualization, but less structured for measurements.
🔸 Point Clouds: every dot is a measured hit. LiDAR or photogrammetry gives us millions of them forming a constellation of reality. Amazing for accuracy, but they don’t connect the dots out of the box.
🔸 Meshes: take those points, connect them into triangles, and you get very realistic surfaces. Strong for 3D analysis, simulation as continues watertight models.
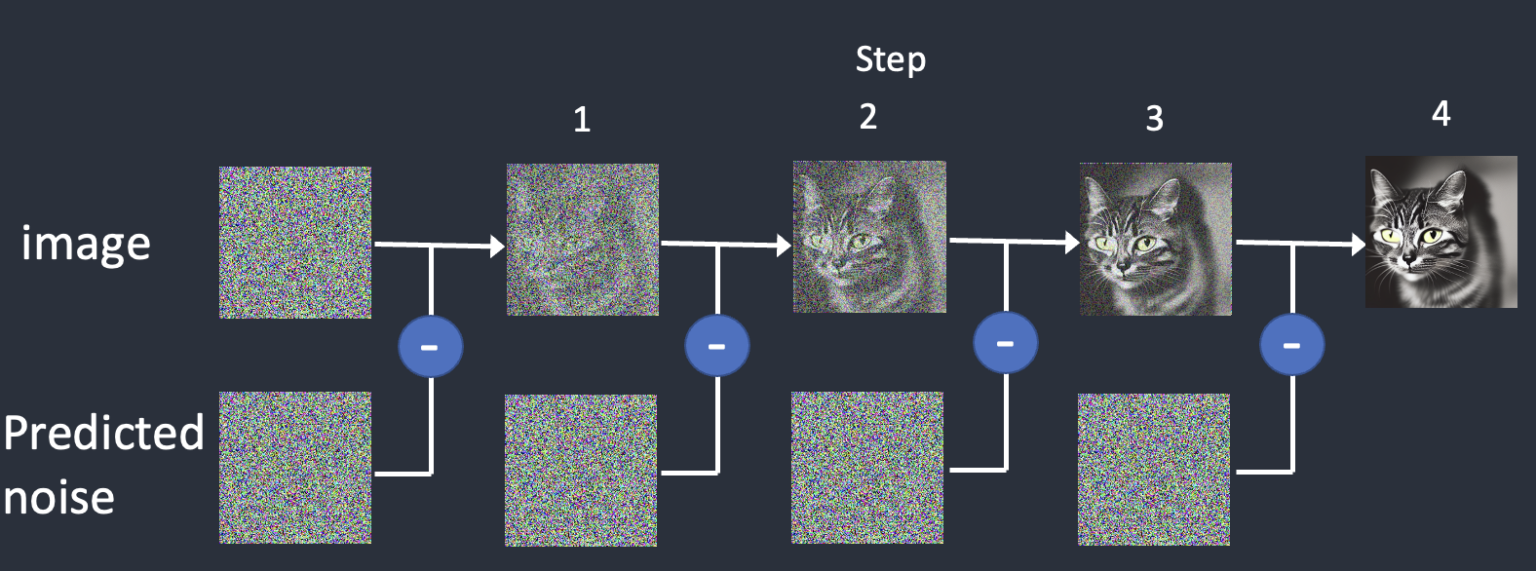
Stable Diffusion is a latent diffusion model that generates AI images from text. Instead of operating in the high-dimensional image space, it first compresses the image into the latent space.
Stable Diffusion belongs to a class of deep learning models called diffusion models. They are generative models, meaning they are designed to generate new data similar to what they have seen in training. In the case of Stable Diffusion, the data are images.
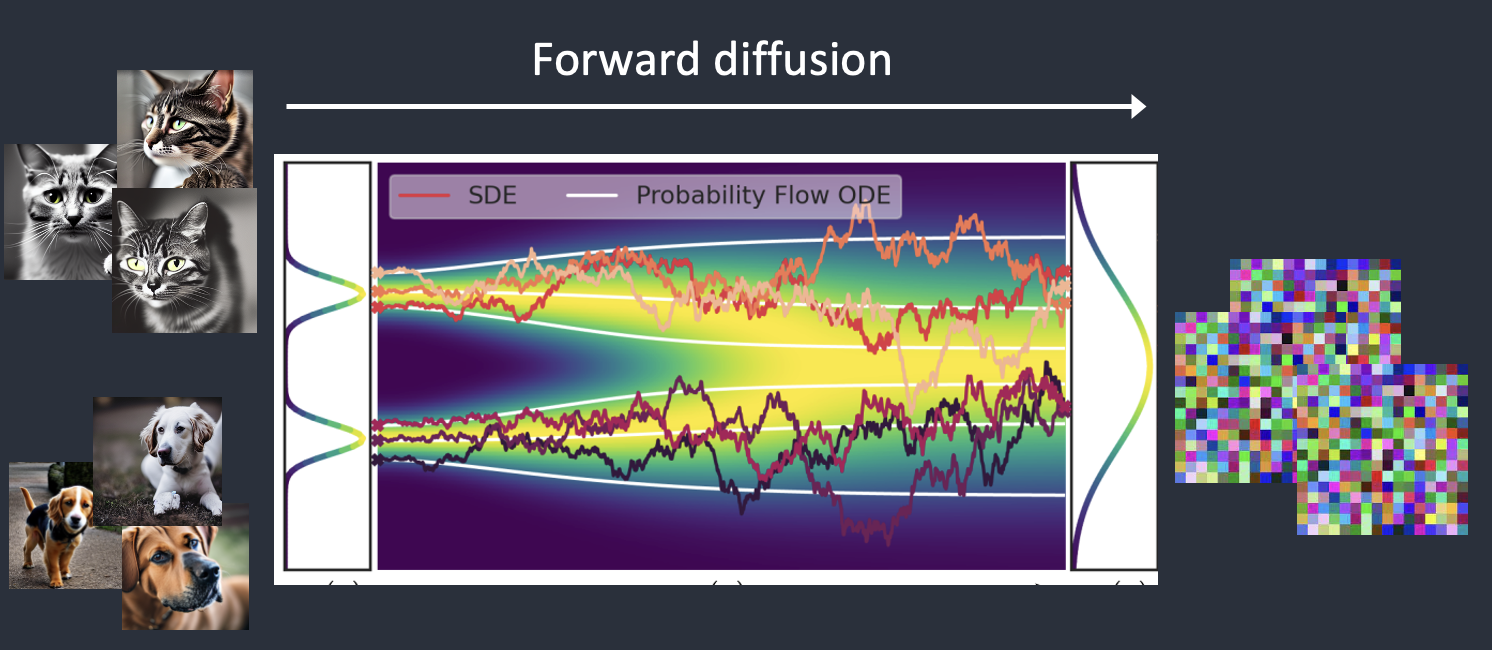
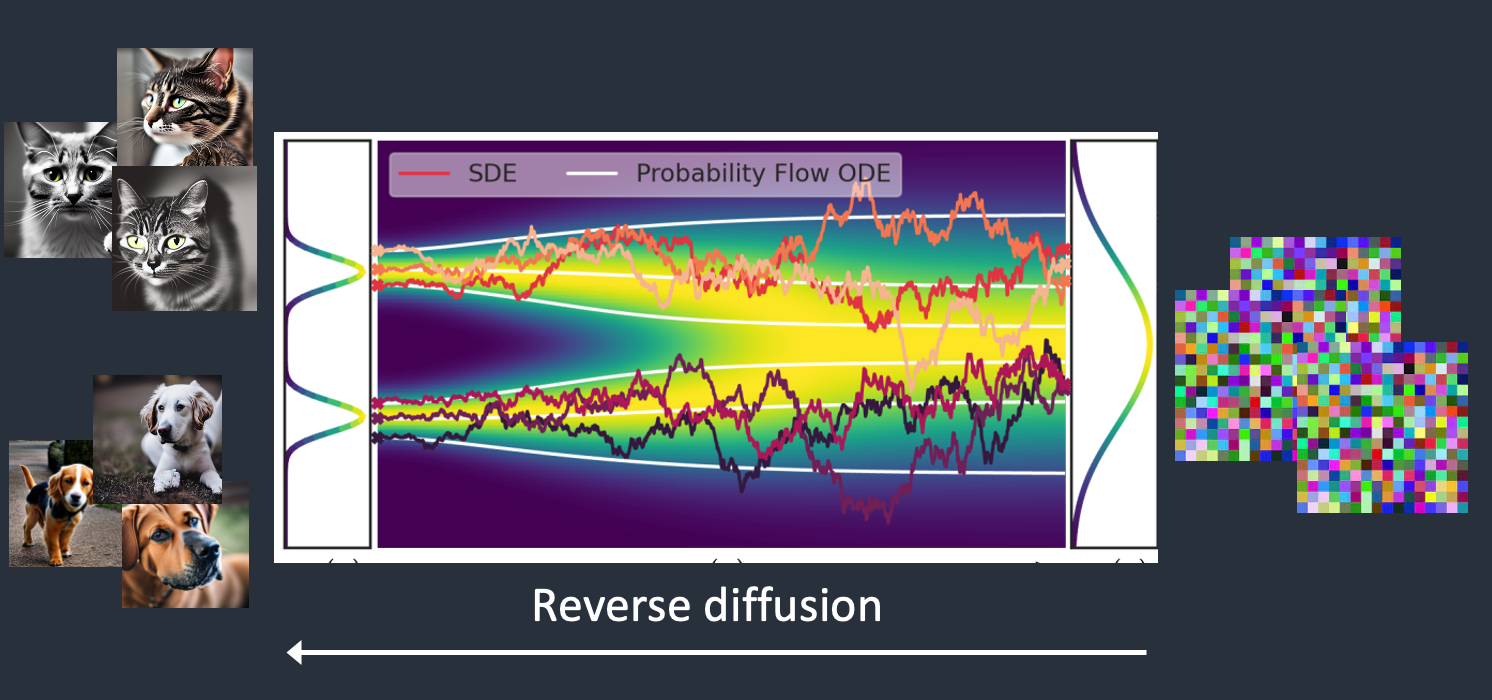
Why is it called the diffusion model? Because its math looks very much like diffusion in physics. Let’s go through the idea.
Note: In Foundry’s Nuke, the software will map 18% gray to whatever your center f/stop is set to in the viewer settings (f/8 by default… change that to EV by following the instructions below).
You can experiment with this by attaching an Exposure node to a Constant set to 0.18, setting your viewer read-out to Spotmeter, and adjusting the stops in the node up and down. You will see that a full stop up or down will give you the respective next value on the aperture scale (f8, f11, f16 etc.).
One stop doubles or halves the amount or light that hits the filmback/ccd, so everything works in powers of 2.
So starting with 0.18 in your constant, you will see that raising it by a stop will give you .36 as a floating point number (in linear space), while your f/stop will be f/11 and so on.
If you set your center stop to 0 (see below) you will get a relative readout in EVs, where EV 0 again equals 18% constant gray.
In other words. Setting the center f-stop to 0 means that in a neutral plate, the middle gray in the macbeth chart will equal to exposure value 0. EV 0 corresponds to an exposure time of 1 sec and an aperture of f/1.0.
This will set the sun usually around EV12-17 and the sky EV1-4 , depending on cloud coverage.
To switch Foundry’s Nuke’s SpotMeter to return the EV of an image, click on the main viewport, and then press s, this opens the viewer’s properties. Now set the center f-stop to 0 in there. And the SpotMeter in the viewport will change from aperture and fstops to EV.