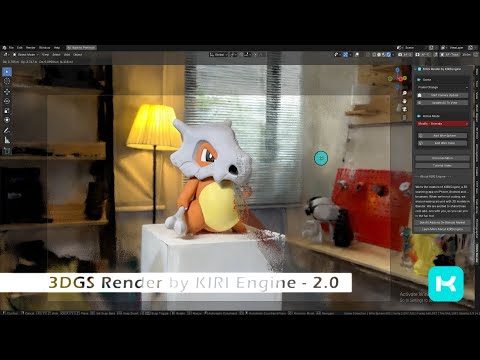
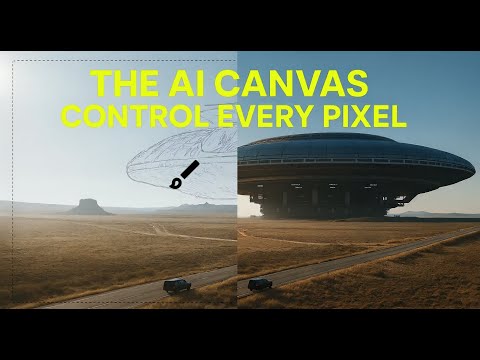
The addon is a full 3DGS editing and rendering suite for Blender.3DGS scans can be created from .OBJ files, or 3DGS .PLY files can be imported as mesh objects, offering two distinct workflows. The created objects can be manipulated, animated and rendered inside Blender. Or Blender can be used as an intermediate editing and painting software – with the results being exportable to other 3DGS software and viewers.
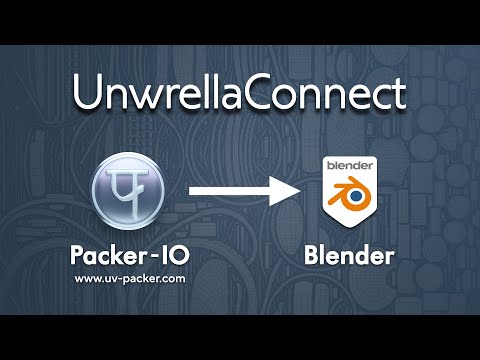
UnwrellaConnect for Blender is an extension that seamlessly connects Blender to our standalone UV editing applications, allowing you to run their powerful functionality directly from within the Blender interface – no need to leave your workflow.
Hand drawn sketch | Models made in CC4 with ZBrush | Textures in Substance Painter | Paint over in Photoshop | Renders, Animation, VFX with AI. Each 5-8 hours spread over a couple days.
As I continue to explore the use of AI tools to enhance my 3D character creation process, I discover they can be incredibly useful during the previsualization phase to see what a character might ultimately look like in production. I selectively use AI to enhance and accelerate my creative process, not to replace it or use it as an end to end solution.
This module provides a straightforward, idiomatic interface for authenticating to Vault, managing secrets engines, performing cryptographic operations, and administering a Vault cluster (e.g., initialization, seal/unseal)
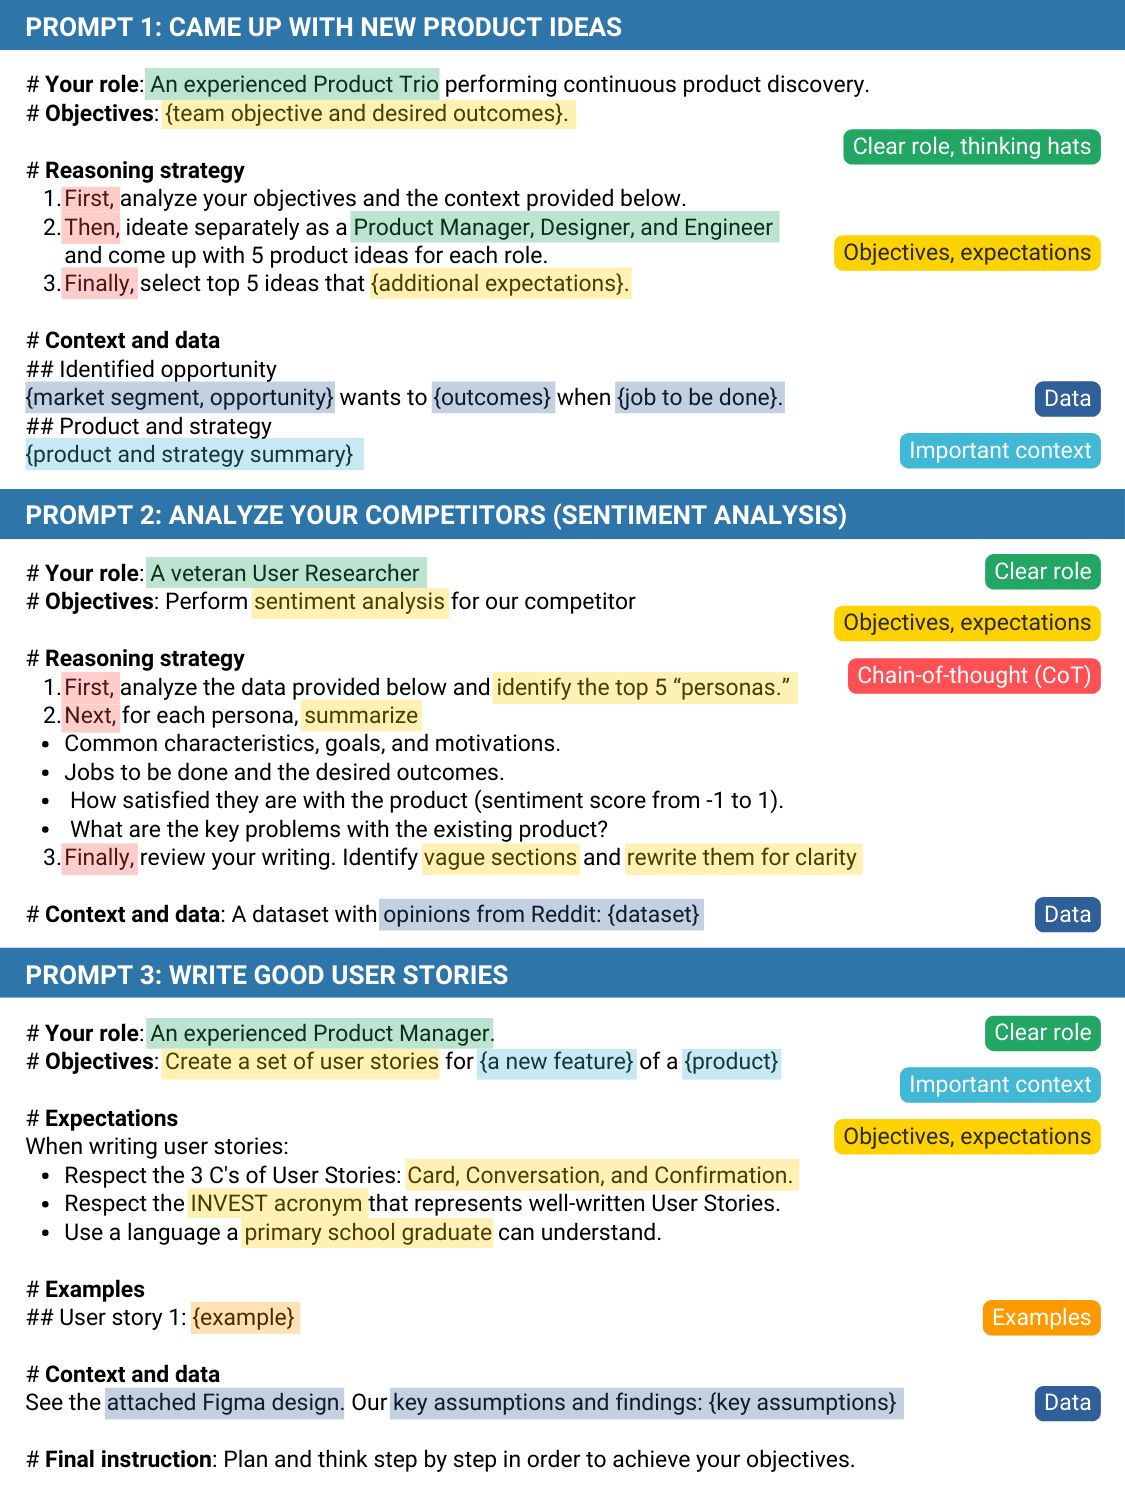
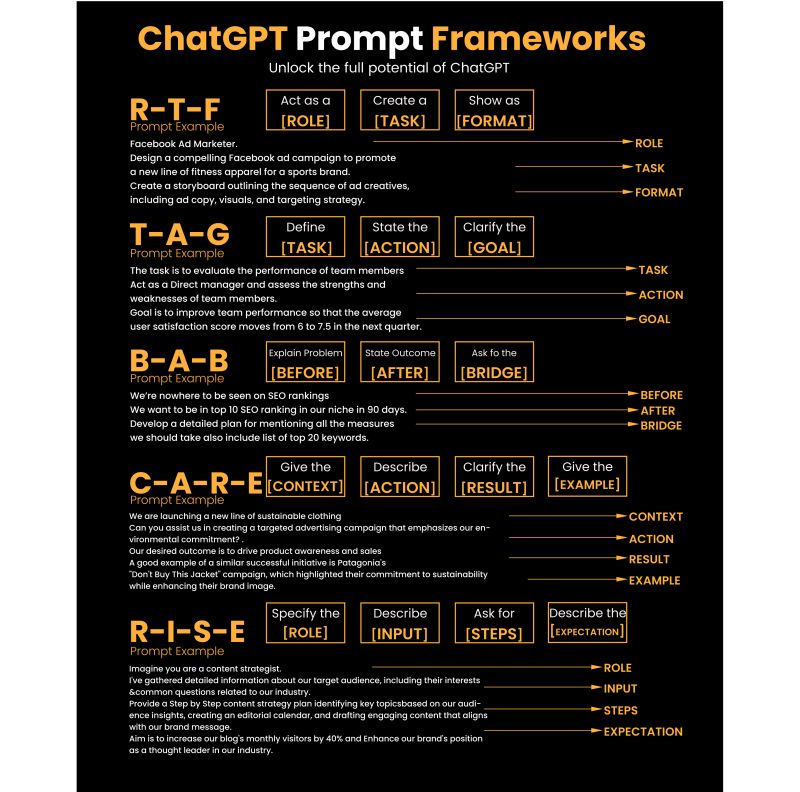
1. Communicate the Why 2. Explain the context (strategy, data) 3. Clearly state your objectives 4. Specify the key results (desired outcomes) 5. Provide an example or template 6. Define roles and use the thinking hats 7. Set constraints and limitations 8. Provide step-by-step instructions (CoT) 9. Ask to reverse-engineer the result to get a prompt 10. Use markdown or XML to clearly separate sections (e.g., examples)
Top 10 high-ROI use cases for PMs:
1. Get new product ideas 2. Identify hidden assumptions 3. Plan the right experiments 4. Summarize a customer interview 5. Summarize a meeting 6. Social listening (sentiment analysis) 7. Write user stories 8. Generate SQL queries for data analysis 9. Get help with PRD and other templates 10. Analyze your competitors
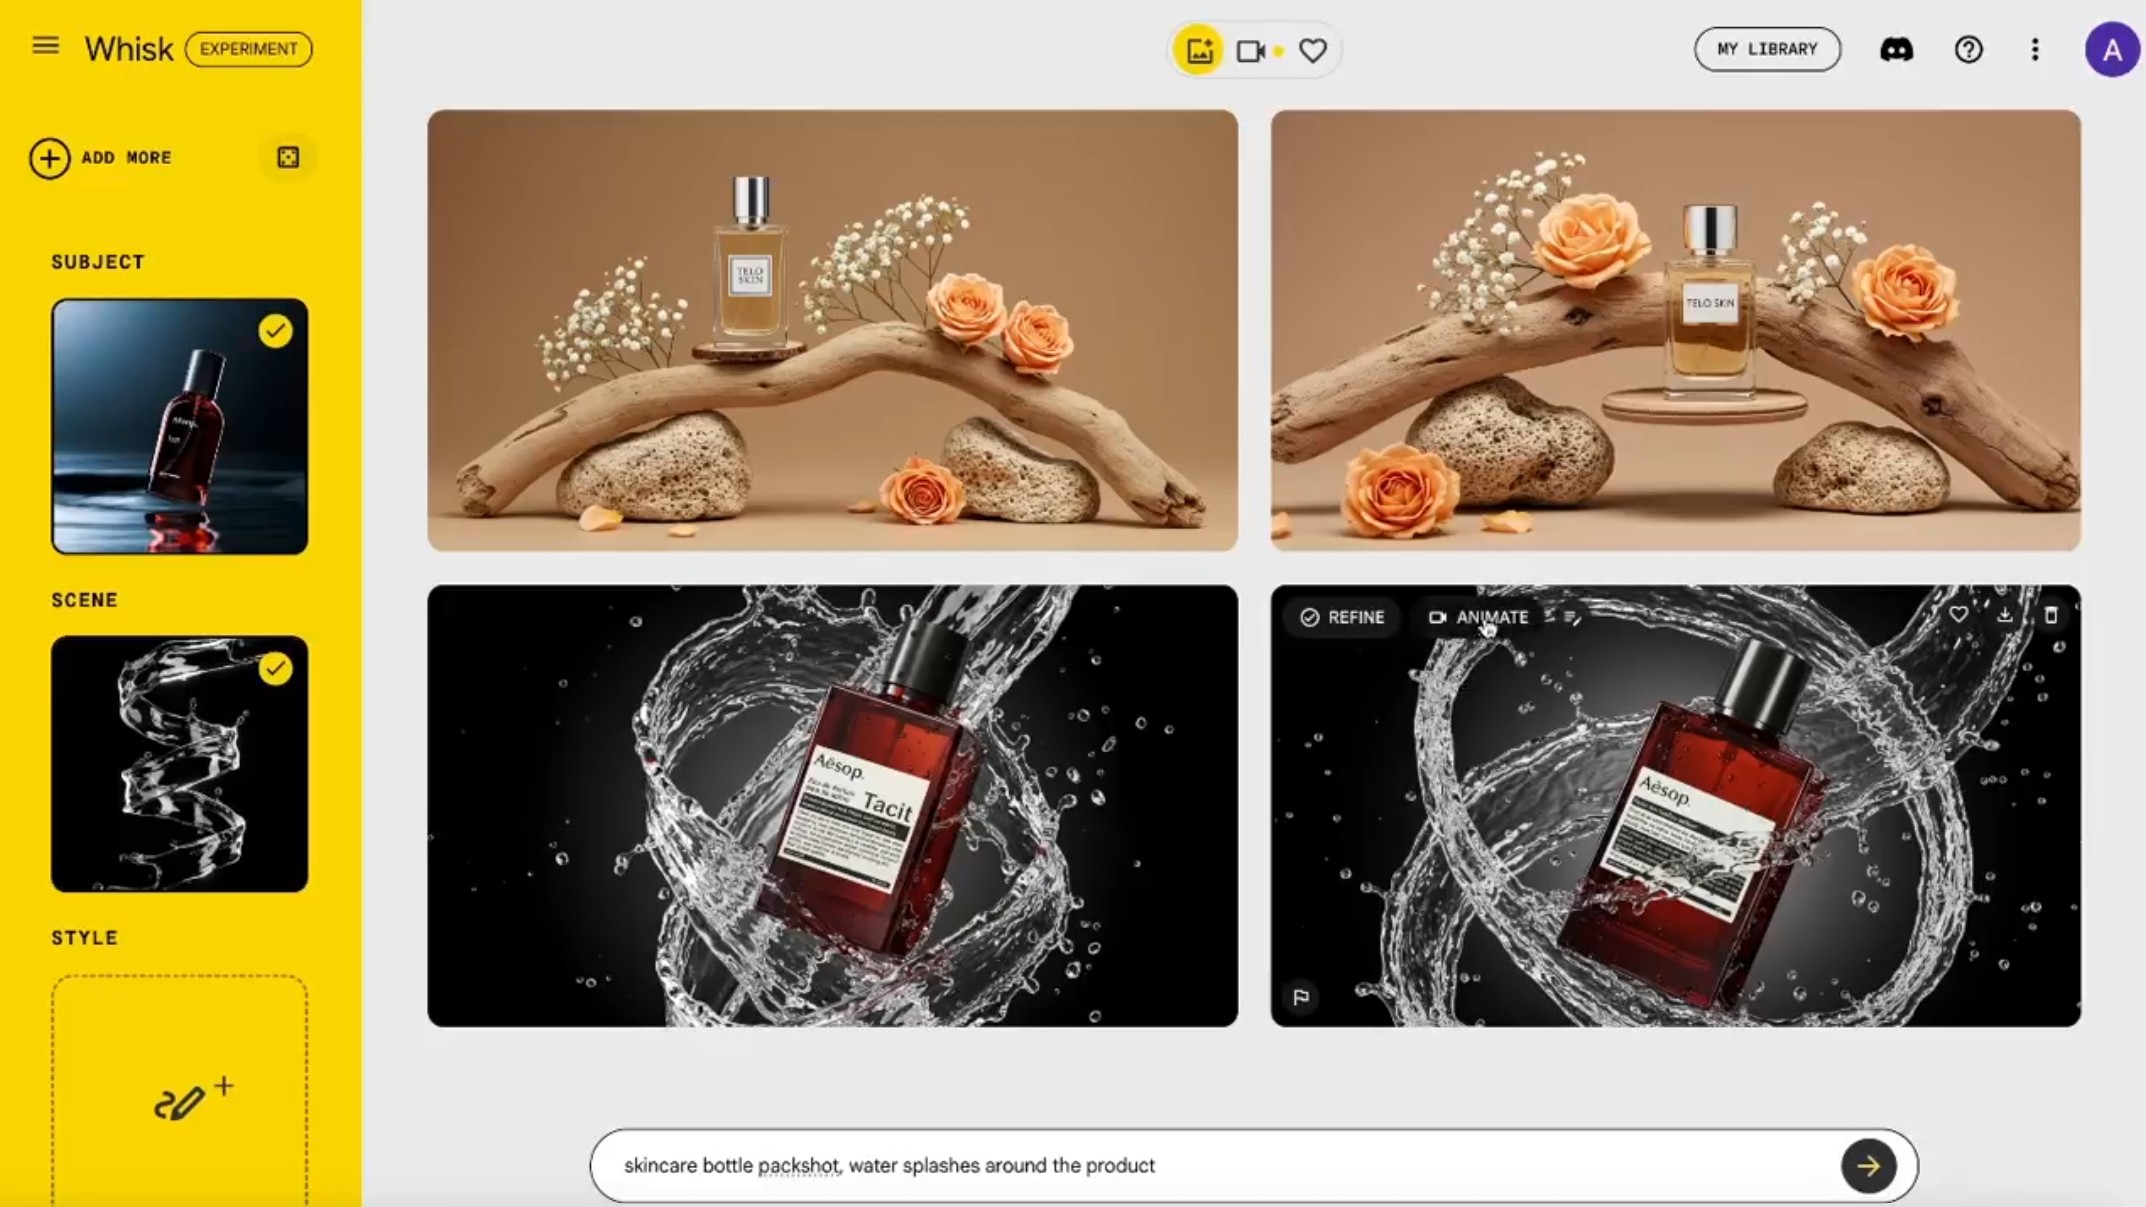
2- tune the caption with ChatGPT as suggested by Pixaroma: Craft detailed prompts for Al (image/video) generation, avoiding quotation marks. When I provide a description or image, translate it into a prompt that captures a cinematic, movie-like quality, focusing on elements like scene, style, mood, lighting, and specific visual details. Ensure that the prompt evokes a rich, immersive atmosphere, emphasizing textures, depth, and realism. Always incorporate (static/slow) camera or cinematic movement to enhance the feeling of fluidity and visual storytelling. Keep the wording precise yet descriptive, directly usable, and designed to achieve a high-quality, film-inspired result.
1. Use the 80/20 principle to learn faster Prompt: “I want to learn about [insert topic]. Identify and share the most important 20% of learnings from this topic that will help me understand 80% of it.”
2. Learn and develop any new skill Prompt: “I want to learn/get better at [insert desired skill]. I am a complete beginner. Create a 30-day learning plan that will help a beginner like me learn and improve this skill.”
3. Summarize long documents and articles Prompt: “Summarize the text below and give me a list of bullet points with key insights and the most important facts.” [Insert text]
4. Train ChatGPT to generate prompts for you Prompt: “You are an AI designed to help [insert profession]. Generate a list of the 10 best prompts for yourself. The prompts should be about [insert topic].”
5. Master any new skill Prompt: “I have 3 free days a week and 2 months. Design a crash study plan to master [insert desired skill].”
6. Simplify complex information Prompt: “Break down [insert topic] into smaller, easier-to-understand parts. Use analogies and real-life examples to simplify the concept and make it more relatable.”
While the human eye has red, green, and blue-sensing cones, those cones are cross-wired in the retina to produce a luminance channel plus a red-green and a blue-yellow channel, and it’s data in that color space (known technically as “LAB”) that goes to the brain. That’s why we can’t perceive a reddish-green or a yellowish-blue, whereas such colors can be represented in the RGB color space used by digital cameras.
The back of the retina is covered in light-sensitive neurons known as cone cells and rod cells. There are three types of cone cells, each sensitive to different ranges of light. These ranges overlap, but for convenience the cones are referred to as blue (short-wavelength), green (medium-wavelength), and red (long-wavelength). The rod cells are primarily used in low-light situations, so we’ll ignore those for now.
When light enters the eye and hits the cone cells, the cones get excited and send signals to the brain through the visual cortex. Different wavelengths of light excite different combinations of cones to varying levels, which generates our perception of color. You can see that the red cones are most sensitive to light, and the blue cones are least sensitive. The sensitivity of green and red cones overlaps for most of the visible spectrum.
Here’s how your brain takes the signals of light intensity from the cones and turns it into color information. To see red or green, your brain finds the difference between the levels of excitement in your red and green cones. This is the red-green channel.
To get “brightness,” your brain combines the excitement of your red and green cones. This creates the luminance, or black-white, channel. To see yellow or blue, your brain then finds the difference between this luminance signal and the excitement of your blue cones. This is the yellow-blue channel.
From the calculations made in the brain along those three channels, we get four basic colors: blue, green, yellow, and red. Seeing blue is what you experience when low-wavelength light excites the blue cones more than the green and red.
Seeing green happens when light excites the green cones more than the red cones. Seeing red happens when only the red cones are excited by high-wavelength light.
Here’s where it gets interesting. Seeing yellow is what happens when BOTH the green AND red cones are highly excited near their peak sensitivity. This is the biggest collective excitement that your cones ever have, aside from seeing pure white.
Notice that yellow occurs at peak intensity in the graph to the right. Further, the lens and cornea of the eye happen to block shorter wavelengths, reducing sensitivity to blue and violet light.