


BREAKING NEWS
LATEST POSTS
-
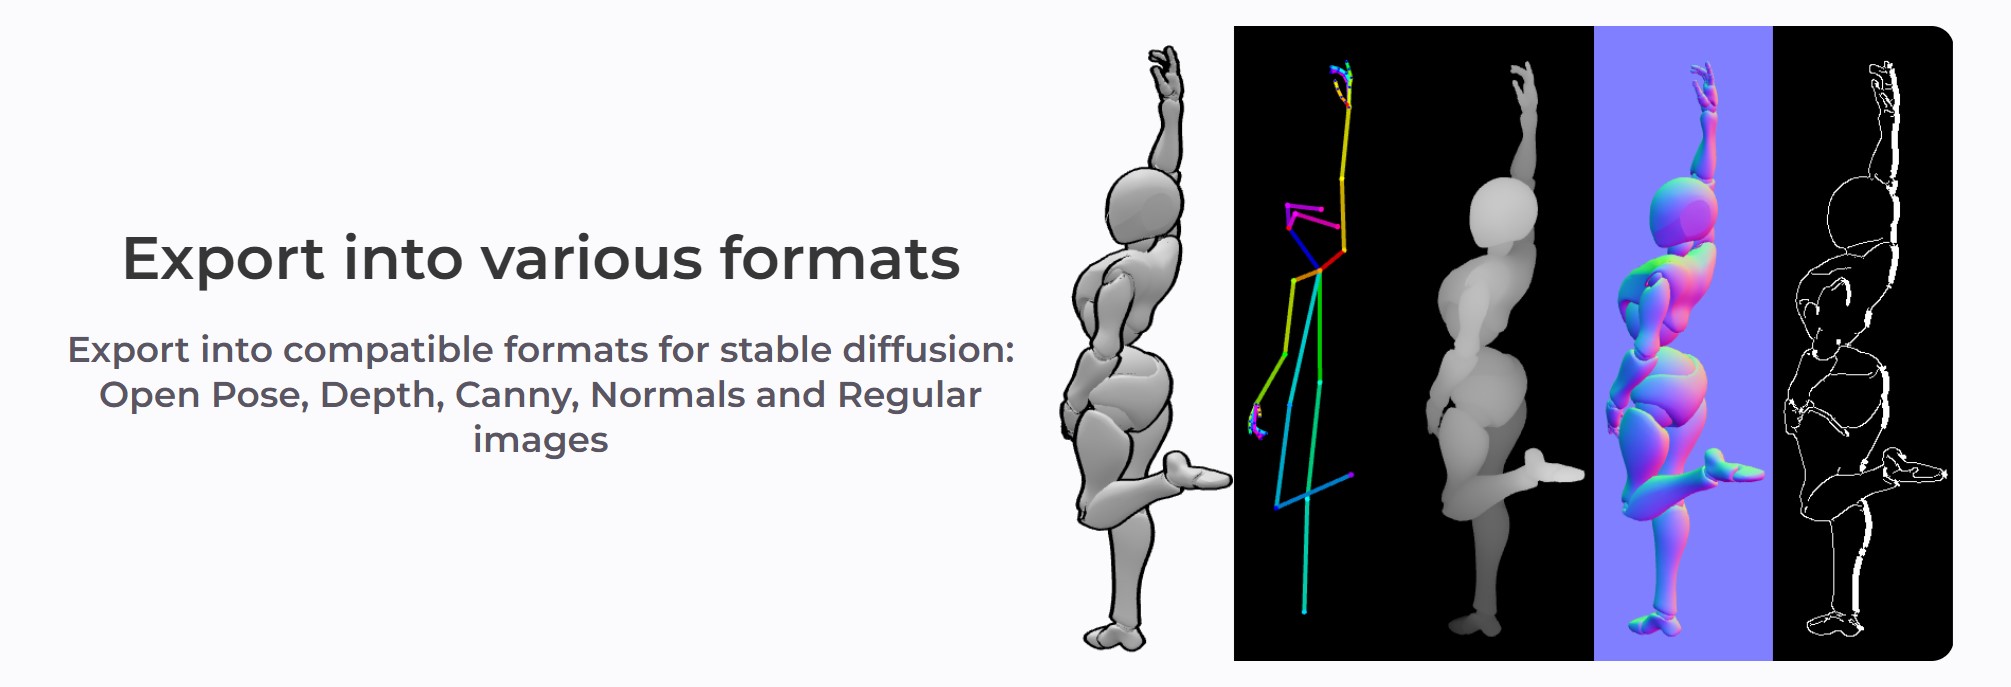
posemy.art – Create Poses for Drawing Reference and AI apps in Seconds for Free
Export into compatible formats for stable diffusion:
Open Pose, Depth, Canny, Normals and Regular images
-
Mickmumpitz – Create CONSISTENT CHARACTERS from an INPUT IMAGE with FLUX and a character sheet! (ComfyUI Tutorial + Installation Guide + Lora training)
https://www.patreon.com/posts/create-from-with-115147229
Note: the image below is not from the workflow
Nodes:
Install missing nodes in the workflow through the manager.
Models:
Make sure not to mix SD1.5 and SDLX models.
Follow the details under the pdf below.
General suggesions:
– Comfy Org / Flux.1 [dev] Checkpoint model (fp8)
The manager will put it under checkpoints, which will not work.
Make sure to put it under the models/unet folder for the Load Diffusion Model node to work.
– same for realvisxlV50_v50LightningBakedvae.safetensors
it should go under models/vae
-
Emmanuel Tsekleves – Writing Research Papers
Here’s the journey of crafting a compelling paper:
1️. ABSTRACT
This is your elevator pitch.
Give a methodology overview.
Paint the problem you’re solving.
Highlight key findings and their impact.
2️. INTRODUCTION
Start with what we know.
Set the stage for our current understanding.
Hook your reader with the relevance of your work.
3️. LITERATURE REVIEW
Identify what’s unknown.
Spot the gaps in current knowledge.
Your job in the next sections is to fill this gap.
4️. METHODOLOGY
What did you do?
Outline how you’ll fill that gap.
Be transparent about your approach.
Make it reproducible so others can follow.
5️. RESULTS
Let the data speak for itself.
Present your findings clearly.
Keep it concise and focused.
6️. DISCUSSION
Now, connect the dots.
Discuss implications and significance.
How do your findings bridge the knowledge gap?
7️. CONCLUSION
Wrap it up with future directions.
What does this mean for us moving forward?
Leave the reader with a call to action or reflection.
8️. REFERENCES
Acknowledge the giants whose shoulders you stand on.
A robust reference list shows the depth of your research.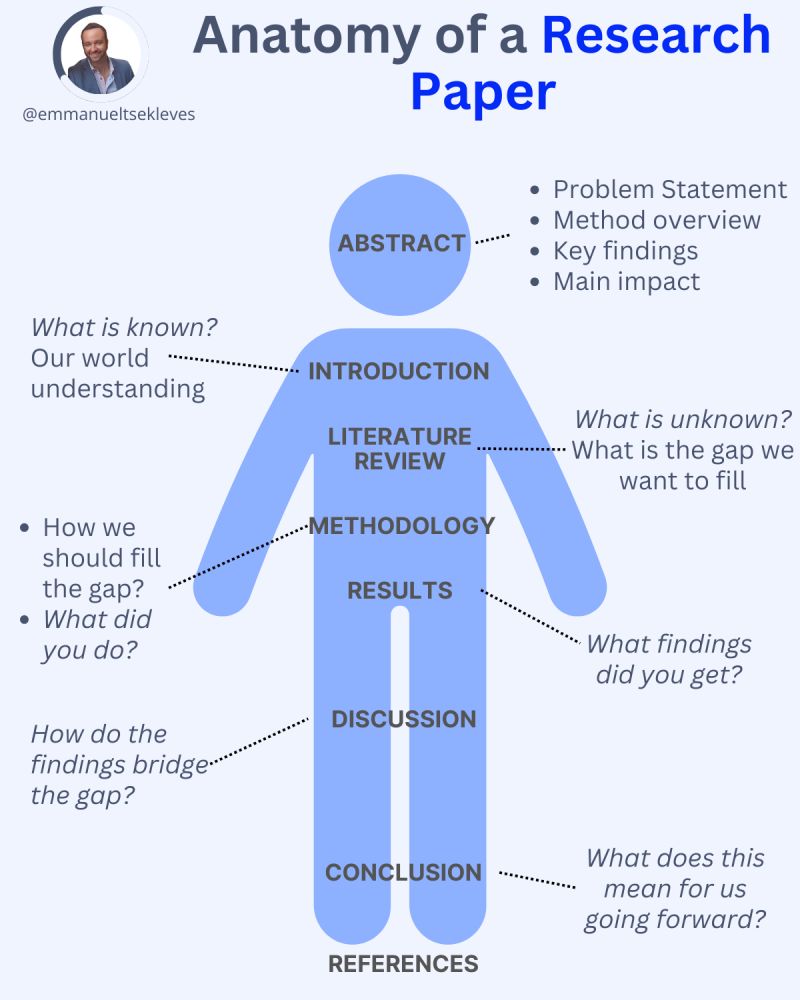


-
Odyssey.systems Explorer – pioneering generative world models and gaussian splatting
Odyssey and a Pixar co-founder, Ed Catmull (also an investor), just dropped Explorer, a revolutionary 3D world generator that turns any image into an editable 3D world.
https://odyssey.systems/introducing-explorer


FEATURED POSTS


-
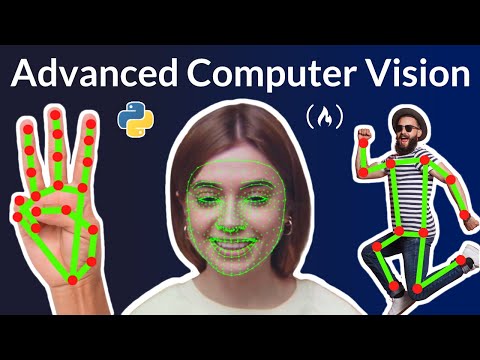
Advanced Computer Vision with Python OpenCV and Mediapipe
https://www.freecodecamp.org/news/advanced-computer-vision-with-python
https://www.freecodecamp.org/news/how-to-use-opencv-and-python-for-computer-vision-and-ai

Working for a VFX (Visual Effects) studio provides numerous opportunities to leverage the power of Python and OpenCV for various tasks. OpenCV is a versatile computer vision library that can be applied to many aspects of the VFX pipeline. Here’s a detailed list of opportunities to take advantage of Python and OpenCV in a VFX studio:
- Image and Video Processing:
- Preprocessing: Python and OpenCV can be used for tasks like resizing, color correction, noise reduction, and frame interpolation to prepare images and videos for further processing.
- Format Conversion: Convert between different image and video formats using OpenCV’s capabilities.
- Tracking and Matchmoving:
- Feature Detection and Tracking: Utilize OpenCV to detect and track features in image sequences, which is essential for matchmoving tasks to integrate computer-generated elements into live-action footage.
- Rotoscoping and Masking:
- Segmentation and Masking: Use OpenCV for creating and manipulating masks and alpha channels for various VFX tasks, like isolating objects or characters from their backgrounds.
- Camera Calibration:
- Intrinsic and Extrinsic Calibration: Python and OpenCV can help calibrate cameras for accurate 3D scene reconstruction and camera tracking.
- 3D Scene Reconstruction:
- Stereoscopy: Use OpenCV to process stereoscopic image pairs for creating 3D depth maps and generating realistic 3D scenes.
- Structure from Motion (SfM): Implement SfM techniques to create 3D models from 2D image sequences.
- Green Screen and Blue Screen Keying:
- Chroma Keying: Implement advanced keying algorithms using OpenCV to seamlessly integrate actors and objects into virtual environments.
- Particle and Fluid Simulations:
- Particle Tracking: Utilize OpenCV to track and manipulate particles in fluid simulations for more realistic visual effects.
- Motion Analysis:
- Optical Flow: Implement optical flow algorithms to analyze motion patterns in footage, useful for creating dynamic VFX elements that follow the motion of objects.
- Virtual Set Extension:
- Camera Projection: Use camera calibration techniques to project virtual environments onto physical sets, extending the visual scope of a scene.
- Color Grading:
- Color Correction: Implement custom color grading algorithms to match the color tones and moods of different shots.
- Automated QC (Quality Control):
- Artifact Detection: Develop Python scripts to automatically detect and flag visual artifacts like noise, flicker, or compression artifacts in rendered frames.
- Data Analysis and Visualization:
- Performance Metrics: Use Python to analyze rendering times and optimize the rendering process.
- Data Visualization: Generate graphs and charts to visualize render farm usage, project progress, and resource allocation.
- Automating Repetitive Tasks:
- Batch Processing: Automate repetitive tasks like resizing images, applying filters, or converting file formats across multiple shots.
- Machine Learning Integration:
- Object Detection: Integrate machine learning models (using frameworks like TensorFlow or PyTorch) to detect and track specific objects or elements within scenes.
- Pipeline Integration:
- Custom Tools: Develop Python scripts and tools to integrate OpenCV-based processes seamlessly into the studio’s pipeline.
- Real-time Visualization:
- Live Previsualization: Implement real-time OpenCV-based visualizations to aid decision-making during the preproduction stage.
- VR and AR Integration:
- Augmented Reality: Use Python and OpenCV to integrate virtual elements into real-world footage, creating compelling AR experiences.
- Camera Effects:
- Lens Distortion: Correct lens distortions and apply various camera effects using OpenCV, contributing to the desired visual style.
Interpolating frames from an EXR sequence using OpenCV can be useful when you have only every second frame of a final render and you want to create smoother motion by generating intermediate frames. However, keep in mind that interpolating frames might not always yield perfect results, especially if there are complex changes between frames. Here’s a basic example of how you might use OpenCV to achieve this:
import cv2
import numpy as np
import os

# Replace with the path to your EXR frames
exr_folder = "path_to_exr_frames"

# Replace with the appropriate frame extension and naming convention
frame_template = "frame_{:04d}.exr"

# Define the range of frame numbers you have
start_frame = 1
end_frame = 100
step = 2

# Define the output folder for interpolated frames
output_folder = "output_interpolated_frames"
os.makedirs(output_folder, exist_ok=True)

# Loop through the frame range and interpolate
for frame_num in range(start_frame, end_frame + 1, step):
    frame_path = os.path.join(exr_folder, frame_template.format(frame_num))
    next_frame_path = os.path.join(exr_folder, frame_template.format(frame_num + step))

    if os.path.exists(frame_path) and os.path.exists(next_frame_path):
        frame = cv2.imread(frame_path, cv2.IMREAD_ANYDEPTH | cv2.IMREAD_COLOR)
        next_frame = cv2.imread(next_frame_path, cv2.IMREAD_ANYDEPTH | cv2.IMREAD_COLOR)

        # Interpolate frames using simple averaging
        interpolated_frame = (frame + next_frame) / 2

        # Save interpolated frame
        output_path = os.path.join(output_folder, frame_template.format(frame_num))
        cv2.imwrite(output_path, interpolated_frame)

        print(f"Interpolated frame {frame_num}") # alternatively: print("Interpolated frame {}".format(frame_num))
Please note the following points:
- The above example uses simple averaging to interpolate frames. More advanced interpolation methods might provide better results, such as motion-based algorithms like optical flow-based interpolation.
- EXR files can store high dynamic range (HDR) data, so make sure to use cv2.IMREAD_ANYDEPTH flag when reading these files.
- OpenCV might not support EXR format directly. You might need to use a library like exr to read and manipulate EXR files, and then convert them to OpenCV-compatible formats.
- Consider the characteristics of your specific render when using interpolation. If there are large changes between frames, the interpolation might lead to artifacts.
- Experiment with different interpolation methods and parameters to achieve the desired result.
- For a more advanced and accurate interpolation, you might need to implement or use existing algorithms that take into account motion estimation and compensation.
- Image and Video Processing:
-
Types of Film Lights and their efficiency – CRI, Color Temperature and Luminous Efficacy
nofilmschool.com/types-of-film-lights
“Not every light performs the same way. Lights and lighting are tricky to handle. You have to plan for every circumstance. But the good news is, lighting can be adjusted. Let’s look at different factors that affect lighting in every scene you shoot. “
Use CRI, Luminous Efficacy and color temperature controls to match your needs.
Color Temperature
Color temperature describes the “color” of white light by a light source radiated by a perfect black body at a given temperature measured in degrees Kelvinhttps://www.pixelsham.com/2019/10/18/color-temperature/
CRI
“The Color Rendering Index is a measurement of how faithfully a light source reveals the colors of whatever it illuminates, it describes the ability of a light source to reveal the color of an object, as compared to the color a natural light source would provide. The highest possible CRI is 100. A CRI of 100 generally refers to a perfect black body, like a tungsten light source or the sun. “https://www.studiobinder.com/blog/what-is-color-rendering-index
(more…)
-
About green screens
hackaday.com/2015/02/07/how-green-screen-worked-before-computers/
www.newtek.com/blog/tips/best-green-screen-materials/
www.chromawall.com/blog//chroma-key-green

Chroma Key Green, the color of green screens is also known as Chroma Green and is valued at approximately 354C in the Pantone color matching system (PMS).
Chroma Green can be broken down in many different ways. Here is green screen green as other values useful for both physical and digital production:
Green Screen as RGB Color Value: 0, 177, 64
Green Screen as CMYK Color Value: 81, 0, 92, 0
Green Screen as Hex Color Value: #00b140
Green Screen as Websafe Color Value: #009933Chroma Key Green is reasonably close to an 18% gray reflectance.
Illuminate your green screen with an uniform source with less than 2/3 EV variation.
The level of brightness at any given f-stop should be equivalent to a 90% white card under the same lighting.
