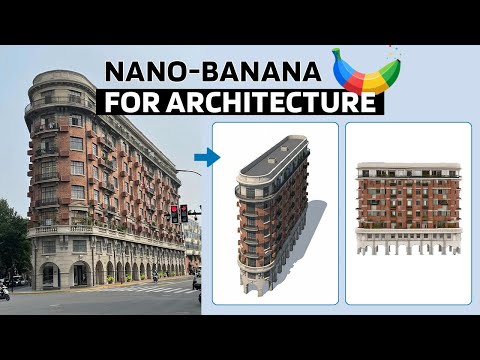
Log in with your Gmail and select Gemini 2.5 (Nano Banana).
Upload a photo — either from your laptop or a Google Street View screenshot.
Paste this example prompt: “Use the provided architectural photo as reference. Generate a high-fidelity 3D building model in the look of a 3D-printed architecture model.”
Wait a few seconds, and your 3D architecture model will be ready.
Pro tip: If you want more accuracy, upload two images — a street photo for the facade and an aerial view for the roof/top.
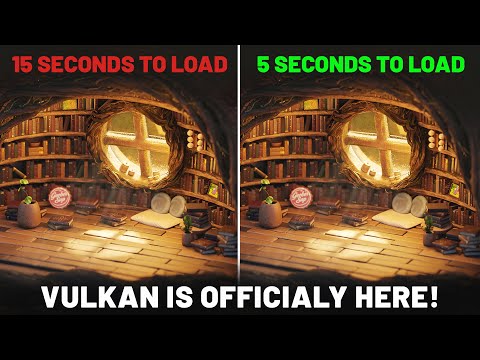
Blender is switching from OpenGL to Vulkan as its default graphics backend, starting significantly with Blender 4.5, to achieve better performance and prepare for future features like real-time ray tracing and global illumination. To enable this switch, go to Edit > Preferences > System and set the “Backend” option to “Vulkan,” then restart Blender. This change offers substantial benefits, including faster startup times, improved viewport responsiveness, and more efficient handling of complex scenes by better utilizing your CPU and GPU resources.
Why the Switch to Vulkan?
Modern Graphics API: Vulkan is a newer, lower-level, and more efficient API that provides developers with greater control over hardware, unlike the older, higher-level OpenGL.
Performance Boost: This change significantly improves performance in various areas, such as viewport rendering, material loading, and overall UI responsiveness, especially in complex scenes with many textures.
Better Resource Utilization: Vulkan distributes work more effectively across the CPU and reduces driver overhead, allowing Blender to make better use of your computer’s power.
Future-Proofing: The Vulkan backend paves the way for advanced features like real-time ray tracing and global illumination in future versions of Blender.
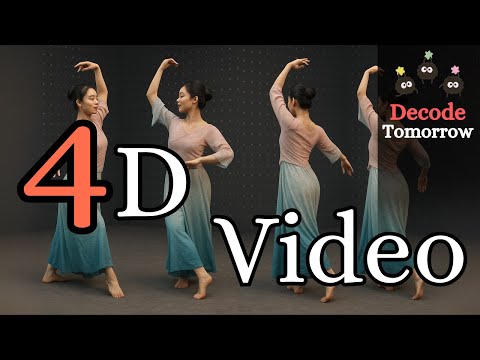
Given sparse-view videos, Diffuman4D (1) generates 4D-consistent multi-view videos conditioned on these inputs, and (2) reconstructs a high-fidelity 4DGS model of the human performance using both the input and the generated videos.
Truly Infinite Videos This isn’t a gimmick. You can generate incredibly long videos without frying your VRAM. Perfect for podcasts, presentations, or full-on virtual influencers.
More Than Just Lips This is the best part. It doesn’t just sync the mouth; it generates realistic head movements, body posture, and facial expressions that match the audio’s emotion. It makes characters feel alive.
Keeps Everything Consistent It preserves the character’s identity, the background, and even camera movements from your original video, so everything looks seamless.
Completely Open Source & Ready for Business The code, the weights, and the paper are all out there for you to use. Best of all, it’s released under an Apache 2.0 license, which means you are free to use what you create for commercial projects!
The trigger phrase is “equirectangular 360 degree panorama”. I would avoid saying “spherical projection” since that tends to result in non-equirectangular spherical images.
Image resolution should always be a 2:1 aspect ratio. 1024 x 512 or 1408 x 704 work quite well and were used in the training data. 2048 x 1024 also works.
I suggest using a weight of 0.5 – 1.5. If you are having issues with the image generating too flat instead of having the necessary spherical distortion, try increasing the weight above 1, though this could negatively impact small details of the image. For Flux guidance, I recommend a value of about 2.5 for realistic scenes.
Basically, gamma is the relationship between the brightness of a pixel as it appears on the screen, and the numerical value of that pixel. Generally Gamma is just about defining relationships.
Three main types: – Image Gamma encoded in images – Display Gammas encoded in hardware and/or viewing time – System or Viewing Gamma which is the net effect of all gammas when you look back at a final image. In theory this should flatten back to 1.0 gamma.
Note. The Median Cut algorithm is typically used for color quantization, which involves reducing the number of colors in an image while preserving its visual quality. It doesn’t directly provide a way to identify the brightest areas in an image. However, if you’re interested in identifying the brightest areas, you might want to look into other methods like thresholding, histogram analysis, or edge detection, through openCV for example.