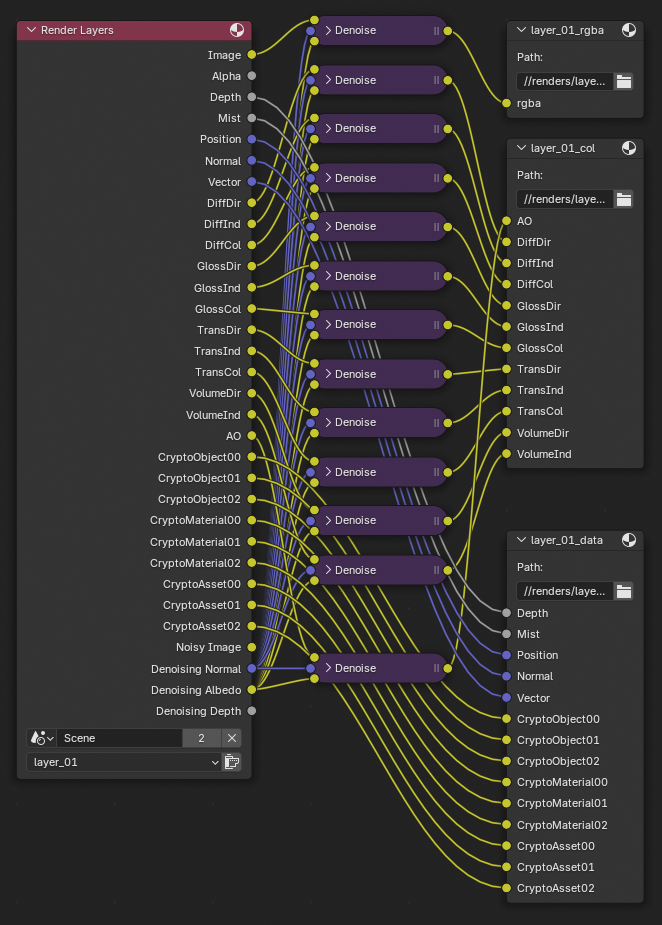
Link all your passes and aovs into the output node automatically. It can works with EEVEE and CYCLES. The default output for Blender is really bad, but after use this script can really save your life and make your life easier!
Despite embracing technology, the “Blade Runner” and “Alien” director has long incorporated the fear of AI in his stories onscreen and knows better than most about its ramifications. Scott previously told Rolling Stone in November 2023 that when it came to his concerns about artificial intelligence broadly, he said that AI was “dangerous” and akin to a “technical hydrogen bomb.”
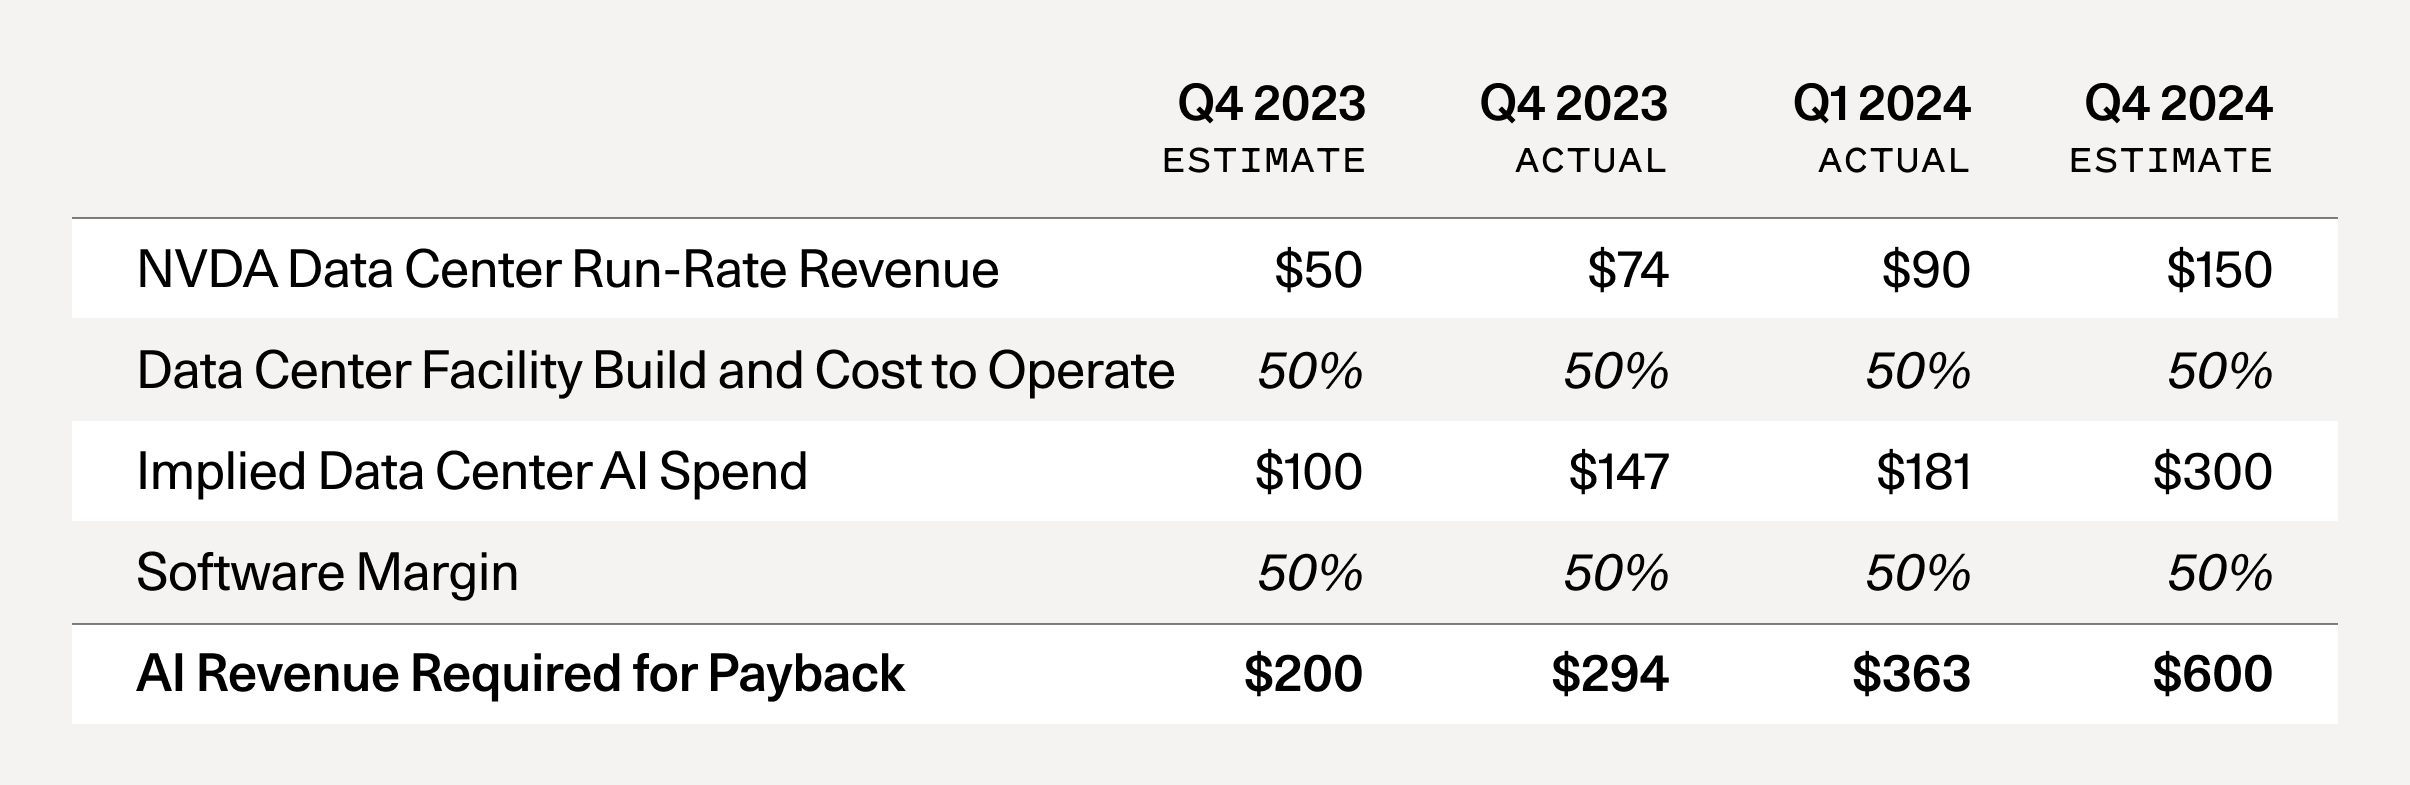
The expanding economic impact of AI, highlights a significant gap between AI infrastructure investments and actual revenue generation. Despite easing GPU shortages and increased investments by cloud providers, AI-related revenue, particularly dominated by OpenAI, remains insufficient to justify the massive capital expenditures. The analysis reveals that this gap has grown from $125 billion to $500 billion, posing challenges for the AI industry while emphasizing the need for realistic expectations and sustainable value creation.
OpenAI training and inference costs could reach $7bn for 2024, AI startup set to lose $5bn – report
The power of AI will transform every facet of our society, from the micro changes in our day-to-day lives to the macro changes in global geopolitics. It will challenge our values and assumptions and make us reconsider what it means to be human. It is inevitable that some capital will be wasted getting there. We may even experience a bubble or two. But this is part of the growing pains of advancing humankind. Society, like our individual lives, seldom take the shortest route. As to the argument that we are in a bubble right now, we think it deserves some reconsidering.
QuickTime (.mov) files are fundamentally time-based, not frame-based, and so don’t have a built-in, uniform “first frame/last frame” field you can set as numeric frame IDs. Instead, tools like Shotgun Create rely on the timecode track and the movie’s duration to infer frame numbers. If you want Shotgun to pick up a non-default frame range (e.g. start at 1001, end at 1064), you must bake in an SMPTE timecode that corresponds to your desired start frame, and ensure the movie’s duration matches your clip length.
How Shotgun Reads Frame Ranges
Default start frame is 1. If no timecode metadata is present, Shotgun assumes the movie begins at frame 1.
Timecode ⇒ frame number. Shotgun Create “honors the timecodes of media sources,” mapping the embedded TC to frame IDs. For example, a 24 fps QuickTime tagged with a start timecode of 00:00:41:17 will be interpreted as beginning on frame 1001 (1001 ÷ 24 fps ≈ 41.71 s).
Embedding a Start Timecode
QuickTime uses a tmcd (timecode) track. You can bake in an SMPTE track via FFmpeg’s -timecode flag or via Compressor/encoder settings:
Compute your start TC.
Desired start frame = 1001
Frame 1001 at 24 fps ⇒ 1001 ÷ 24 ≈ 41.708 s ⇒ TC 00:00:41:17