BREAKING NEWS
LATEST POSTS
-
Aitor Echeveste – Free CG and Comp Projection Shot, Download the Assets & Follow the Workflow
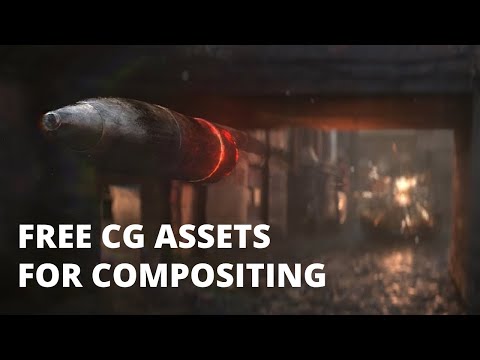
What’s Included:
- Cleaned and extended base plates
- Full Maya and Nuke 3D projection layouts
- Bullet and environment CG renders with AOVs (RGB, normals, position, ID, etc.)
- Explosion FX in slow motion
- 3D scene geometry for projection
- Camera + lensing setup
- Light groups and passes for look development
-
Tauseef Fayyaz About readable code – Clean Code Practices
𝗛𝗲𝗿𝗲’𝘀 𝘄𝗵𝗮𝘁 𝘁𝗼 𝗺𝗮𝘀𝘁𝗲𝗿 𝗶𝗻 𝗖𝗹𝗲𝗮𝗻 𝗖𝗼𝗱𝗲 𝗣𝗿𝗮𝗰𝘁𝗶𝗰𝗲𝘀:
🔹 Code Readability & Simplicity – Use meaningful names, write short functions, follow SRP, flatten logic, and remove dead code.
→ Clarity is a feature.
🔹 Function & Class Design – Limit parameters, favor pure functions, small classes, and composition over inheritance.
→ Structure drives scalability.
🔹 Testing & Maintainability – Write readable unit tests, avoid over-mocking, test edge cases, and refactor with confidence.
→ Test what matters.
🔹 Code Structure & Architecture – Organize by features, minimize global state, avoid god objects, and abstract smartly.
→ Architecture isn’t just backend.
🔹 Refactoring & Iteration – Apply the Boy Scout Rule, DRY, KISS, and YAGNI principles regularly.
→ Refactor like it’s part of development.
🔹 Robustness & Safety – Validate early, handle errors gracefully, avoid magic numbers, and favor immutability.
→ Safe code is future-proof.
🔹 Documentation & Comments – Let your code explain itself. Comment why, not what, and document at the source.
→ Good docs reduce team friction.
🔹 Tooling & Automation – Use linters, formatters, static analysis, and CI reviews to automate code quality.
→ Let tools guard your gates.
🔹 Final Review Practices – Review, refactor nearby code, and avoid cleverness in the name of brevity.
→ Readable code is better than smart code. -
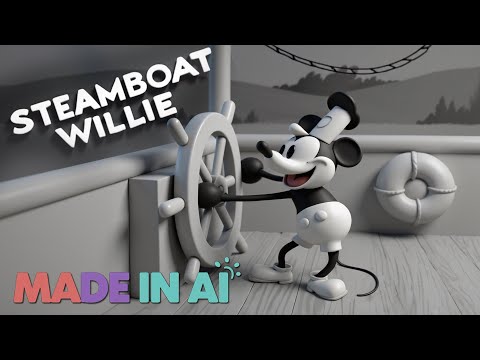
Mark Theriault “Steamboat Willie” – AI Re-Imagining of a 1928 Classic in 4k
I ran Steamboat Willie (now public domain) through Flux Kontext to reimagine it as a 3D-style animated piece. Instead of going the polished route with something like W.A.N. 2.1 for full image-to-video generation, I leaned into the raw, handmade vibe that comes from converting each frame individually. It gave it a kind of stop-motion texture, imperfect, a bit wobbly, but full of character.
-
Microsoft DAViD – Data-efficient and Accurate Vision Models from Synthetic Data
Our human-centric dense prediction model delivers high-quality, detailed (depth) results while achieving remarkable efficiency, running orders of magnitude faster than competing methods, with inference speeds as low as 21 milliseconds per frame (the large multi-task model on an NVIDIA A100). It reliably captures a wide range of human characteristics under diverse lighting conditions, preserving fine-grained details such as hair strands and subtle facial features. This demonstrates the model’s robustness and accuracy in complex, real-world scenarios.
https://microsoft.github.io/DAViD
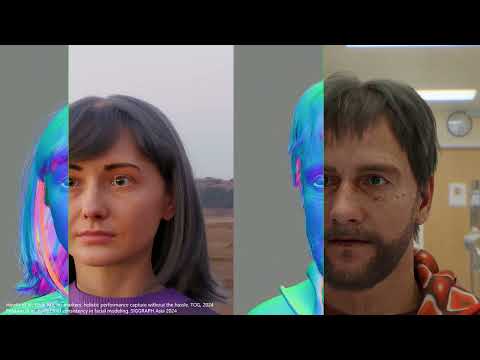
The state of the art in human-centric computer vision achieves high accuracy and robustness across a diverse range of tasks. The most effective models in this domain have billions of parameters, thus requiring extremely large datasets, expensive training regimes, and compute-intensive inference. In this paper, we demonstrate that it is possible to train models on much smaller but high-fidelity synthetic datasets, with no loss in accuracy and higher efficiency. Using synthetic training data provides us with excellent levels of detail and perfect labels, while providing strong guarantees for data provenance, usage rights, and user consent. Procedural data synthesis also provides us with explicit control on data diversity, that we can use to address unfairness in the models we train. Extensive quantitative assessment on real input images demonstrates accuracy of our models on three dense prediction tasks: depth estimation, surface normal estimation, and soft foreground segmentation. Our models require only a fraction of the cost of training and inference when compared with foundational models of similar accuracy.
-
-
Embedding frame ranges into Quicktime movies with FFmpeg
QuickTime (.mov) files are fundamentally time-based, not frame-based, and so don’t have a built-in, uniform “first frame/last frame” field you can set as numeric frame IDs. Instead, tools like Shotgun Create rely on the timecode track and the movie’s duration to infer frame numbers. If you want Shotgun to pick up a non-default frame range (e.g. start at 1001, end at 1064), you must bake in an SMPTE timecode that corresponds to your desired start frame, and ensure the movie’s duration matches your clip length.
How Shotgun Reads Frame Ranges
- Default start frame is 1. If no timecode metadata is present, Shotgun assumes the movie begins at frame 1.
- Timecode ⇒ frame number. Shotgun Create “honors the timecodes of media sources,” mapping the embedded TC to frame IDs. For example, a 24 fps QuickTime tagged with a start timecode of 00:00:41:17 will be interpreted as beginning on frame 1001 (1001 ÷ 24 fps ≈ 41.71 s).
Embedding a Start Timecode
QuickTime uses a
tmcd(timecode) track. You can bake in an SMPTE track via FFmpeg’s-timecodeflag or via Compressor/encoder settings:- Compute your start TC.
- Desired start frame = 1001
- Frame 1001 at 24 fps ⇒ 1001 ÷ 24 ≈ 41.708 s ⇒ TC 00:00:41:17
- FFmpeg example:
ffmpeg -i input.mov \
  -c copy \
  -timecode 00:00:41:17 \
  output.mov
This adds a timecode track beginning at 00:00:41:17, which Shotgun maps to frame 1001.
Ensuring the Correct End Frame
Shotgun infers the last frame from the movie’s duration. To end on frame 1064:
- Frame count = 1064 – 1001 + 1 = 64 frames
- Duration = 64 ÷ 24 fps ≈ 2.667 s
FFmpeg trim example:
ffmpeg -i input.mov \
  -c copy \
  -timecode 00:00:41:17 \
  -t 00:00:02.667 \
  output_trimmed.mov
This results in a 64-frame clip (1001→1064) at 24 fps.

-
Aider.chat – A free, open-source AI pair-programming CLI tool
Aider enables developers to interactively generate, modify, and test code by leveraging both cloud-hosted and local LLMs directly from the terminal or within an IDE. Key capabilities include comprehensive codebase mapping, support for over 100 programming languages, automated git commit messages, voice-to-code interactions, and built-in linting and testing workflows. Installation is straightforward via pip or uv, and while the tool itself has no licensing cost, actual usage costs stem from the underlying LLM APIs, which are billed separately by providers like OpenAI or Anthropic.
Key Features
- Cloud & Local LLM Support
Connect to most major LLM providers out of the box, or run models locally for privacy and cost control aider.chat. - Codebase Mapping
Automatically indexes all project files so that even large repositories can be edited contextually aider.chat. - 100+ Language Support
Works with Python, JavaScript, Rust, Ruby, Go, C++, PHP, HTML, CSS, and dozens more aider.chat. - Git Integration
Generates sensible commit messages and automates diffs/undo operations through familiar git tooling aider.chat. - Voice-to-Code
Speak commands to Aider to request features, tests, or fixes without typing aider.chat. - Images & Web Pages
Attach screenshots, diagrams, or documentation URLs to provide visual context for edits aider.chat. - Linting & Testing
Runs lint and test suites automatically after each change, and can fix issues it detects
- Cloud & Local LLM Support
-
SourceTree vs Github Desktop – Which one to use
Sourcetree and GitHub Desktop are both free, GUI-based Git clients aimed at simplifying version control for developers. While they share the same core purpose—making Git more accessible—they differ in features, UI design, integration options, and target audiences.
Installation & Setup
- Sourcetree
- Download: https://www.sourcetreeapp.com/
- Supported OS: Windows 10+, macOS 10.13+
- Prerequisites: Comes bundled with its own Git, or can be pointed to a system Git install.
- Initial Setup: Wizard guides SSH key generation, authentication with Bitbucket/GitHub/GitLab.
- GitHub Desktop
- Download: https://desktop.github.com/
- Supported OS: Windows 10+, macOS 10.15+
- Prerequisites: Bundled Git; seamless login with GitHub.com or GitHub Enterprise.
- Initial Setup: One-click sign-in with GitHub; auto-syncs repositories from your GitHub account.
Feature Comparison
(more…)Feature Sourcetree GitHub Desktop Branch Visualization Detailed graph view with drag-and-drop for rebasing/merging Linear graph, simpler but less configurable Staging & Commit File-by-file staging, inline diff view All-or-nothing staging, side-by-side diff Interactive Rebase Full support via UI Basic support via command line only Conflict Resolution Built-in merge tool integration (DiffMerge, Beyond Compare) Contextual conflict editor with choice panels Submodule Management Native submodule support Limited; requires CLI Custom Actions / Hooks Define custom actions (e.g., launch scripts) No UI for custom Git hooks Git Flow / Hg Flow Built-in support None Performance Can lag on very large repos Generally snappier on medium-sized repos Memory Footprint Higher RAM usage Lightweight Platform Integration Atlassian Bitbucket, Jira Deep GitHub.com / Enterprise integration Learning Curve Steeper for beginners Beginner-friendly - Sourcetree


FEATURED POSTS

-
Rendering – BRDF – Bidirectional reflectance distribution function
http://en.wikipedia.org/wiki/Bidirectional_reflectance_distribution_function
The bidirectional reflectance distribution function is a four-dimensional function that defines how light is reflected at an opaque surface
http://www.cs.ucla.edu/~zhu/tutorial/An_Introduction_to_BRDF-Based_Lighting.pdf
In general, when light interacts with matter, a complicated light-matter dynamic occurs. This interaction depends on the physical characteristics of the light as well as the physical composition and characteristics of the matter.
That is, some of the incident light is reflected, some of the light is transmitted, and another portion of the light is absorbed by the medium itself.
A BRDF describes how much light is reflected when light makes contact with a certain material. Similarly, a BTDF (Bi-directional Transmission Distribution Function) describes how much light is transmitted when light makes contact with a certain material
http://www.cs.princeton.edu/~smr/cs348c-97/surveypaper.html
It is difficult to establish exactly how far one should go in elaborating the surface model. A truly complete representation of the reflective behavior of a surface might take into account such phenomena as polarization, scattering, fluorescence, and phosphorescence, all of which might vary with position on the surface. Therefore, the variables in this complete function would be:
incoming and outgoing angle incoming and outgoing wavelength incoming and outgoing polarization (both linear and circular) incoming and outgoing position (which might differ due to subsurface scattering) time delay between the incoming and outgoing light ray
-
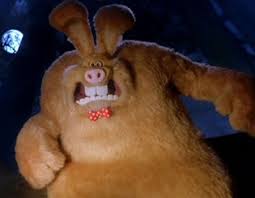
Methods for creating motion blur in Stop motion
en.wikipedia.org/wiki/Go_motion
Petroleum jelly
This crude but reasonably effective technique involves smearing petroleum jelly (“Vaseline”) on a plate of glass in front of the camera lens, also known as vaselensing, then cleaning and reapplying it after each shot — a time-consuming process, but one which creates a blur around the model. This technique was used for the endoskeleton in The Terminator. This process was also employed by Jim Danforth to blur the pterodactyl’s wings in Hammer Films’ When Dinosaurs Ruled the Earth, and by Randal William Cook on the terror dogs sequence in Ghostbusters.[citation needed]Bumping the puppet
Gently bumping or flicking the puppet before taking the frame will produce a slight blur; however, care must be taken when doing this that the puppet does not move too much or that one does not bump or move props or set pieces.Moving the table
Moving the table on which the model is standing while the film is being exposed creates a slight, realistic blur. This technique was developed by Ladislas Starevich: when the characters ran, he moved the set in the opposite direction. This is seen in The Little Parade when the ballerina is chased by the devil. Starevich also used this technique on his films The Eyes of the Dragon, The Magical Clock and The Mascot. Aardman Animations used this for the train chase in The Wrong Trousers and again during the lorry chase in A Close Shave. In both cases the cameras were moved physically during a 1-2 second exposure. The technique was revived for the full-length Wallace & Gromit: The Curse of the Were-Rabbit.Go motion
The most sophisticated technique was originally developed for the film The Empire Strikes Back and used for some shots of the tauntauns and was later used on films like Dragonslayer and is quite different from traditional stop motion. The model is essentially a rod puppet. The rods are attached to motors which are linked to a computer that can record the movements as the model is traditionally animated. When enough movements have been made, the model is reset to its original position, the camera rolls and the model is moved across the table. Because the model is moving during shots, motion blur is created.A variation of go motion was used in E.T. the Extra-Terrestrial to partially animate the children on their bicycles.