There are three models, two are available now, and a third open-weight version is coming soon:
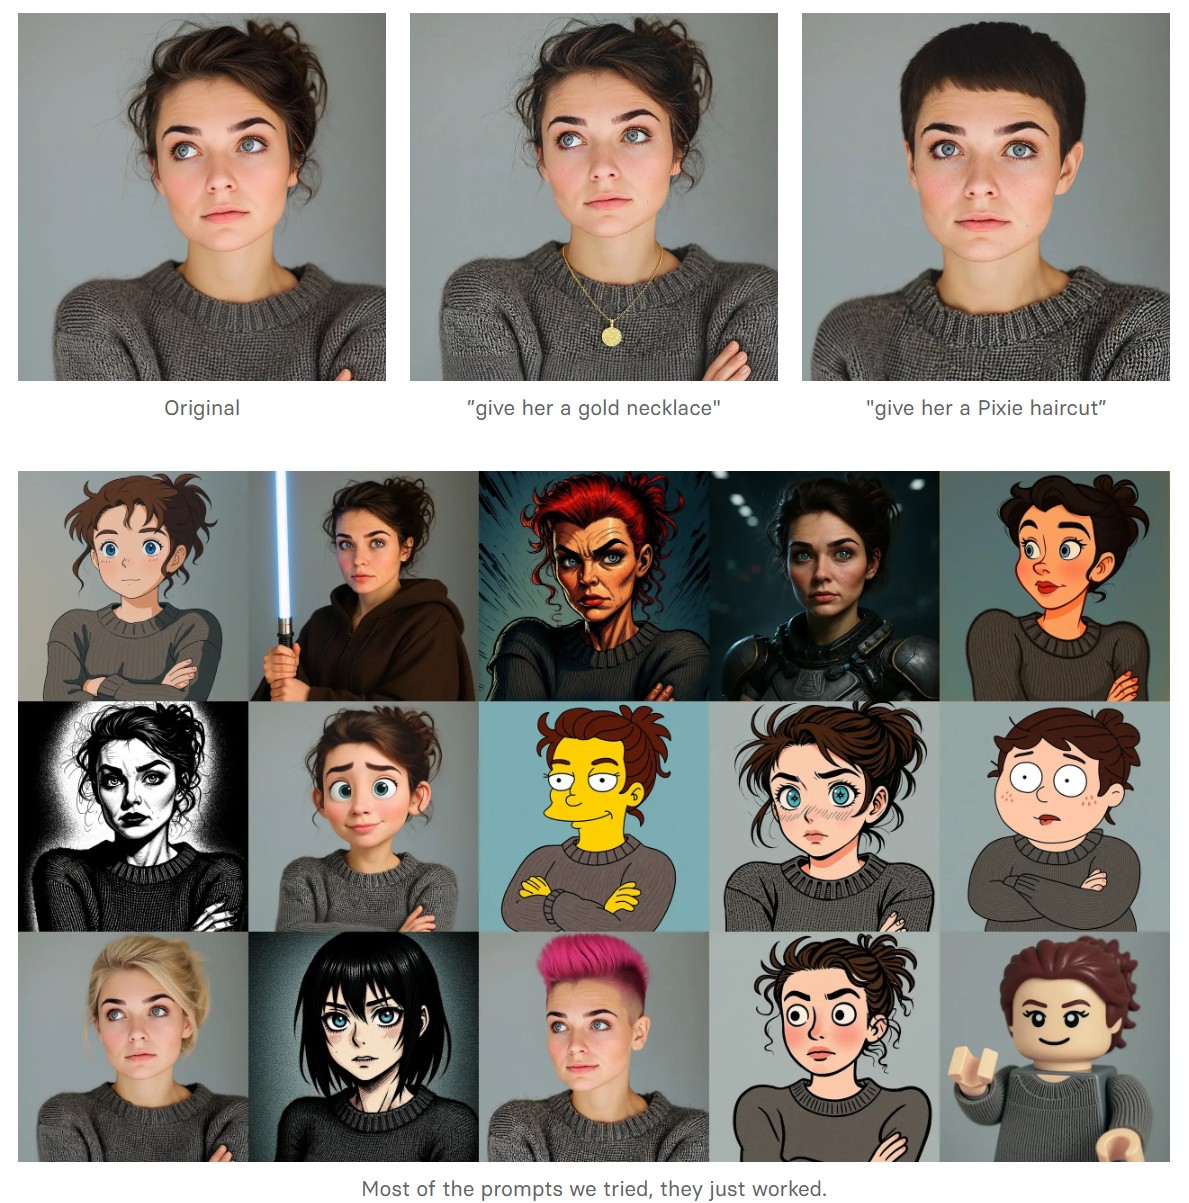
FLUX.1 Kontext [pro]: State-of-the-art performance for image editing. High-quality outputs, great prompt following, and consistent results.
FLUX.1 Kontext [max]: A premium model that brings maximum performance, improved prompt adherence, and high-quality typography generation without compromise on speed.
Coming soon: FLUX.1 Kontext [dev]: An open-weight, guidance-distilled version of Kontext.
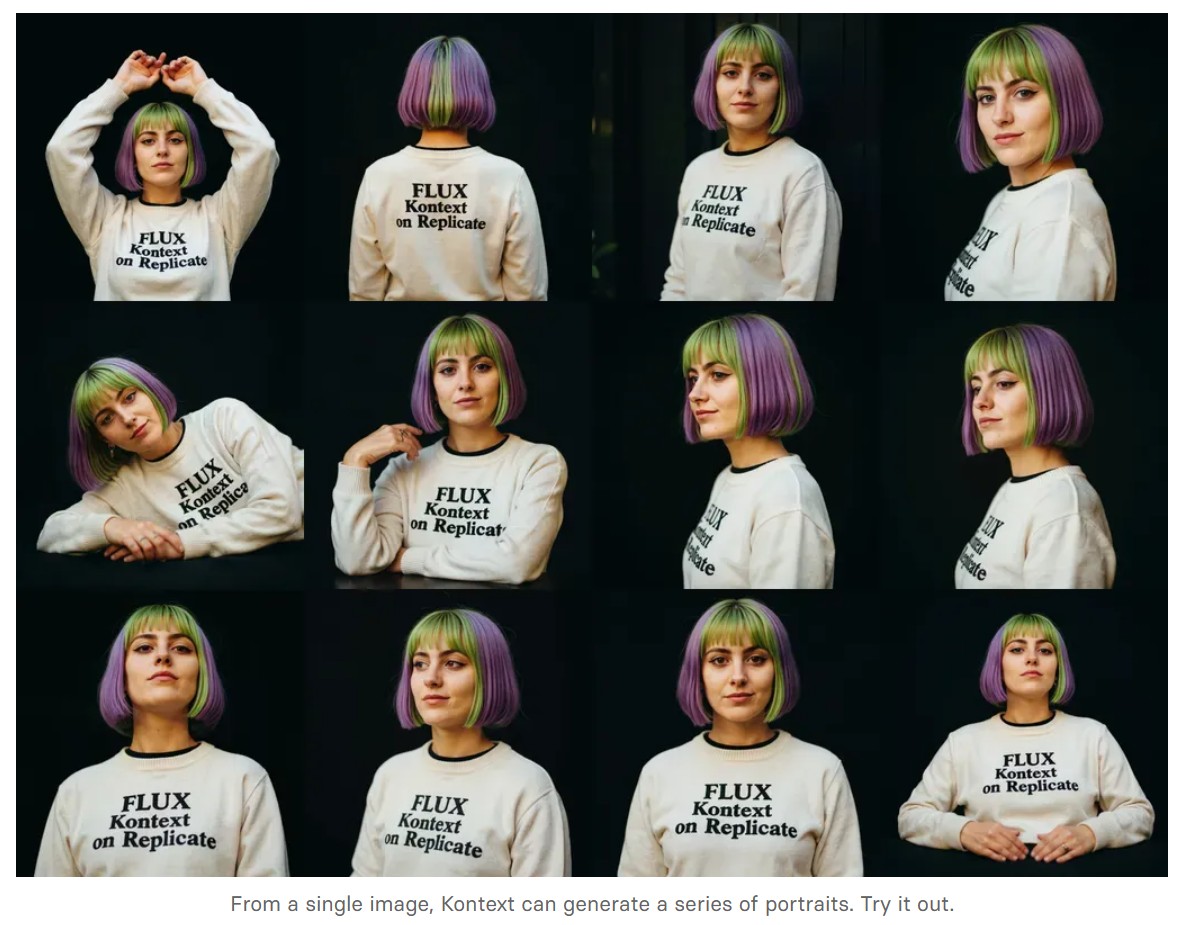
We’re so excited with what Kontext can do, we’ve created a collection of models on Replicate to give you ideas:
DB Browser for SQLite (DB4S) is a high quality, visual, open source tool designed for people who want to create, search, and edit SQLite or SQLCipher database files. DB4S gives a familiar spreadsheet-like interface on the database in addition to providing a full SQL query facility. It works with Windows, macOS, and most versions of Linux and Unix. Documentation for the program is on the wiki.
If you’re serious about AI Agents, this is the guide you’ve been waiting for. It’s packed with everything you need to build powerful AI agents. It follows a very hands-on approach that cuts down your time and avoids the common mistakes most developers make.
Andreas Horn on AI Agents vs Agentic AI
1. 𝗔𝗜 𝗔𝗴𝗲𝗻𝘁𝘀: 𝗧𝗼𝗼𝗹𝘀 𝘄𝗶𝘁𝗵 𝗔𝘂𝘁𝗼𝗻𝗼𝗺𝘆, 𝗪𝗶𝘁𝗵𝗶𝗻 𝗟𝗶𝗺𝗶𝘁𝘀 ➜ AI agents are modular, goal-directed systems that operate within clearly defined boundaries. They’re built to: * Use tools (APIs, browsers, databases) * Execute specific, task-oriented workflows * React to prompts or real-time inputs * Plan short sequences and return actionable outputs
But even the most advanced are limited by scope. They don’t initiate. They don’t collaborate. They execute what we ask!
2. 𝗔𝗴𝗲𝗻𝘁𝗶𝗰 𝗔𝗜: 𝗔 𝗦𝘆𝘀𝘁𝗲𝗺 𝗼𝗳 𝗦𝘆𝘀𝘁𝗲𝗺𝘀 ➜ Agentic AI is an architectural leap. It’s not just one smarter agent — it’s multiple specialized agents working together toward shared goals. These systems exhibit: * Multi-agent collaboration * Goal decomposition and role assignment * Inter-agent communication via memory or messaging * Persistent context across time and tasks * Recursive planning and error recovery * Distributed orchestration and adaptive feedback
Agentic AI systems don’t just follow instructions. They coordinate. They adapt. They manage complexity.
The new Vancouver virtual stage will measure 50 feet in diameter, 23 feet tall, and will have a 14 foot deep semi-circle to surround actors and physical sets with a digital environment. There’s also two movable wild walls 20 feet wide and 16.5 feet tall and mounted on a ground-hover system to allow quick repositioning, especially for capturing car driving scenes.
The Windows “Robust File Copy” utility for efficiently copying files and directories, with built-in retry, logging, and mirroring capabilities.
By default, Robocopy skips copying existing files if the specific metadata of the files match.
/mir : Mirror the source directory tree to the destination (equivalent to /e + /purge): /e : copies all subdirectories, including empty ones /purge : deletes files/folders at the destination that no longer exist at the source /sj : Copy NTFS junction points (“soft-links”) themselves rather than what they point to. This preserves the junction at the destination. /sl : Copy symbolic links as links (don’t follow them and copy the target file/directory). /mt:24 :Run the copy operation using 24 concurrent threads (range 1–128; default is 8), for higher throughput on multi-core systems. This switch cannot be combined with /ipg or /efsraw. /J : unbuffered I/O (good for large files) /R:<N> : to limit retries (default is 1 000 000) /W:<S> : to set the wait time in seconds (default is 30) /NJS : No Job Summary. /NC : No Class – don’t log file classes. /NFL : (No File List) Suppresses the per-file lines (e.g. “New File …”, “Copied …”). Benefit: Cuts down console I/O, often shaving 10–20 % off total runtime on large trees. /NDL : (No Directory List) Suppresses the per-directory header lines. Benefit: Further reduces console chatter. /NP : (No Progress) Suppresses the percentage-complete on each file. Drawback: You lose the “XX %” indicator /NJH : (No Job Header) and /NJS (No Job Summary) Only affect the very first and very last block; negligible on runtime and you probably want at least the summary. /NS (No Size) and /NC (No Class) Remove size and class columns from each line. If you’re suppressing file/directory lists anyway, these don’t help much. /XD : ignore given types /ETA : Show Estimated Time of Arrival of copied files.
Note: Robocopy’s support for NTFS reparse-points (symbolic links and junctions) is a bit quirky:
/SL only affects symbolic links (it tells RoboCopy to replicate the link itself rather than follow it).
/SJ only affects junction points (ditto for directory-junction reparse points).
If you use both /SL and /SJ, RoboCopy can still attempt to enumerate a link as a real folder—leading to that “ERROR 267: The directory name is invalid.”
Because of this, this errors can be ignored: 2025/05/15 12:09:11 ERROR 267 (0x0000010B) Copying Directory C:\redux-remember\The directory name is invalid.
Bat file example:
@echo off
setlocal

:: Define the source and destination directories
set "src=%cd%"
set "dst=C:\TEMP"

echo Copying %src% to %dst%
:: Use robocopy to copy the contents
robocopy "%src%" "%dst%" /MIR /SJ /SL /MT:24 /J /R:0 /W:2 /NFL /NDL /ETA /NP /NC /XD "__pycache__" ".pnpm"

pause
endlocal
W_hotbox is basically a fully customisable ‘favourites menu’ that pops up for as long as you press the shortcut and disappears as soon as you release. The buttons that make up the menu represent python scripts and change depending on you selection. The ‘Hotbox Manager’ offers you an user friendly interface which allows you to add new buttons on the fly. Those buttons are directly accessible via buttons that appear in the menu under your cursor.
Ever wondered how large language models like ChatGPT are actually built? Behind these impressive AI tools lies a complex but fascinating process of data preparation, model training, and fine-tuning. While it might seem like something only experts with massive resources can do, it’s actually possible to learn how to build your own language model from scratch. And with the right guidance, you can go from loading raw text data to chatting with your very own AI assistant.
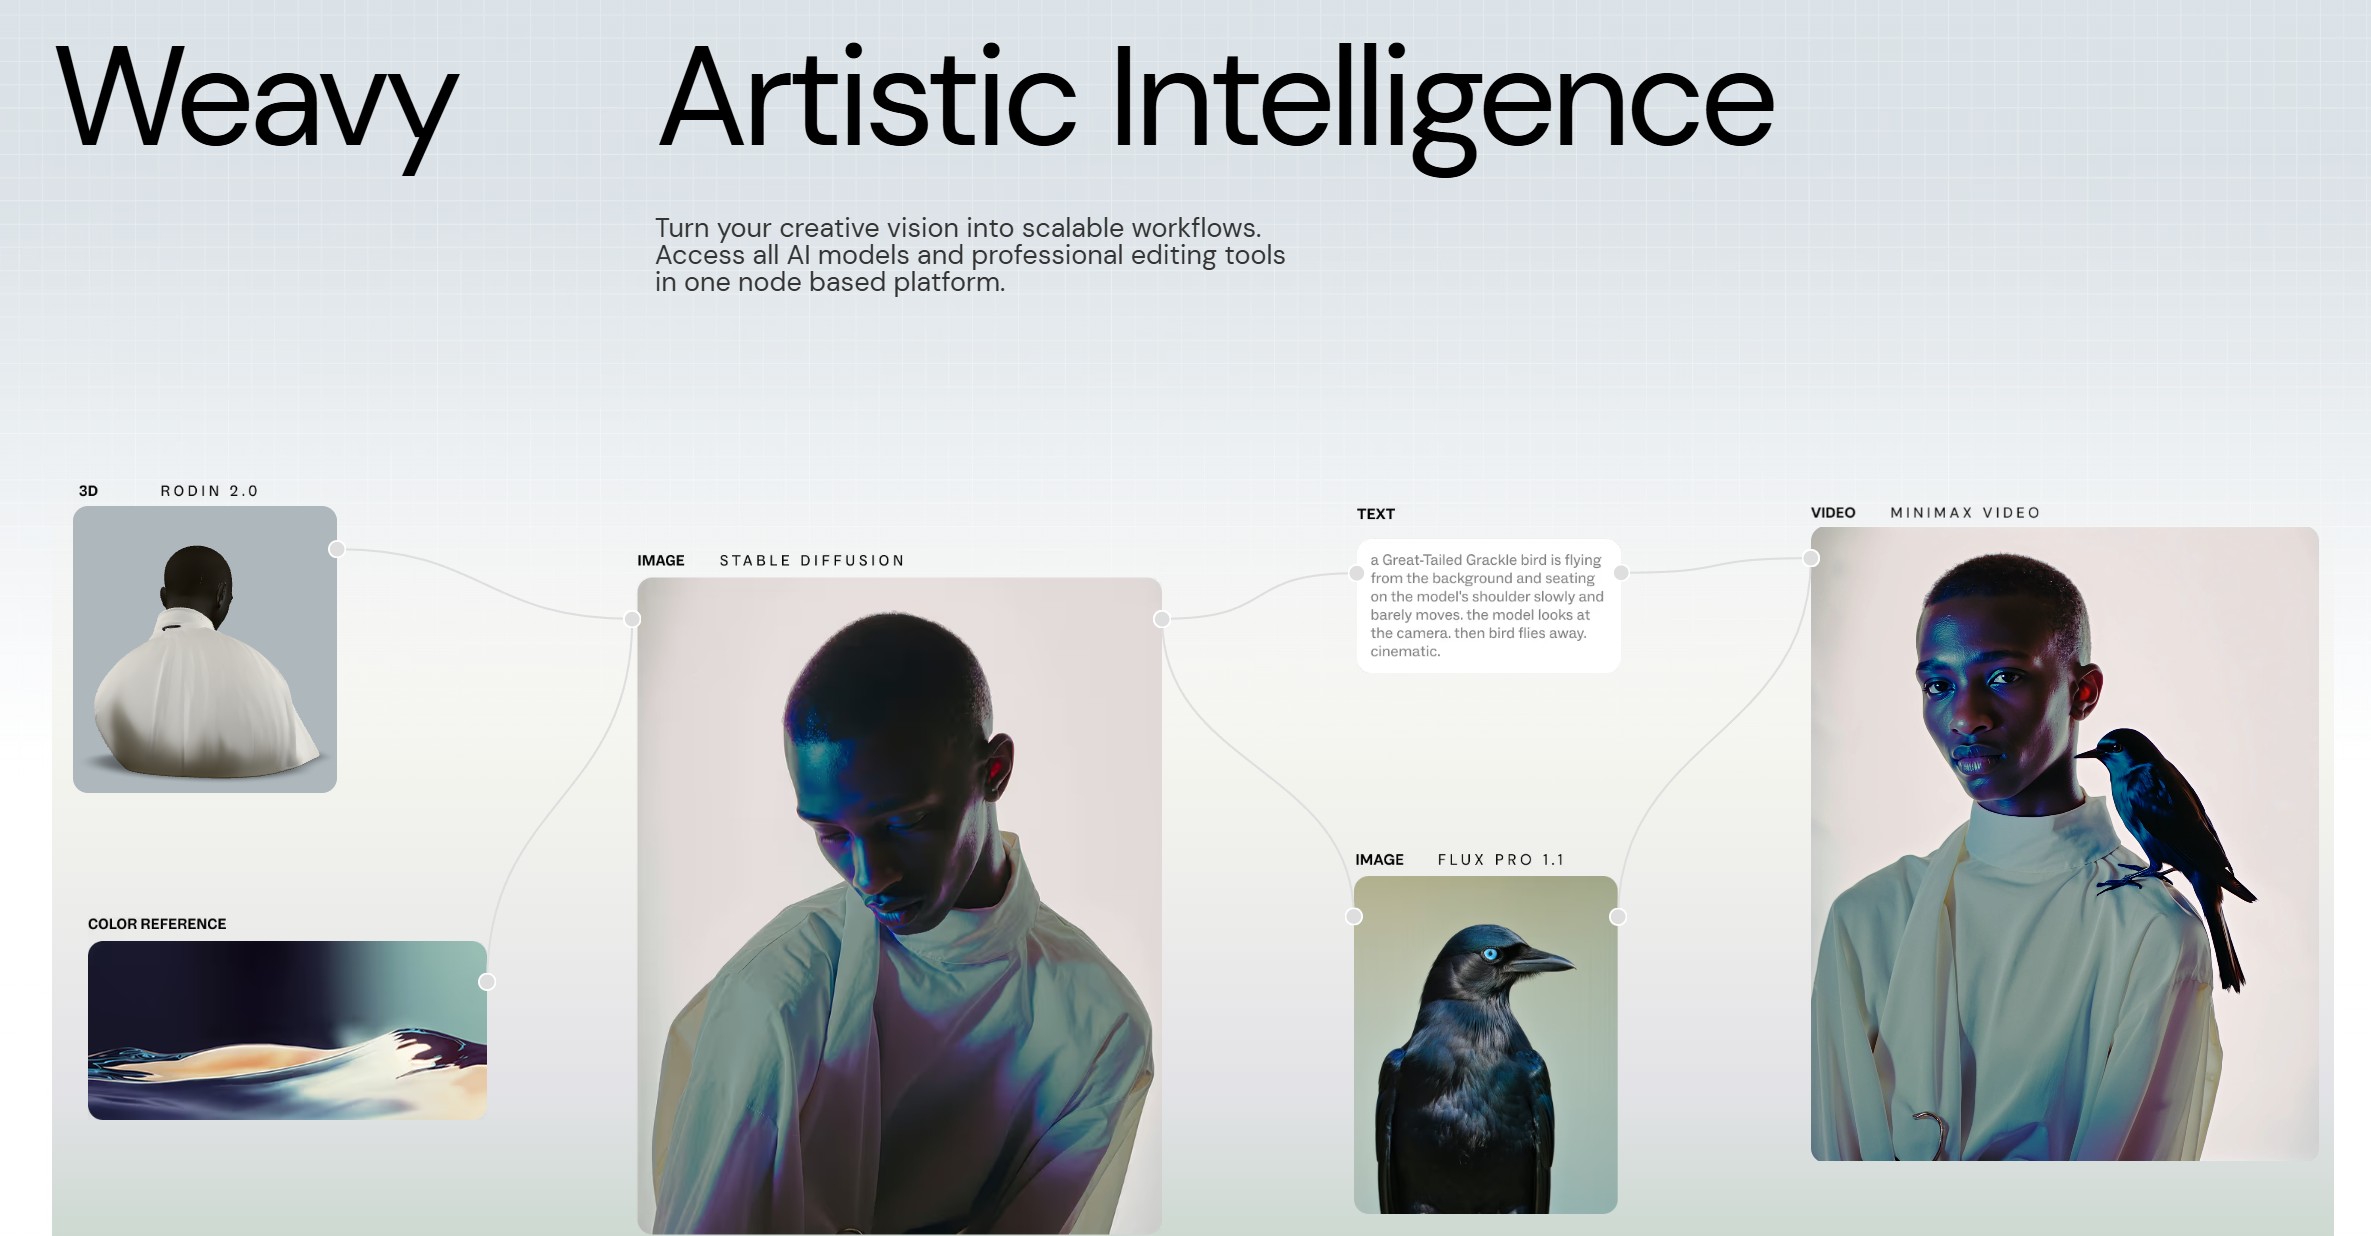
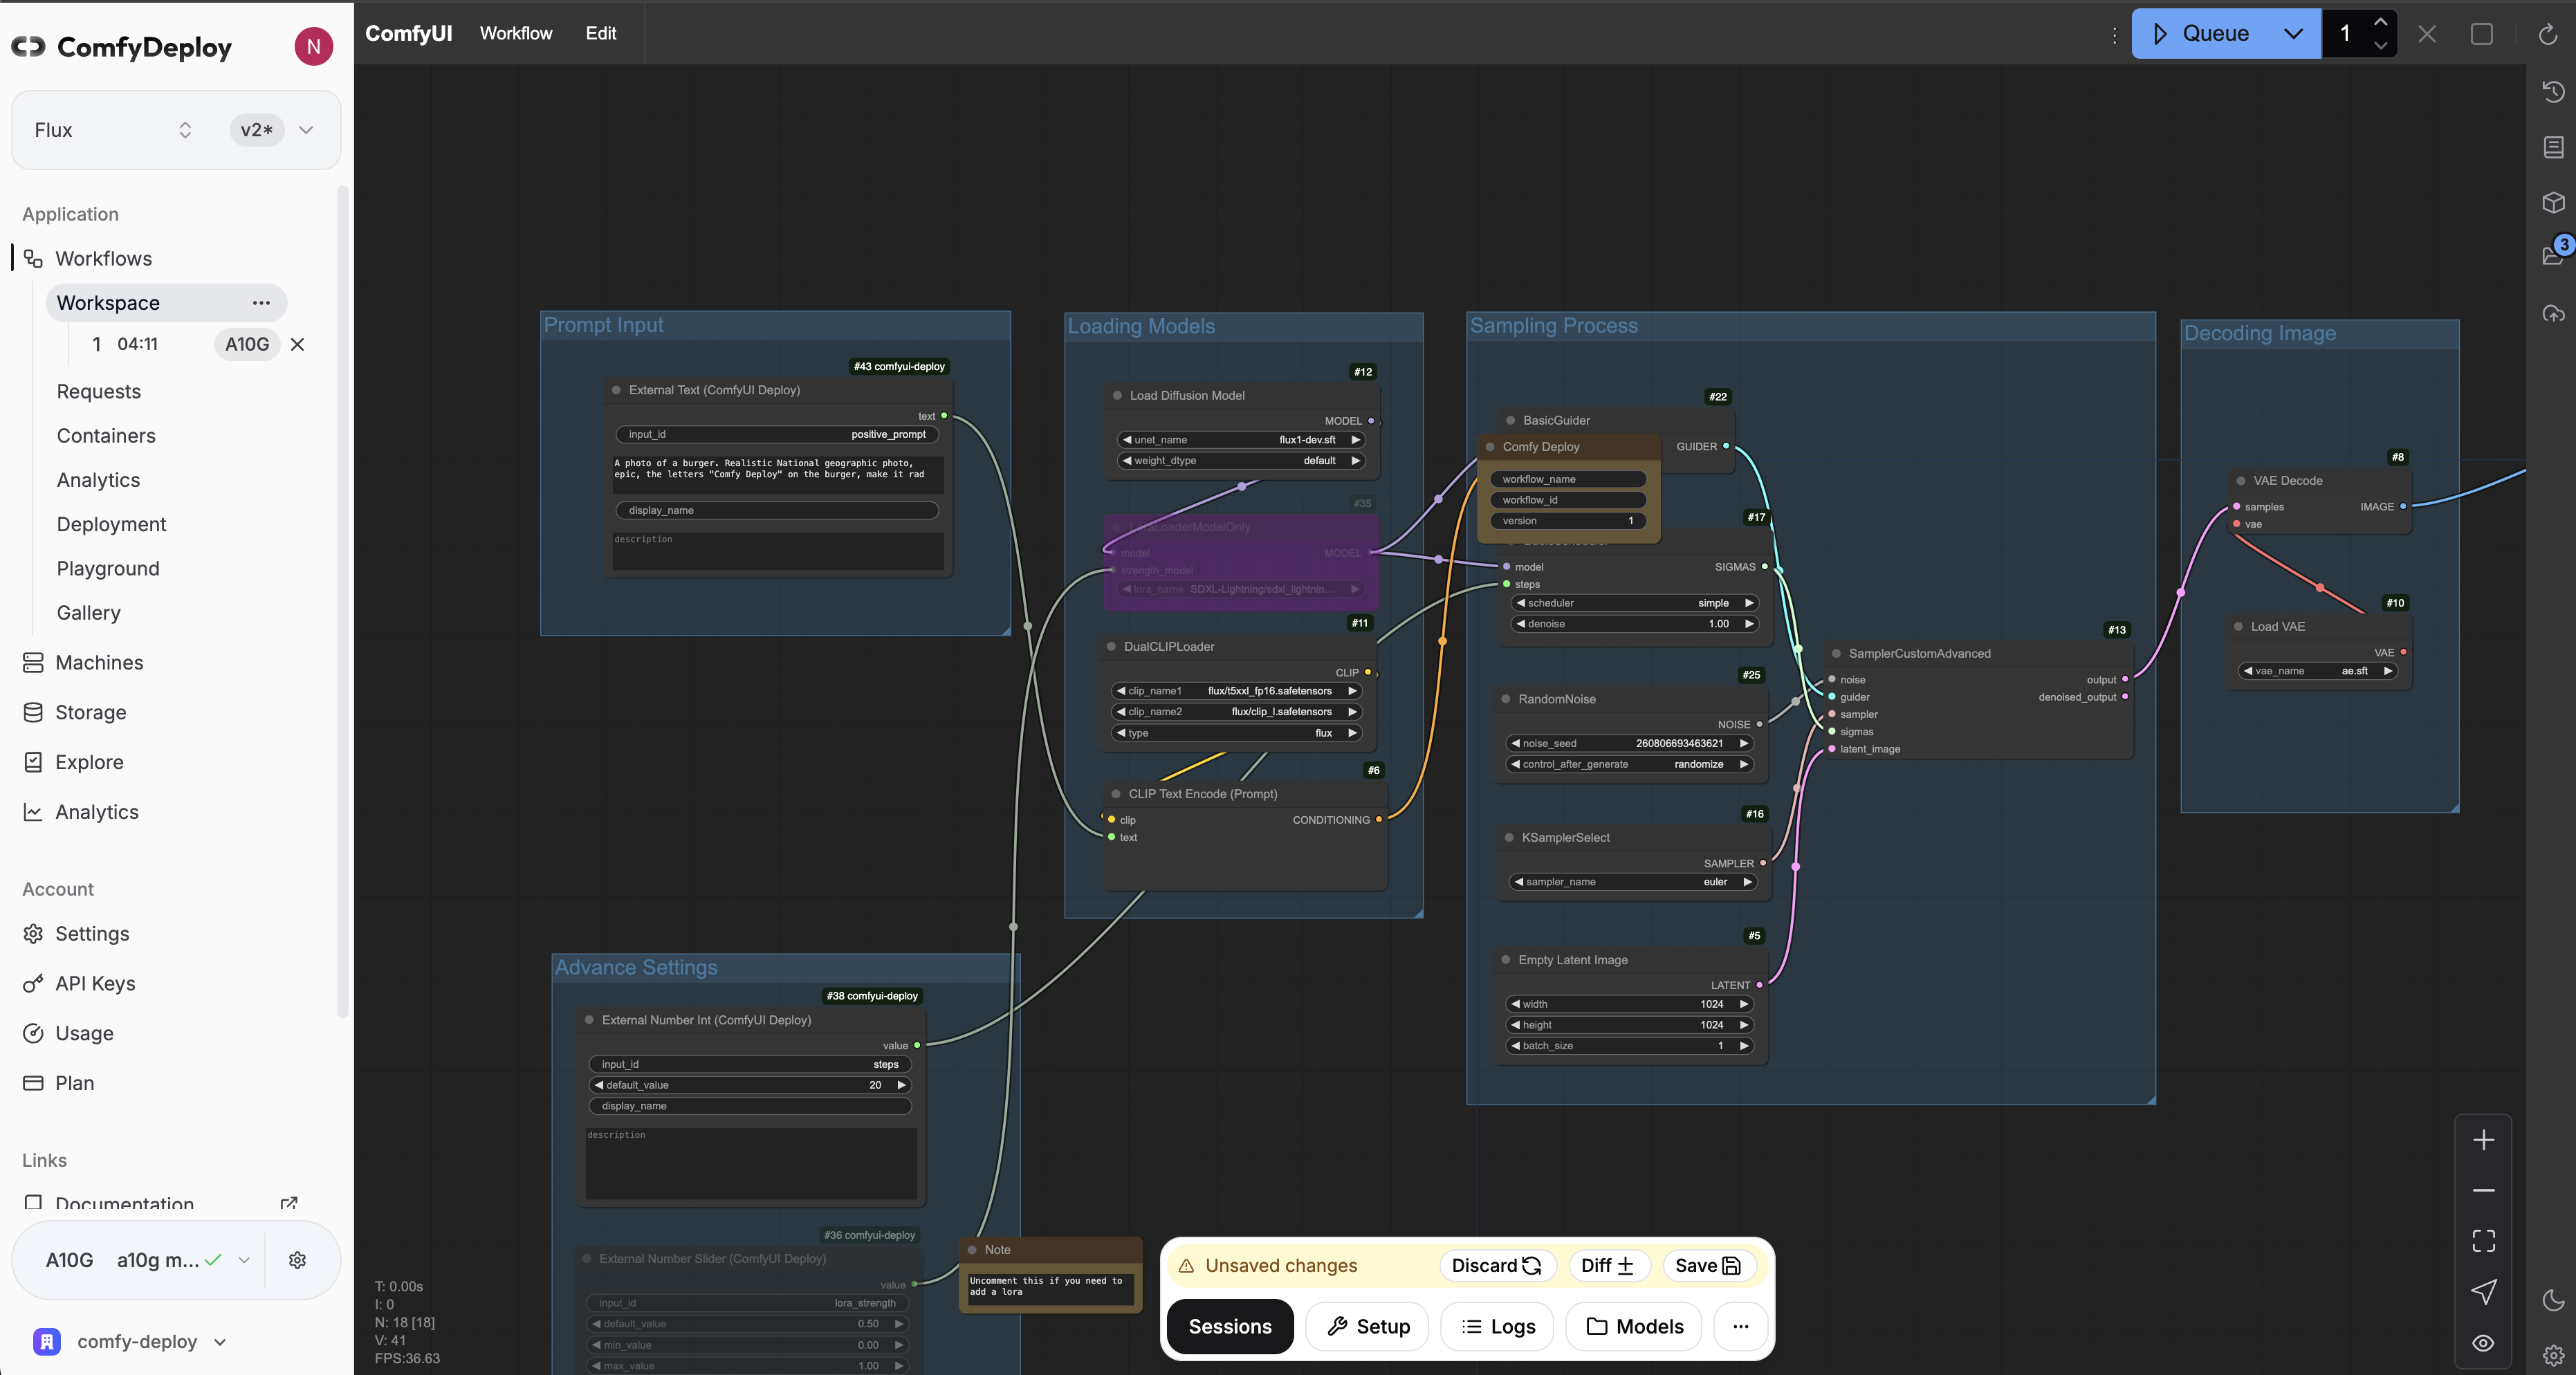
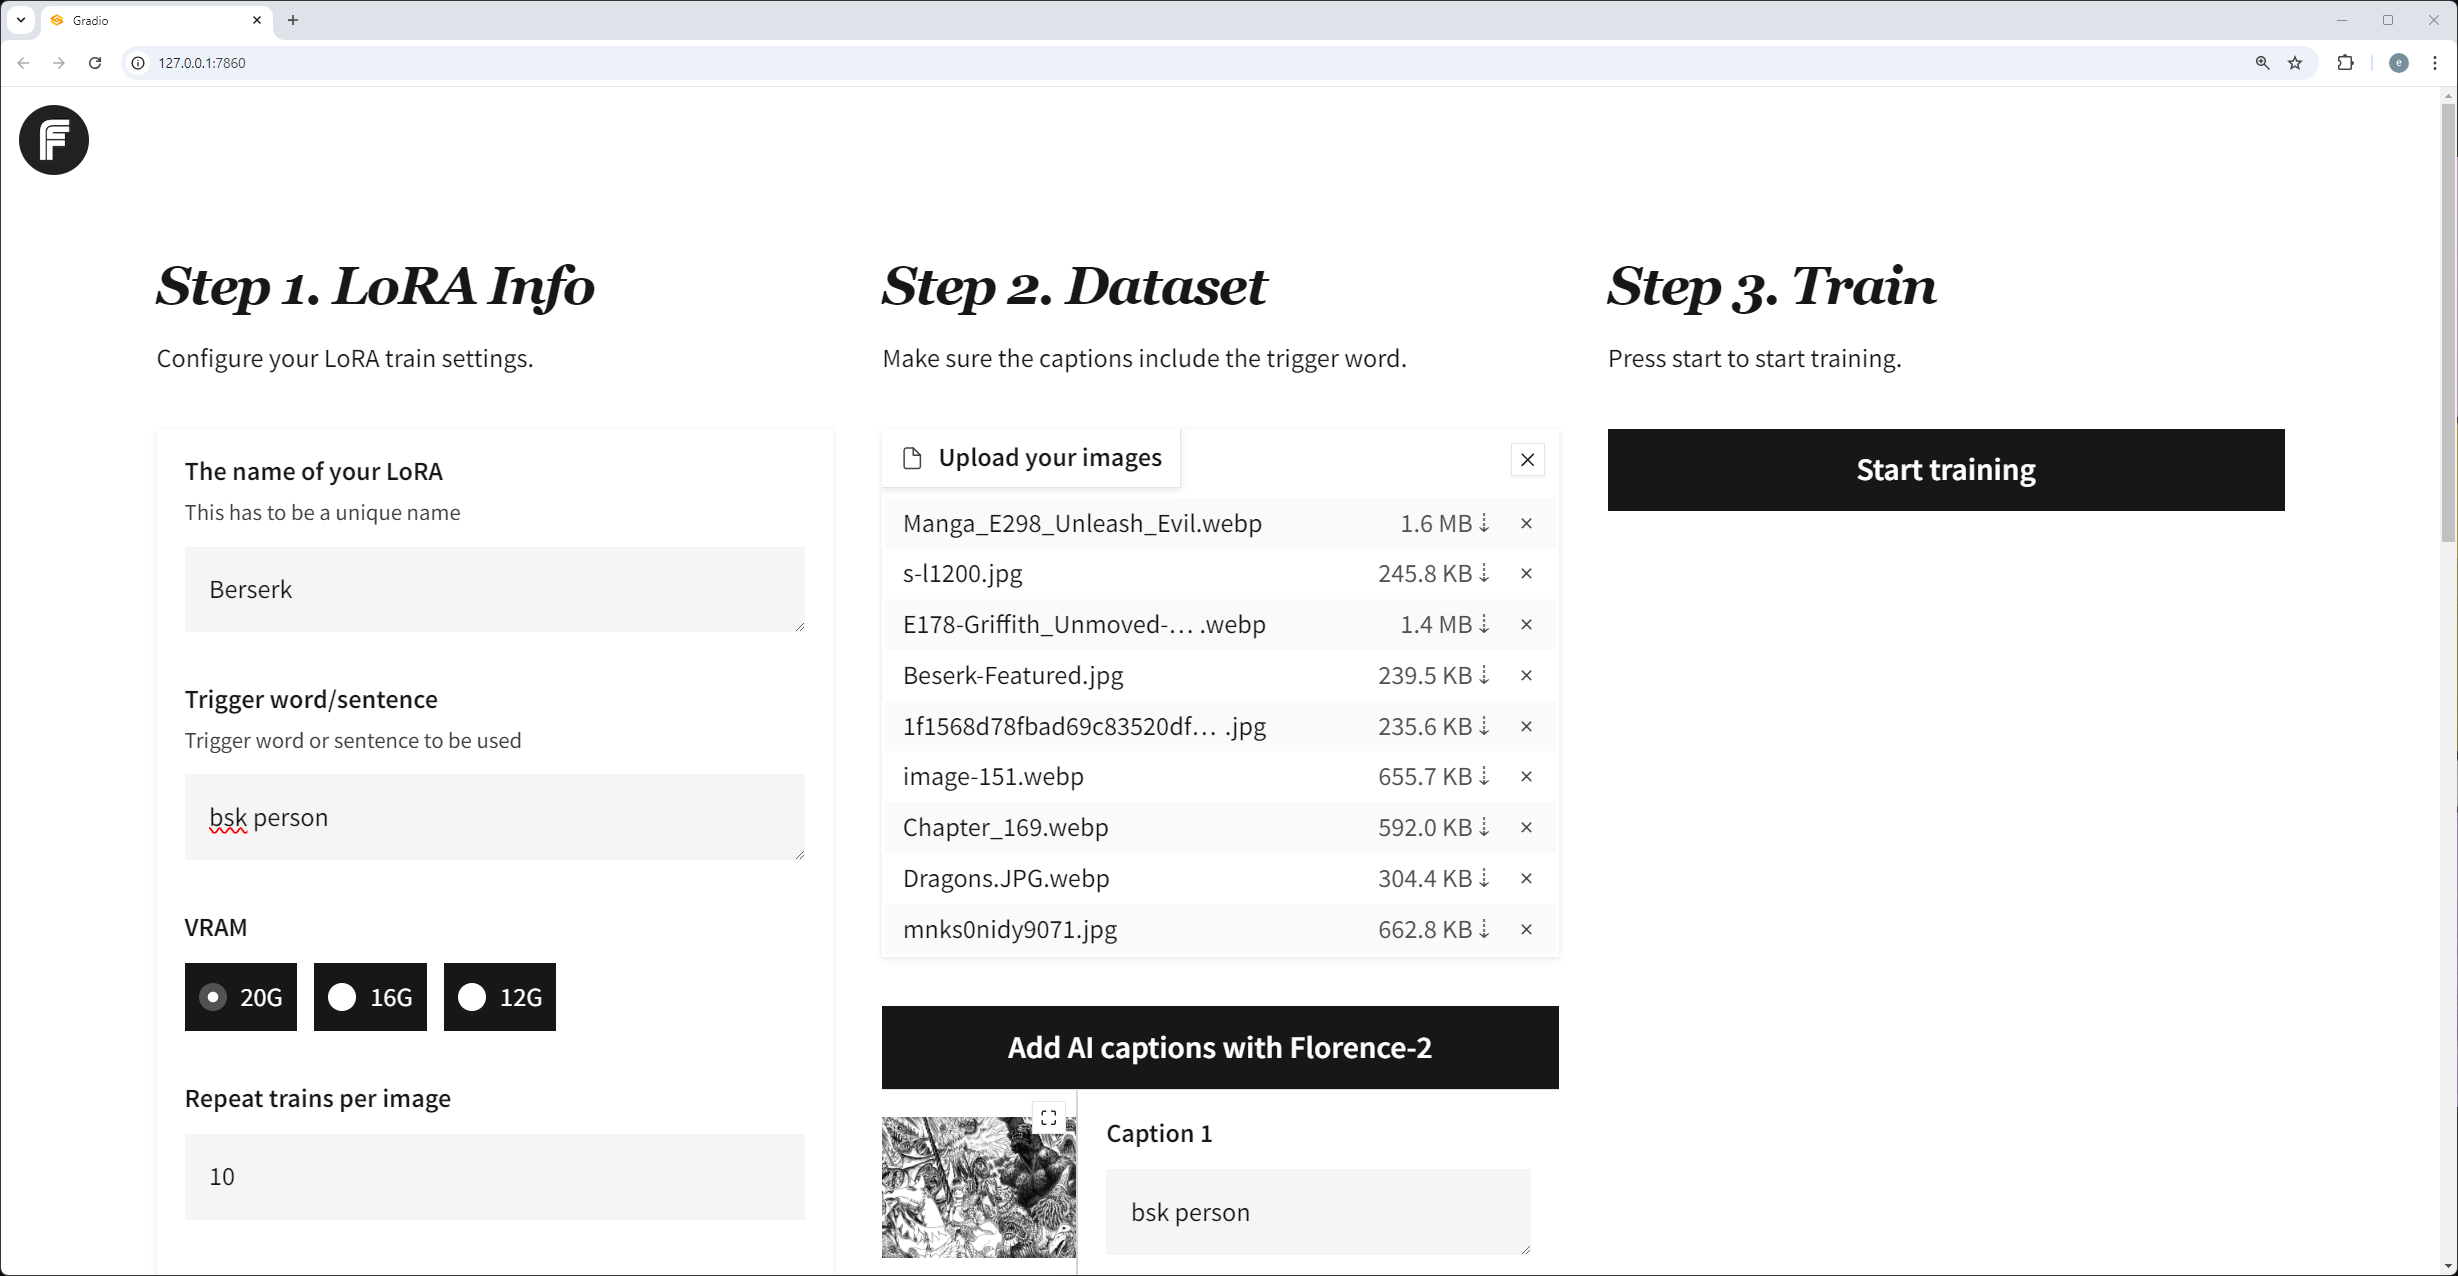
1 – Import your workflow 2 – Build a machine configuration to run your workflows on 3 – Download models into your private storage, to be used in your workflows and team. 4 – Run ComfyUI in the cloud to modify and test your workflows on cloud GPUs 5 – Expose workflow inputs with our custom nodes, for API and playground use 6 – Deploy APIs 7 – Let your team use your workflows in playground without using ComfyUI
While in ZBrush, call up your image editing package and use it to modify the active ZBrush document or tool, then go straight back into ZBrush.
ZAppLink can work on different saved points of view for your model. What you paint in your image editor is then projected to the model’s PolyPaint or texture for more creative freedom.
With ZAppLink you can combine ZBrush’s powerful capabilities with all the painting power of the PSD-capable 2D editor of your choice, making it easy to create stunning textures.
ZAppLink features
Send your document view to the PSD file editor of your choice for texture creation and modification: Photoshop, Gimp and more!
Projections in orthogonal or perspective mode.
Multiple view support: With a single click, send your front, back, left, right, top, bottom and two custom views in dedicated layers to your 2D editor. When your painting is done, automatically reproject all the views back in ZBrush!
Create character sheets based on your saved views with a single click.
ZAppLink works with PolyPaint, Textures based on UV’s and canvas pixols.
With mamba, it’s easy to set up software environments. A software environment is simply a set of different libraries, applications and their dependencies. The power of environments is that they can co-exist: you can easily have an environment called py27 for Python 2.7 and one called py310 for Python 3.10, so that multiple of your projects with different requirements have their dedicated environments. This is similar to “containers” and images. However, mamba makes it easy to add, update or remove software from the environments.
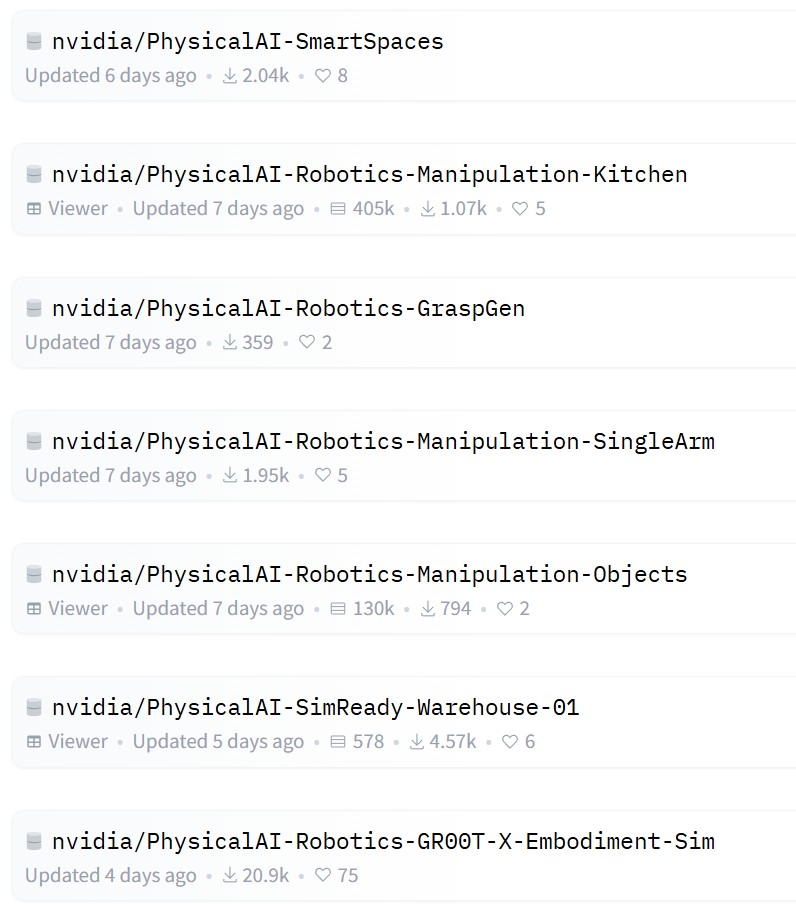
🔹 15TB of high-quality, standardized synthetic data 🔹 320,000+ trajectories for robotics training 🔹 1,000+ OpenUSD assets, including a SimReady collection
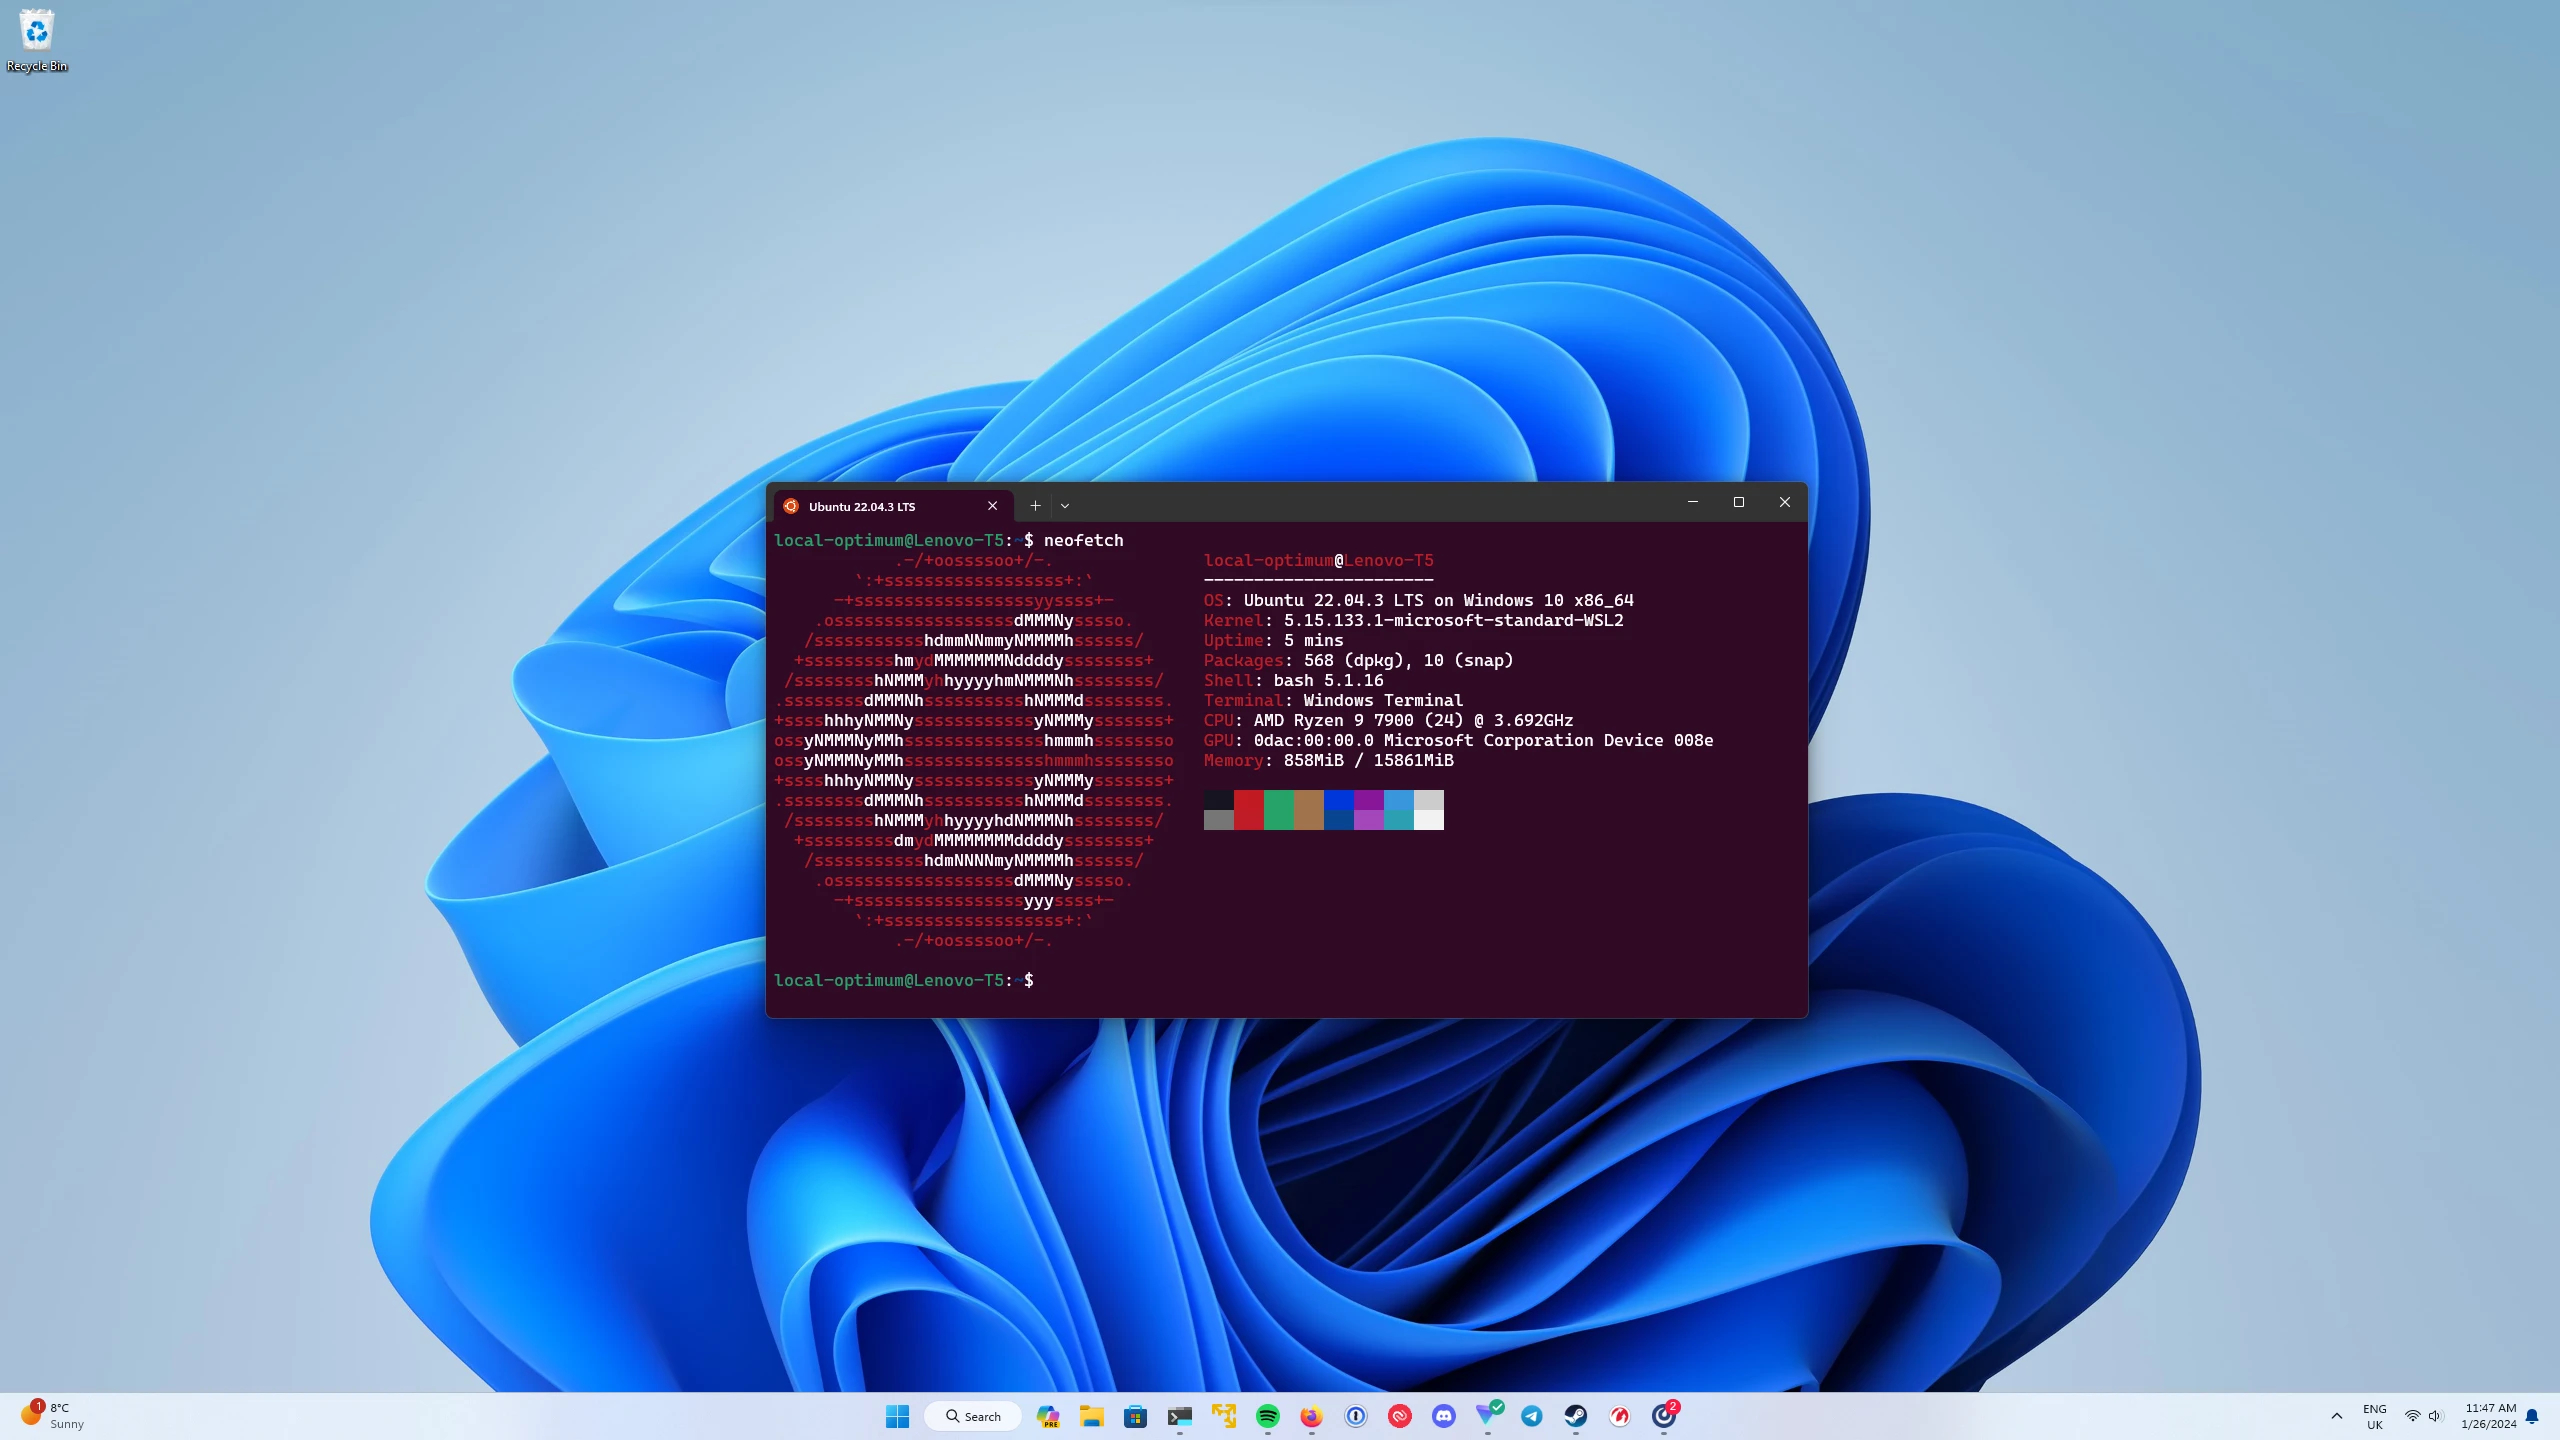
The Windows Subsystem for Linux (WSL) is a feature of the Windows operating system that enables you to run a Linux file system, along with Linux command-line tools and GUI apps, directly on Windows, alongside your traditional Windows desktop and apps.
A demo video, first reported by The Verge, showed an AI version of the character Aloy from the Playstation game Horizon Forbidden West conversing through voice prompts during gameplay on the PS5 console.
The character’s facial expressions are also powered by Sony’s advanced AI software Mockingbird, while the speech artificially replicates the voice of the actor Ashly Burch.
DISCLAIMER – Links and images on this website may be protected by the respective owners’ copyright. All data submitted by users through this site shall be treated as freely available to share.