


BREAKING NEWS
LATEST POSTS
-
Embedding frame ranges into Quicktime movies with FFmpeg
QuickTime (.mov) files are fundamentally time-based, not frame-based, and so don’t have a built-in, uniform “first frame/last frame” field you can set as numeric frame IDs. Instead, tools like Shotgun Create rely on the timecode track and the movie’s duration to infer frame numbers. If you want Shotgun to pick up a non-default frame range (e.g. start at 1001, end at 1064), you must bake in an SMPTE timecode that corresponds to your desired start frame, and ensure the movie’s duration matches your clip length.
How Shotgun Reads Frame Ranges
- Default start frame is 1. If no timecode metadata is present, Shotgun assumes the movie begins at frame 1.
- Timecode ⇒ frame number. Shotgun Create “honors the timecodes of media sources,” mapping the embedded TC to frame IDs. For example, a 24 fps QuickTime tagged with a start timecode of 00:00:41:17 will be interpreted as beginning on frame 1001 (1001 ÷ 24 fps ≈ 41.71 s).
Embedding a Start Timecode
QuickTime uses a
tmcd(timecode) track. You can bake in an SMPTE track via FFmpeg’s-timecodeflag or via Compressor/encoder settings:- Compute your start TC.
- Desired start frame = 1001
- Frame 1001 at 24 fps ⇒ 1001 ÷ 24 ≈ 41.708 s ⇒ TC 00:00:41:17
- FFmpeg example:
ffmpeg -i input.mov \
  -c copy \
  -timecode 00:00:41:17 \
  output.mov
This adds a timecode track beginning at 00:00:41:17, which Shotgun maps to frame 1001.
Ensuring the Correct End Frame
Shotgun infers the last frame from the movie’s duration. To end on frame 1064:
- Frame count = 1064 – 1001 + 1 = 64 frames
- Duration = 64 ÷ 24 fps ≈ 2.667 s
FFmpeg trim example:
ffmpeg -i input.mov \
  -c copy \
  -timecode 00:00:41:17 \
  -t 00:00:02.667 \
  output_trimmed.mov
This results in a 64-frame clip (1001→1064) at 24 fps.

-
Aider.chat – A free, open-source AI pair-programming CLI tool
Aider enables developers to interactively generate, modify, and test code by leveraging both cloud-hosted and local LLMs directly from the terminal or within an IDE. Key capabilities include comprehensive codebase mapping, support for over 100 programming languages, automated git commit messages, voice-to-code interactions, and built-in linting and testing workflows. Installation is straightforward via pip or uv, and while the tool itself has no licensing cost, actual usage costs stem from the underlying LLM APIs, which are billed separately by providers like OpenAI or Anthropic.
Key Features
- Cloud & Local LLM Support
Connect to most major LLM providers out of the box, or run models locally for privacy and cost control aider.chat. - Codebase Mapping
Automatically indexes all project files so that even large repositories can be edited contextually aider.chat. - 100+ Language Support
Works with Python, JavaScript, Rust, Ruby, Go, C++, PHP, HTML, CSS, and dozens more aider.chat. - Git Integration
Generates sensible commit messages and automates diffs/undo operations through familiar git tooling aider.chat. - Voice-to-Code
Speak commands to Aider to request features, tests, or fixes without typing aider.chat. - Images & Web Pages
Attach screenshots, diagrams, or documentation URLs to provide visual context for edits aider.chat. - Linting & Testing
Runs lint and test suites automatically after each change, and can fix issues it detects
- Cloud & Local LLM Support
-
SourceTree vs Github Desktop – Which one to use
Sourcetree and GitHub Desktop are both free, GUI-based Git clients aimed at simplifying version control for developers. While they share the same core purpose—making Git more accessible—they differ in features, UI design, integration options, and target audiences.
Installation & Setup
- Sourcetree
- Download: https://www.sourcetreeapp.com/
- Supported OS: Windows 10+, macOS 10.13+
- Prerequisites: Comes bundled with its own Git, or can be pointed to a system Git install.
- Initial Setup: Wizard guides SSH key generation, authentication with Bitbucket/GitHub/GitLab.
- GitHub Desktop
- Download: https://desktop.github.com/
- Supported OS: Windows 10+, macOS 10.15+
- Prerequisites: Bundled Git; seamless login with GitHub.com or GitHub Enterprise.
- Initial Setup: One-click sign-in with GitHub; auto-syncs repositories from your GitHub account.
Feature Comparison
(more…)Feature Sourcetree GitHub Desktop Branch Visualization Detailed graph view with drag-and-drop for rebasing/merging Linear graph, simpler but less configurable Staging & Commit File-by-file staging, inline diff view All-or-nothing staging, side-by-side diff Interactive Rebase Full support via UI Basic support via command line only Conflict Resolution Built-in merge tool integration (DiffMerge, Beyond Compare) Contextual conflict editor with choice panels Submodule Management Native submodule support Limited; requires CLI Custom Actions / Hooks Define custom actions (e.g., launch scripts) No UI for custom Git hooks Git Flow / Hg Flow Built-in support None Performance Can lag on very large repos Generally snappier on medium-sized repos Memory Footprint Higher RAM usage Lightweight Platform Integration Atlassian Bitbucket, Jira Deep GitHub.com / Enterprise integration Learning Curve Steeper for beginners Beginner-friendly - Sourcetree
-
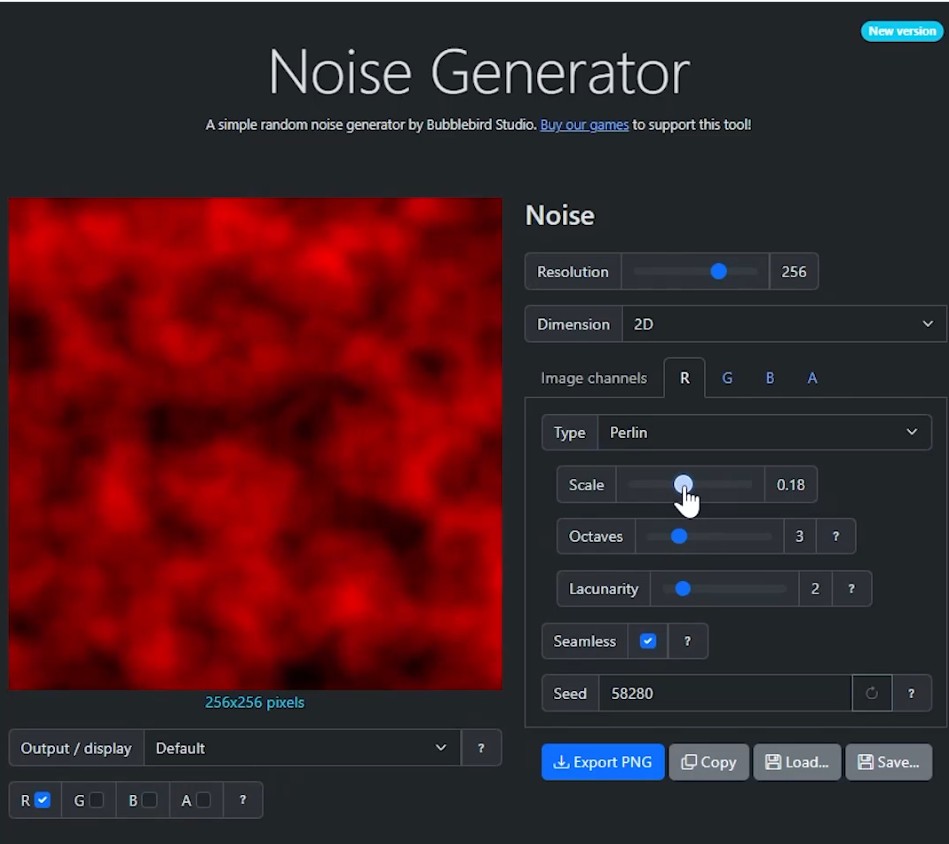
Bubblebird-Studio – Free NoiseGenerator
https://github.com/Bubblebird-Studio/NoiseGenerator
It currently support the following noise models:
Support for Blue Noise is planned.
You can freely use it here: https://noisegen.bubblebirdstudio.com/
-
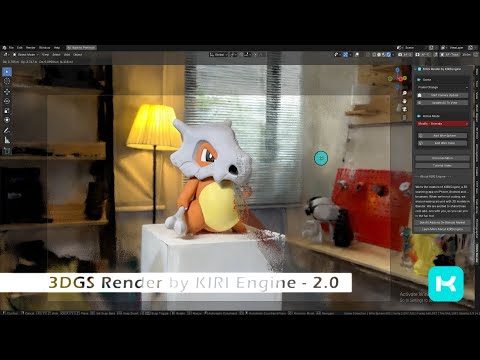
Free 3DGS Render Addon for Blender 2.0
https://superhivemarket.com/products/3dgs-render-by-kiri-engine
https://github.com/Kiri-Innovation/3dgs-render-blender-addon
https://www.kiriengine.app/blender-addon/3dgs-render
The addon is a full 3DGS editing and rendering suite for Blender.3DGS scans can be created from .OBJ files, or 3DGS .PLY files can be imported as mesh objects, offering two distinct workflows. The created objects can be manipulated, animated and rendered inside Blender. Or Blender can be used as an intermediate editing and painting software – with the results being exportable to other 3DGS software and viewers.


FEATURED POSTS


-
Christopher Butler – Understanding the Eye-Mind Connection – Vision is a mental process
https://www.chrbutler.com/understanding-the-eye-mind-connection
The intricate relationship between the eyes and the brain, often termed the eye-mind connection, reveals that vision is predominantly a cognitive process. This understanding has profound implications for fields such as design, where capturing and maintaining attention is paramount. This essay delves into the nuances of visual perception, the brain’s role in interpreting visual data, and how this knowledge can be applied to effective design strategies.
This cognitive aspect of vision is evident in phenomena such as optical illusions, where the brain interprets visual information in a way that contradicts physical reality. These illusions underscore that what we “see” is not merely a direct recording of the external world but a constructed experience shaped by cognitive processes.
Understanding the cognitive nature of vision is crucial for effective design. Designers must consider how the brain processes visual information to create compelling and engaging visuals. This involves several key principles:
- Attention and Engagement
- Visual Hierarchy
- Cognitive Load Management
- Context and Meaning
-
Methods for creating motion blur in Stop motion
en.wikipedia.org/wiki/Go_motion
Petroleum jelly
This crude but reasonably effective technique involves smearing petroleum jelly (“Vaseline”) on a plate of glass in front of the camera lens, also known as vaselensing, then cleaning and reapplying it after each shot — a time-consuming process, but one which creates a blur around the model. This technique was used for the endoskeleton in The Terminator. This process was also employed by Jim Danforth to blur the pterodactyl’s wings in Hammer Films’ When Dinosaurs Ruled the Earth, and by Randal William Cook on the terror dogs sequence in Ghostbusters.[citation needed]Bumping the puppet
Gently bumping or flicking the puppet before taking the frame will produce a slight blur; however, care must be taken when doing this that the puppet does not move too much or that one does not bump or move props or set pieces.Moving the table
Moving the table on which the model is standing while the film is being exposed creates a slight, realistic blur. This technique was developed by Ladislas Starevich: when the characters ran, he moved the set in the opposite direction. This is seen in The Little Parade when the ballerina is chased by the devil. Starevich also used this technique on his films The Eyes of the Dragon, The Magical Clock and The Mascot. Aardman Animations used this for the train chase in The Wrong Trousers and again during the lorry chase in A Close Shave. In both cases the cameras were moved physically during a 1-2 second exposure. The technique was revived for the full-length Wallace & Gromit: The Curse of the Were-Rabbit.Go motion
The most sophisticated technique was originally developed for the film The Empire Strikes Back and used for some shots of the tauntauns and was later used on films like Dragonslayer and is quite different from traditional stop motion. The model is essentially a rod puppet. The rods are attached to motors which are linked to a computer that can record the movements as the model is traditionally animated. When enough movements have been made, the model is reset to its original position, the camera rolls and the model is moved across the table. Because the model is moving during shots, motion blur is created.A variation of go motion was used in E.T. the Extra-Terrestrial to partially animate the children on their bicycles.

-
colorhunt.co
Color Hunt is a free and open platform for color inspiration with thousands of trendy hand-picked color palettes.


