


BREAKING NEWS
LATEST POSTS
-
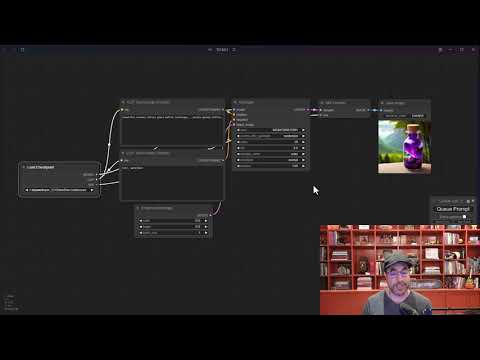
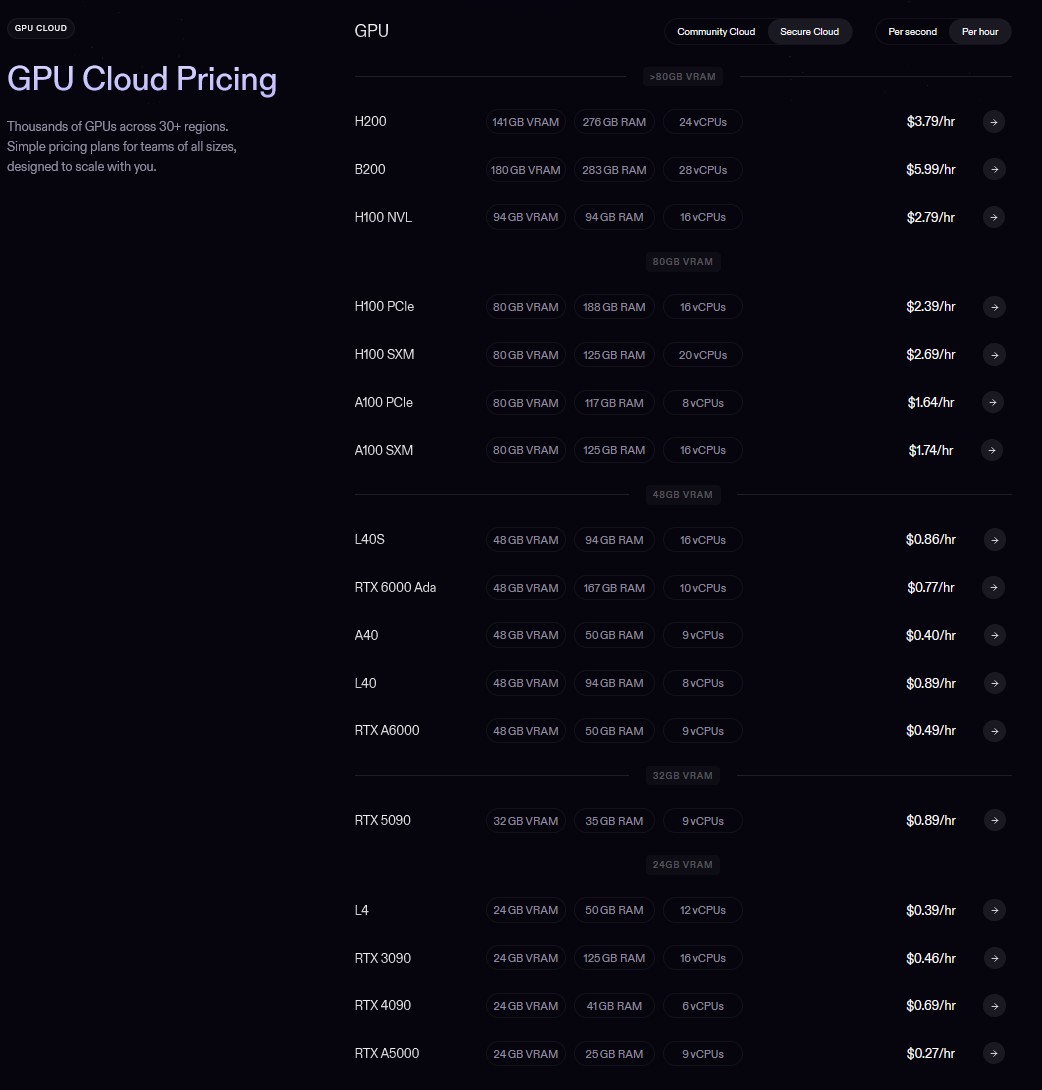
Zibra.AI – Real-Time Volumetric Effects in Virtual Production. Now free for Indies!


A New Era for Volumetrics
For a long time, volumetric visual effects were viable only in high-end offline VFX workflows. Large data footprints and poor real-time rendering performance limited their use: most teams simply avoided volumetrics altogether. It’s similar to the early days of online video: limited computational power and low network bandwidth made video content hard to share or stream. Today, of course, we can’t imagine the internet without it, and we believe volumetrics are on a similar path.
With advanced data compression and real-time, GPU-driven decompression, anyone can now bring CGI-class visual effects into Unreal Engine.
From now on, it’s completely free for individual creators!
What it means for you?
(more…) -
AI and the Law – 𝗬𝗼𝘂𝗿 (𝗽𝗿𝗶𝘃𝗮𝘁𝗲𝗹𝘆) 𝘀𝗵𝗮𝗿𝗲𝗱 𝗖𝗵𝗮𝘁𝗚𝗣𝗧 𝗰𝗵𝗮𝘁𝘀 𝗺𝗶𝗴𝗵𝘁 𝗯𝗲 𝘀𝗵𝗼𝘄𝗶𝗻𝗴 𝘂𝗽 𝗼𝗻 𝗚𝗼𝗼𝗴𝗹𝗲
Many users assume shared conversations are only seen by friends or colleagues — but when you use OpenAI’s share feature, those chats get now indexed by search engines like Google.
Meaning: your “private” AI prompts could end up very public. This is called Google dorking — and it’s shockingly effective.
Over 70,000 chats are now publicly viewable. Some are harmless.
Others? They might expose sensitive strategies, internal docs, product plans, even company secrets.
OpenAI currently does not block indexing. So if you’ve ever shared something thinking it’s “just a link” — it might now be searchable by anyone. You can even build a bot to crawl and analyze these.
Welcome to the new visibility layer of AI. I can’t say I am surprised…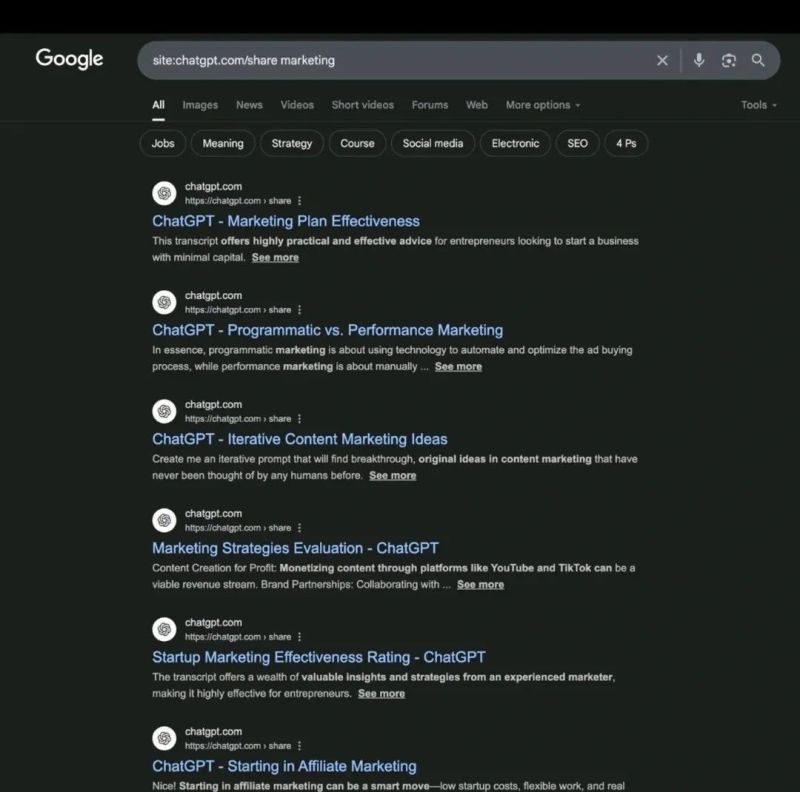


FEATURED POSTS


-
sRGB vs REC709 – An introduction and FFmpeg implementations

1. Basic Comparison
- What they are
- sRGB: A standard “web”/computer-display RGB color space defined by IEC 61966-2-1. It’s used for most monitors, cameras, printers, and the vast majority of images on the Internet.
- Rec. 709: An HD-video color space defined by ITU-R BT.709. It’s the go-to standard for HDTV broadcasts, Blu-ray discs, and professional video pipelines.
- Why they exist
- sRGB: Ensures consistent colors across different consumer devices (PCs, phones, webcams).
- Rec. 709: Ensures consistent colors across video production and playback chains (cameras → editing → broadcast → TV).
- What you’ll see
- On your desktop or phone, images tagged sRGB will look “right” without extra tweaking.
- On an HDTV or video-editing timeline, footage tagged Rec. 709 will display accurate contrast and hue on broadcast-grade monitors.
2. Digging Deeper
Feature sRGB Rec. 709 White point D65 (6504 K), same for both D65 (6504 K) Primaries (x,y) R: (0.640, 0.330) G: (0.300, 0.600) B: (0.150, 0.060) R: (0.640, 0.330) G: (0.300, 0.600) B: (0.150, 0.060) Gamut size Identical triangle on CIE 1931 chart Identical to sRGB Gamma / transfer Piecewise curve: approximate 2.2 with linear toe Pure power-law γ≈2.4 (often approximated as 2.2 in practice) Matrix coefficients N/A (pure RGB usage) Y = 0.2126 R + 0.7152 G + 0.0722 B (Rec. 709 matrix) Typical bit-depth 8-bit/channel (with 16-bit variants) 8-bit/channel (10-bit for professional video) Usage metadata Tagged as “sRGB” in image files (PNG, JPEG, etc.) Tagged as “bt709” in video containers (MP4, MOV) Color range Full-range RGB (0–255) Studio-range Y′CbCr (Y′ [16–235], Cb/Cr [16–240])
Why the Small Differences Matter
(more…) - What they are
-
Embedding frame ranges into Quicktime movies with FFmpeg
QuickTime (.mov) files are fundamentally time-based, not frame-based, and so don’t have a built-in, uniform “first frame/last frame” field you can set as numeric frame IDs. Instead, tools like Shotgun Create rely on the timecode track and the movie’s duration to infer frame numbers. If you want Shotgun to pick up a non-default frame range (e.g. start at 1001, end at 1064), you must bake in an SMPTE timecode that corresponds to your desired start frame, and ensure the movie’s duration matches your clip length.
How Shotgun Reads Frame Ranges
- Default start frame is 1. If no timecode metadata is present, Shotgun assumes the movie begins at frame 1.
- Timecode ⇒ frame number. Shotgun Create “honors the timecodes of media sources,” mapping the embedded TC to frame IDs. For example, a 24 fps QuickTime tagged with a start timecode of 00:00:41:17 will be interpreted as beginning on frame 1001 (1001 ÷ 24 fps ≈ 41.71 s).
Embedding a Start Timecode
QuickTime uses a
tmcd(timecode) track. You can bake in an SMPTE track via FFmpeg’s-timecodeflag or via Compressor/encoder settings:- Compute your start TC.
- Desired start frame = 1001
- Frame 1001 at 24 fps ⇒ 1001 ÷ 24 ≈ 41.708 s ⇒ TC 00:00:41:17
- FFmpeg example:
ffmpeg -i input.mov \
  -c copy \
  -timecode 00:00:41:17 \
  output.mov
This adds a timecode track beginning at 00:00:41:17, which Shotgun maps to frame 1001.
Ensuring the Correct End Frame
Shotgun infers the last frame from the movie’s duration. To end on frame 1064:
- Frame count = 1064 – 1001 + 1 = 64 frames
- Duration = 64 ÷ 24 fps ≈ 2.667 s
FFmpeg trim example:
ffmpeg -i input.mov \
  -c copy \
  -timecode 00:00:41:17 \
  -t 00:00:02.667 \
  output_trimmed.mov
This results in a 64-frame clip (1001→1064) at 24 fps.

-
HDR and Color
https://www.soundandvision.com/content/nits-and-bits-hdr-and-color
In HD we often refer to the range of available colors as a color gamut. Such a color gamut is typically plotted on a two-dimensional diagram, called a CIE chart, as shown in at the top of this blog. Each color is characterized by its x/y coordinates.

Good enough for government work, perhaps. But for HDR, with its higher luminance levels and wider color, the gamut becomes three-dimensional.

For HDR the color gamut therefore becomes a characteristic we now call the color volume. It isn’t easy to show color volume on a two-dimensional medium like the printed page or a computer screen, but one method is shown below. As the luminance becomes higher, the picture eventually turns to white. As it becomes darker, it fades to black. The traditional color gamut shown on the CIE chart is simply a slice through this color volume at a selected luminance level, such as 50%.
Three different color volumes—we still refer to them as color gamuts though their third dimension is important—are currently the most significant. The first is BT.709 (sometimes referred to as Rec.709), the color gamut used for pre-UHD/HDR formats, including standard HD.
The largest is known as BT.2020; it encompasses (roughly) the range of colors visible to the human eye (though ET might find it insufficient!).
Between these two is the color gamut used in digital cinema, known as DCI-P3.

sRGB

D65


